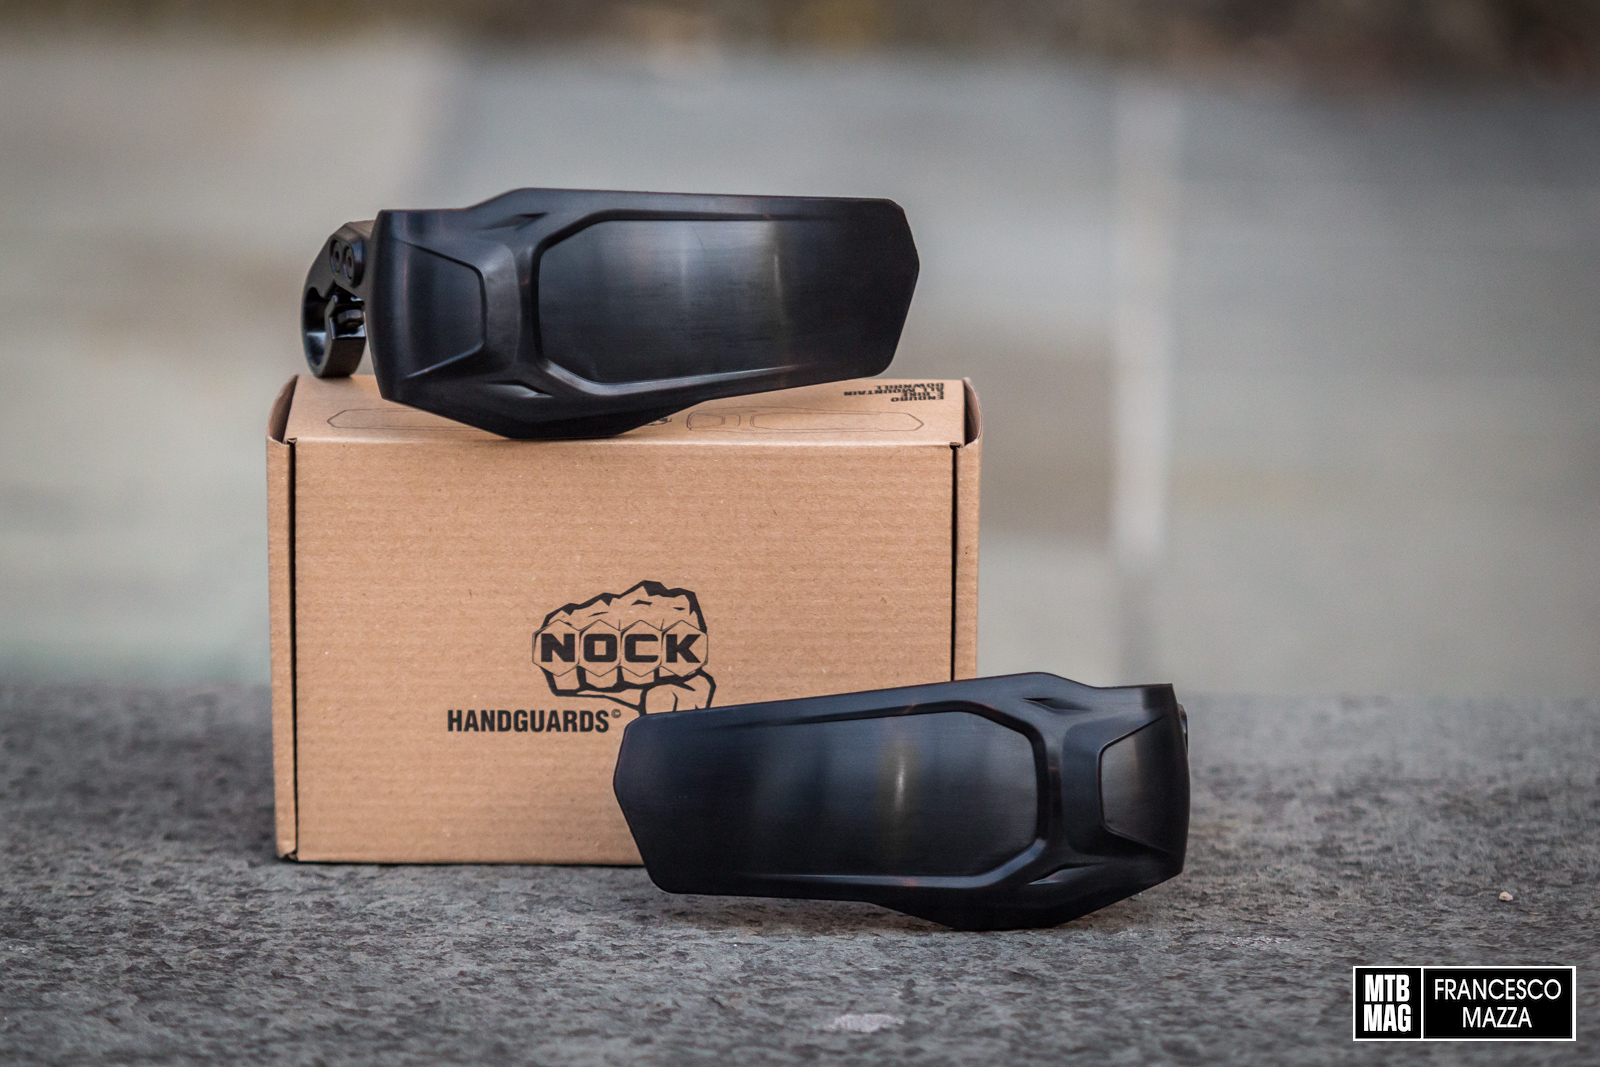
Of all the damage a bike can suffer in the event of a fall, scratches on the fork stanchions are certainly among the most feared. Whether they are superficial scratches or real deep grooves, they can greatly affect the performance and wear of the suspension, as well as obviously having a strong aesthetic impact. The French company SendHit has engineered a solution to this problem, the Scratch Cover kit, which in most cases avoids the costly replacement of the upper leg assembly, effectively restoring the glossy finish of the surface – but how effectively? Let’s find out…
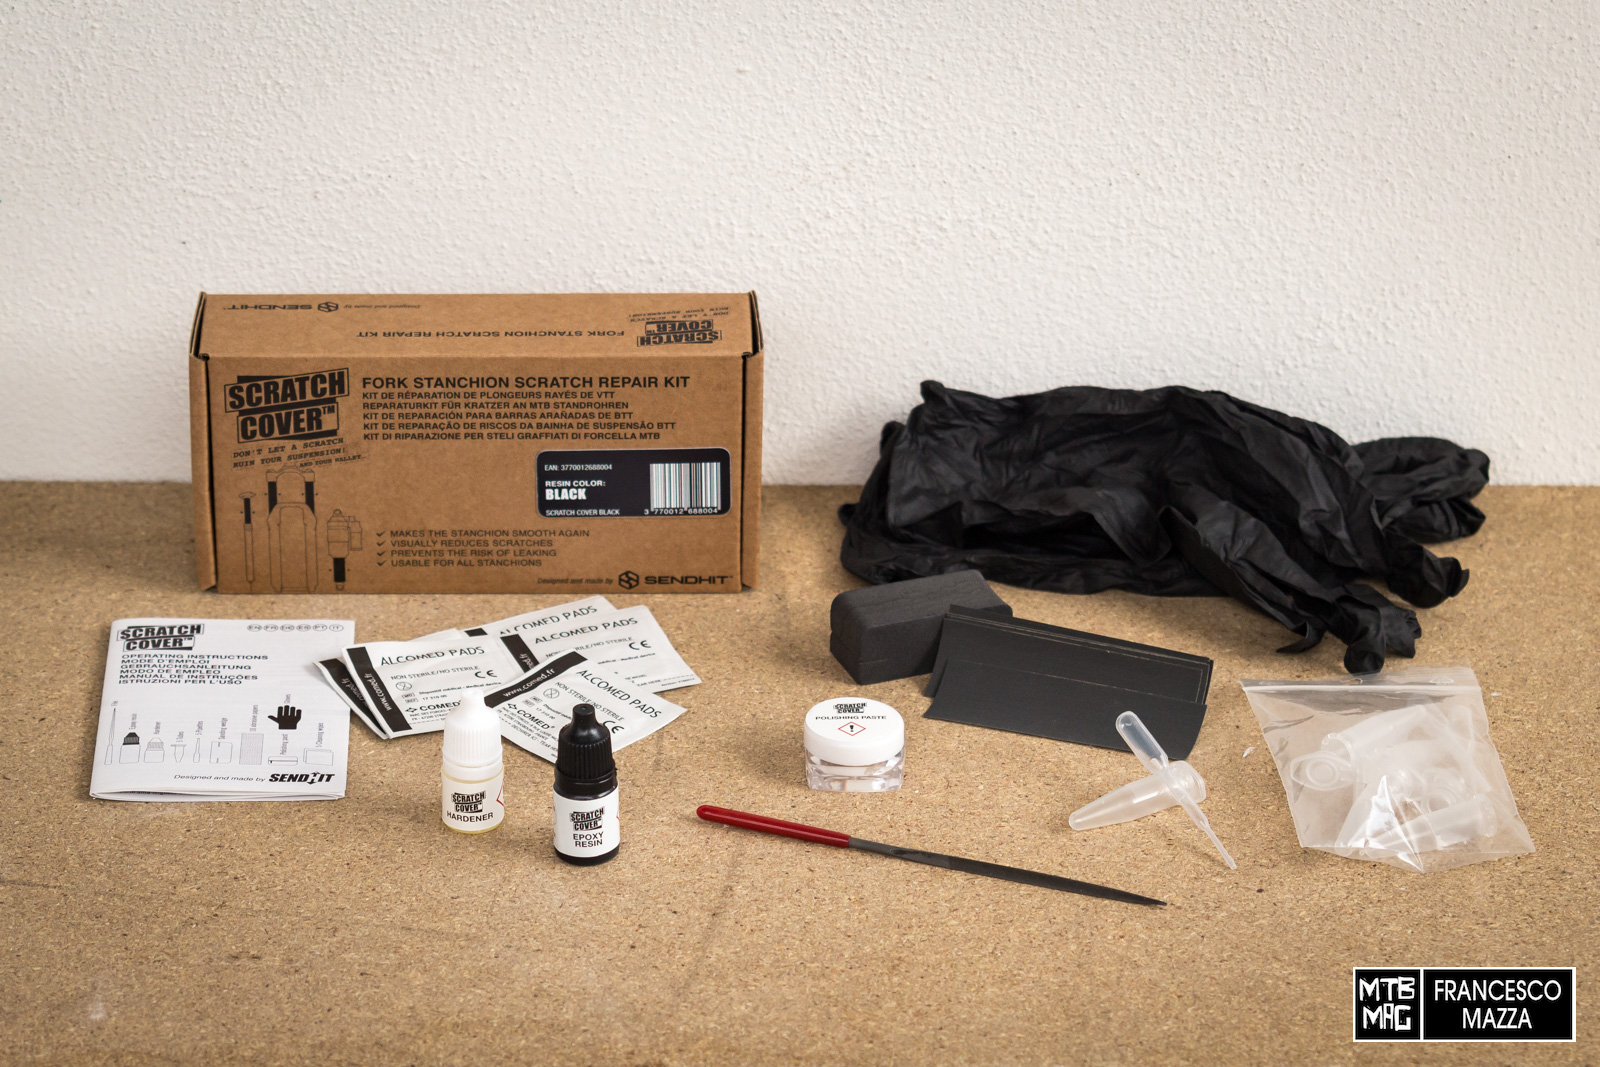
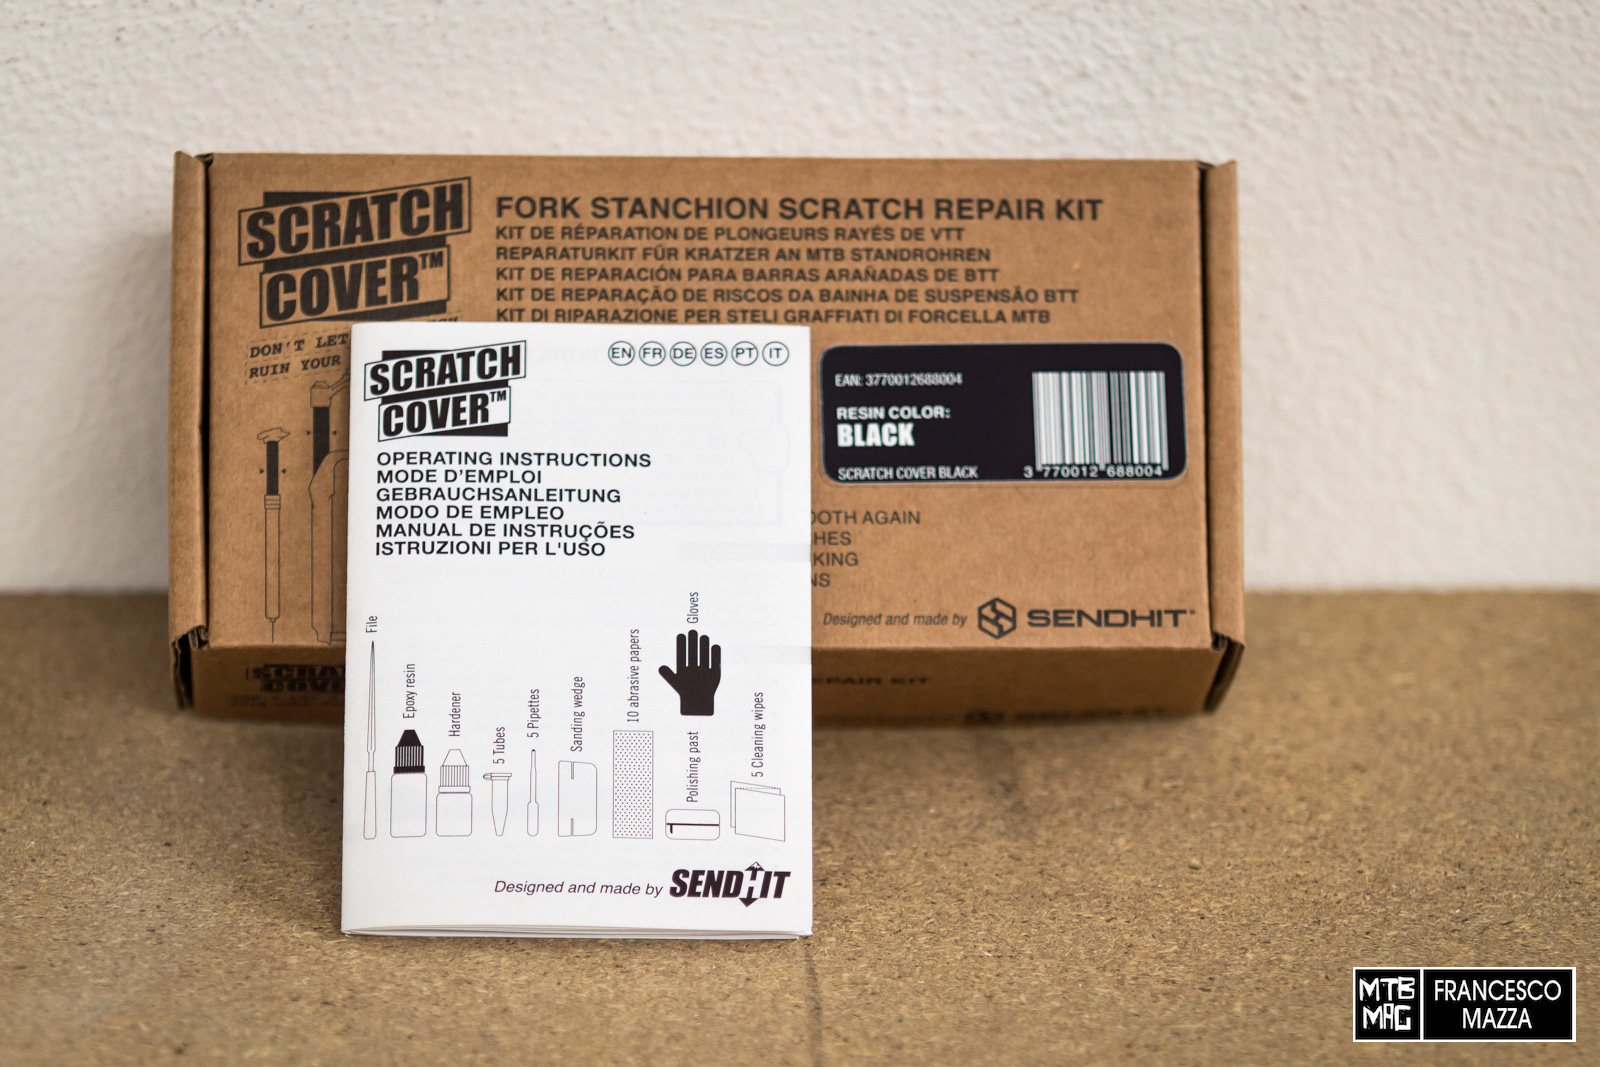
The kit is available in both black and transparent versions so you can choose the most suitable version for the color of the tube that needs to be repaired. I speak in general terms of “tubes” as the Scratch Cover is suitable not only for forks but also for shock shafts and dropper posts. The package contains the necessary amount for at least 5 applications and well beyond, as we will see later. We find a bottle of resin and one of hardener, 5 patches soaked in isopropyl alcohol, 5 test tubes, 5 droppers, a file, 10 strips of fine sandpaper with its support, a jar of abrasive paste and a pair of nitrile gloves, as well as obviously a booklet with instructions for use clearly and precisely illustrated in six languages.
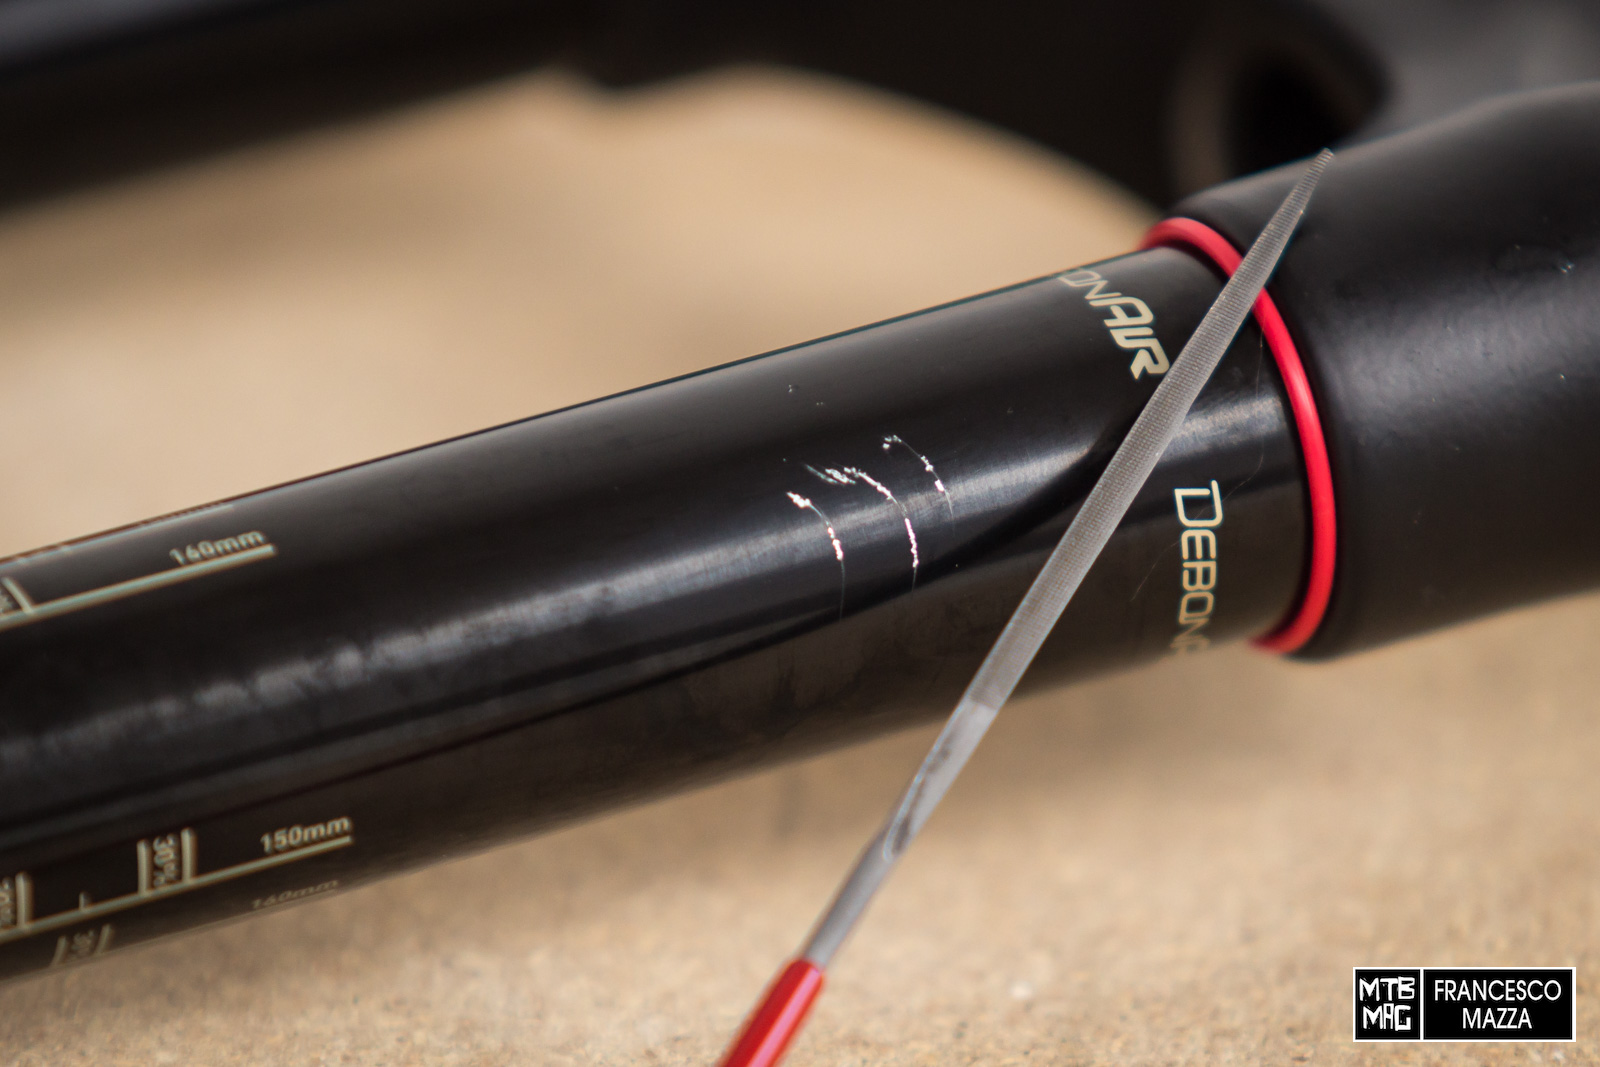
I used the black kit, having to intervene on a RockShox fork upper tube that I scratched specifically for the occasion. Don’t worry, I have not gone crazy, it is simply a spare part destined for the landfill. The scratches I made on the finish are of medium size, conspicuous but not too deep and free of raised burrs. In case of raised burrs, use the file supplied, lubricated with a couple of drops of oil, to eliminate any roughness. If, in addition to scratches, the tube in question has also suffered a dent, unfortunately you will have to opt for a replacement.
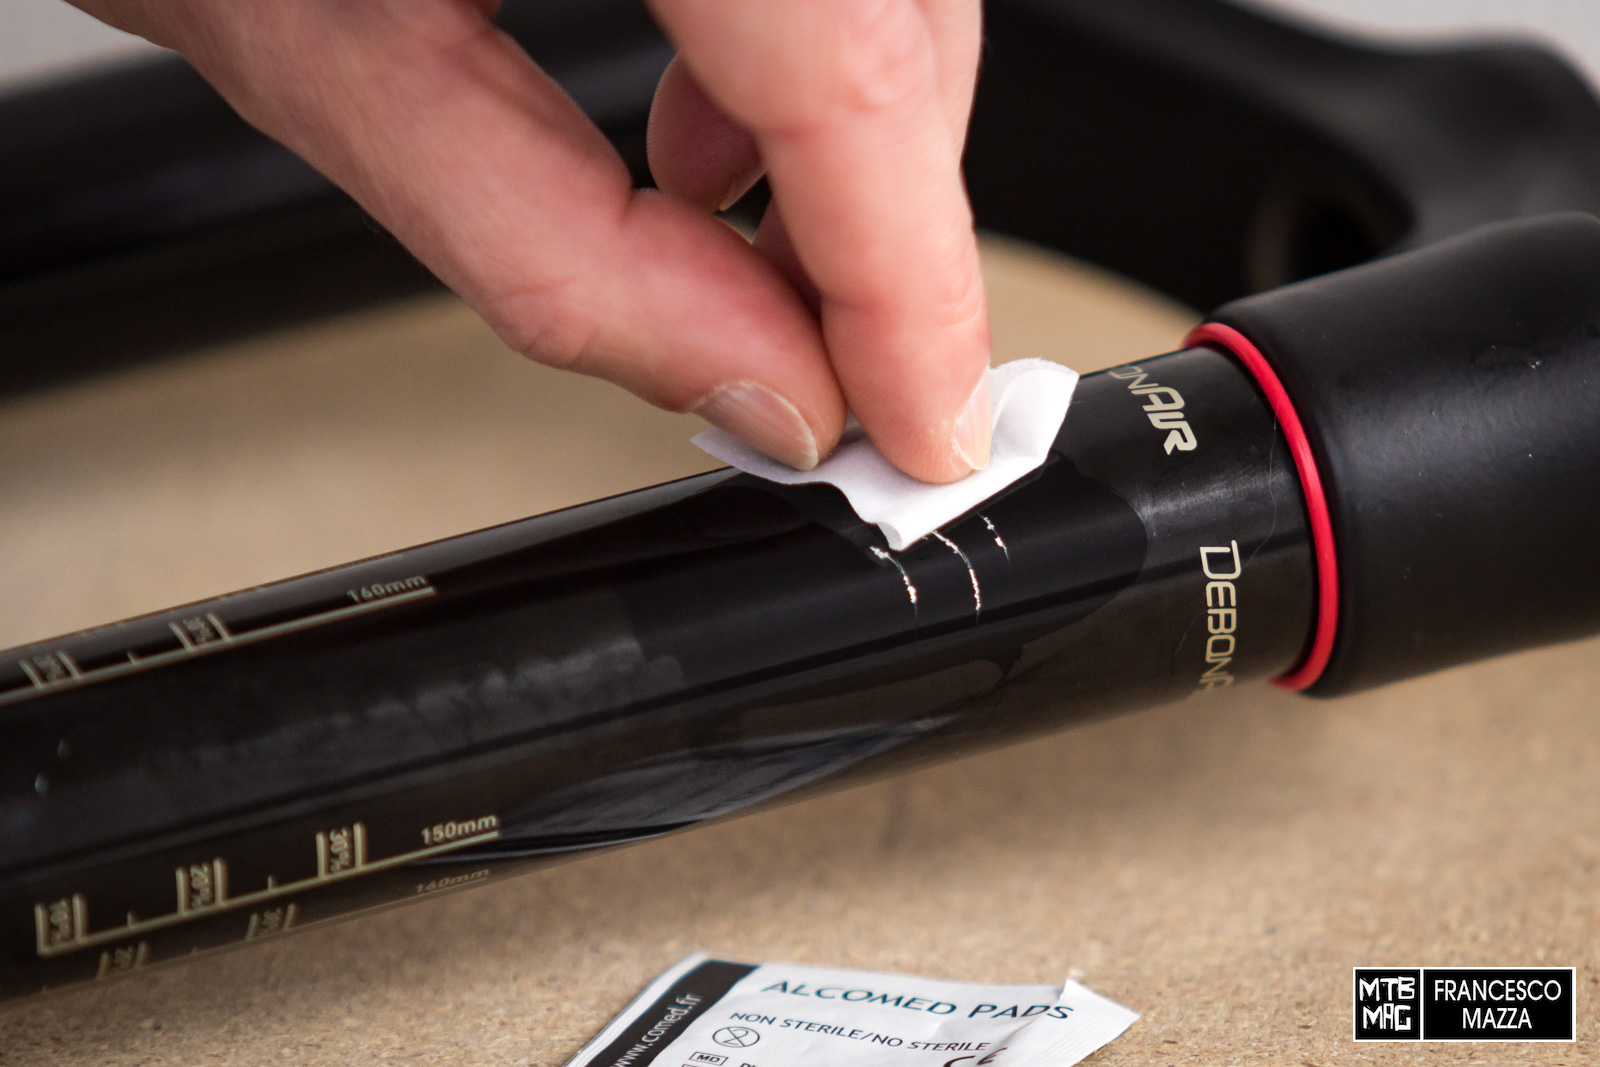
Let’s start with the scratch repair procedure, using one of the patches soaked in isopropyl alcohol to properly clean the area to be treated, especially if there are filings and oil residues, so that the resin adheres perfectly. The stanchion of the suspension must be positioned flat, with the scratches facing upwards, so I recommend that you remove the affected component from the bike to place it on the workbench.
Put on the gloves, take the epoxy resin bottle and shake it well, then pour 1ml inside one of the disposable tubes, referring to the hash mark that indicates the level to be reached. To carry out this operation comfortably, the cardboard package of the kit is provided with a hole in which to position the test tube vertically.
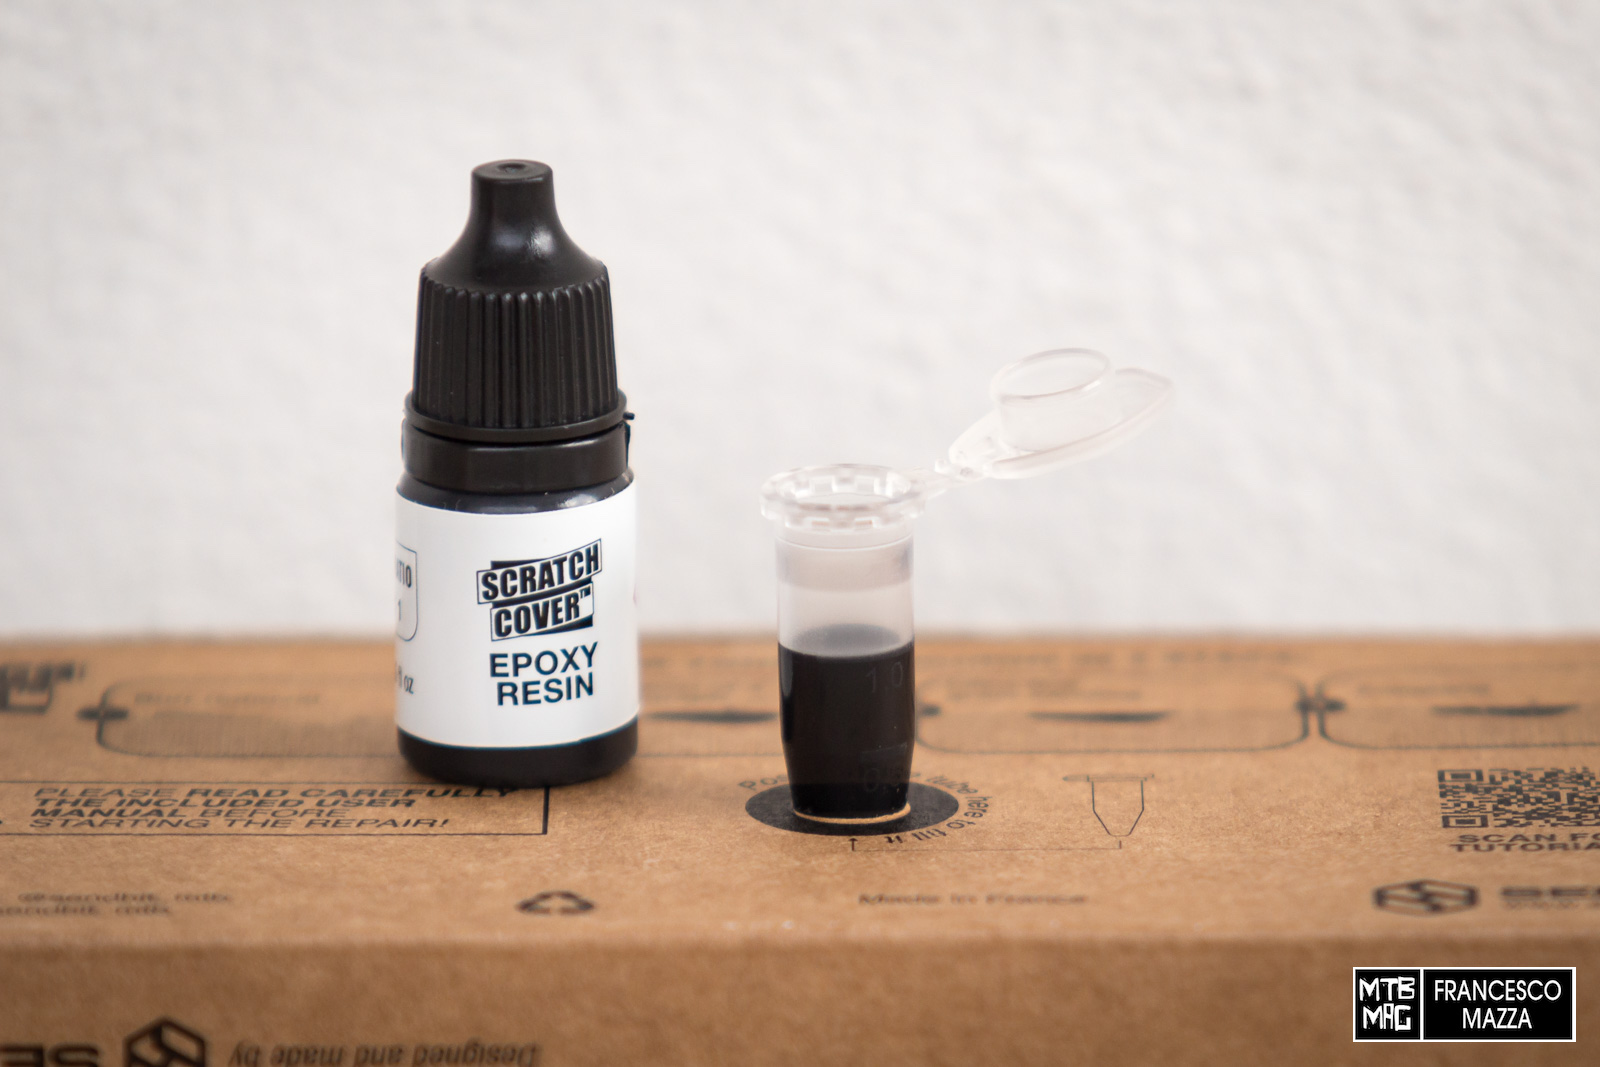
Next, take the bottle of hardener and, after shaking this as well, pour the 5ml into the test tube, filling it up to the last notch, the 1.5ml one. The hardener serves to create the chemical reaction once mixed with the epoxy resin and thus allow it to harden in contact with air.
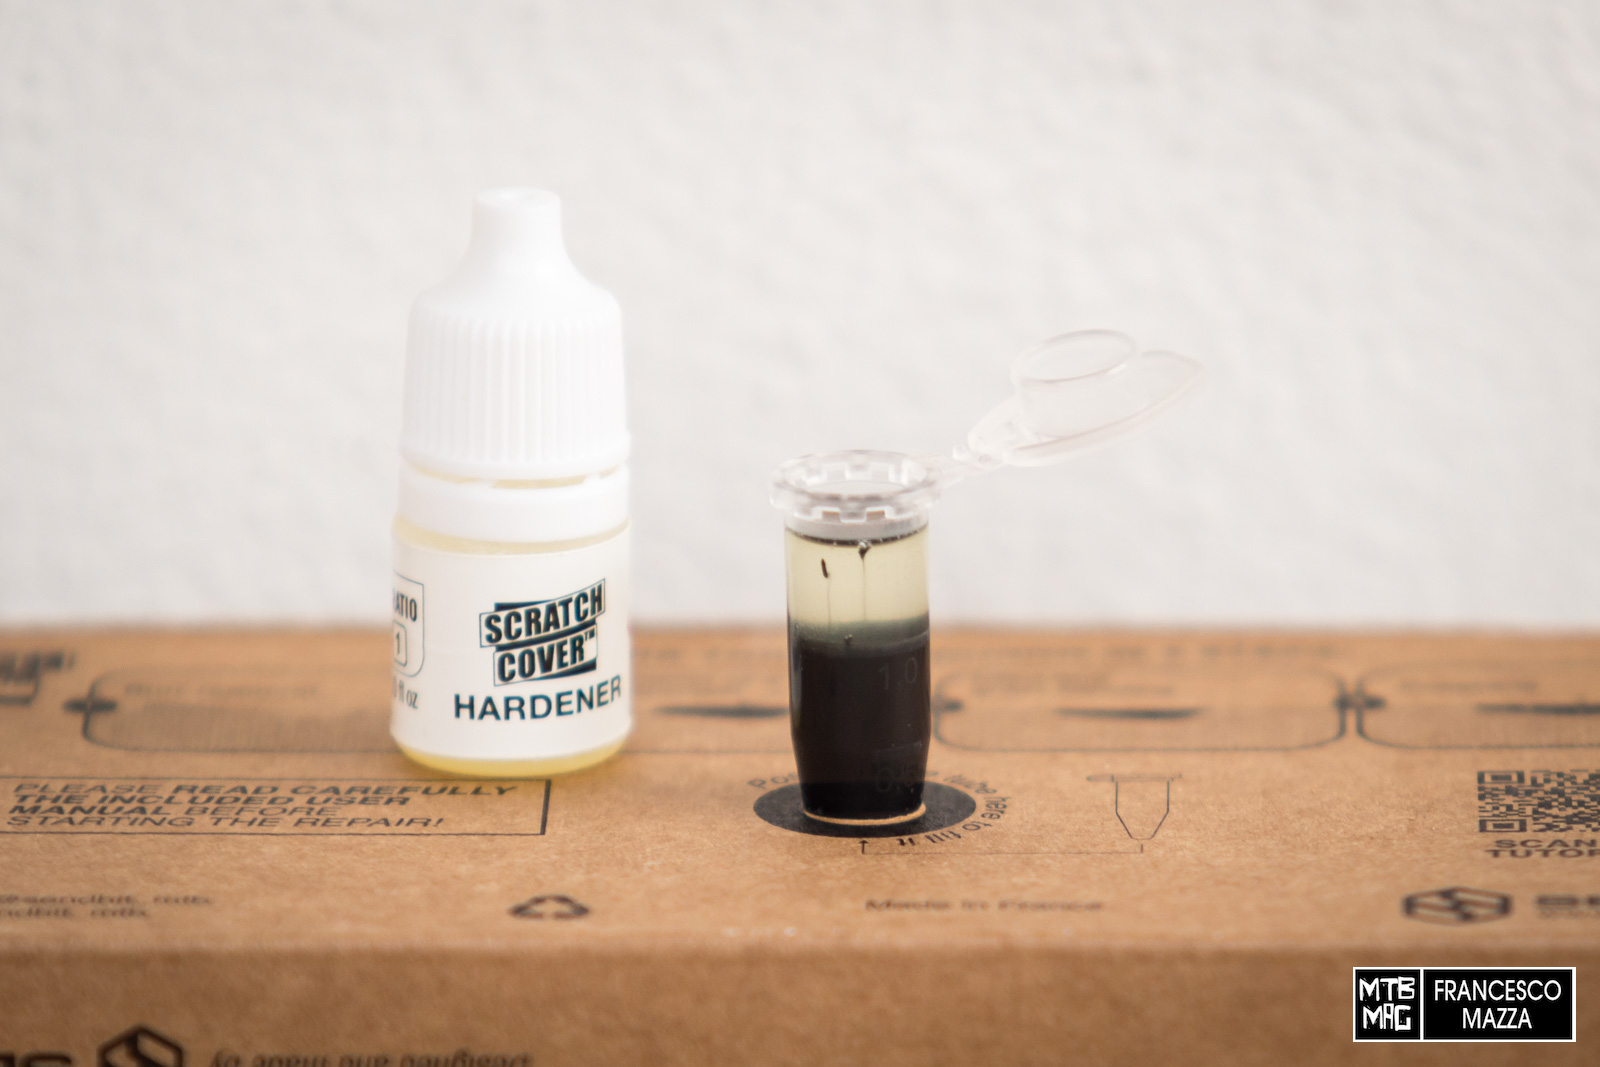
The two components must be mixed thoroughly for at least two minutes, changing the direction several times. For this operation you can use the dropper directly which will also serve as an applicator, since it is equipped with a fine nozzle that adapts to the size of the tube. Be careful not to spill the liquid as the tube is quite full. 1.5ml is likely an abundant amount for a single application, so I recommend halving the recommended doses, obviously keeping the proportions thanks to the notches on the tube.
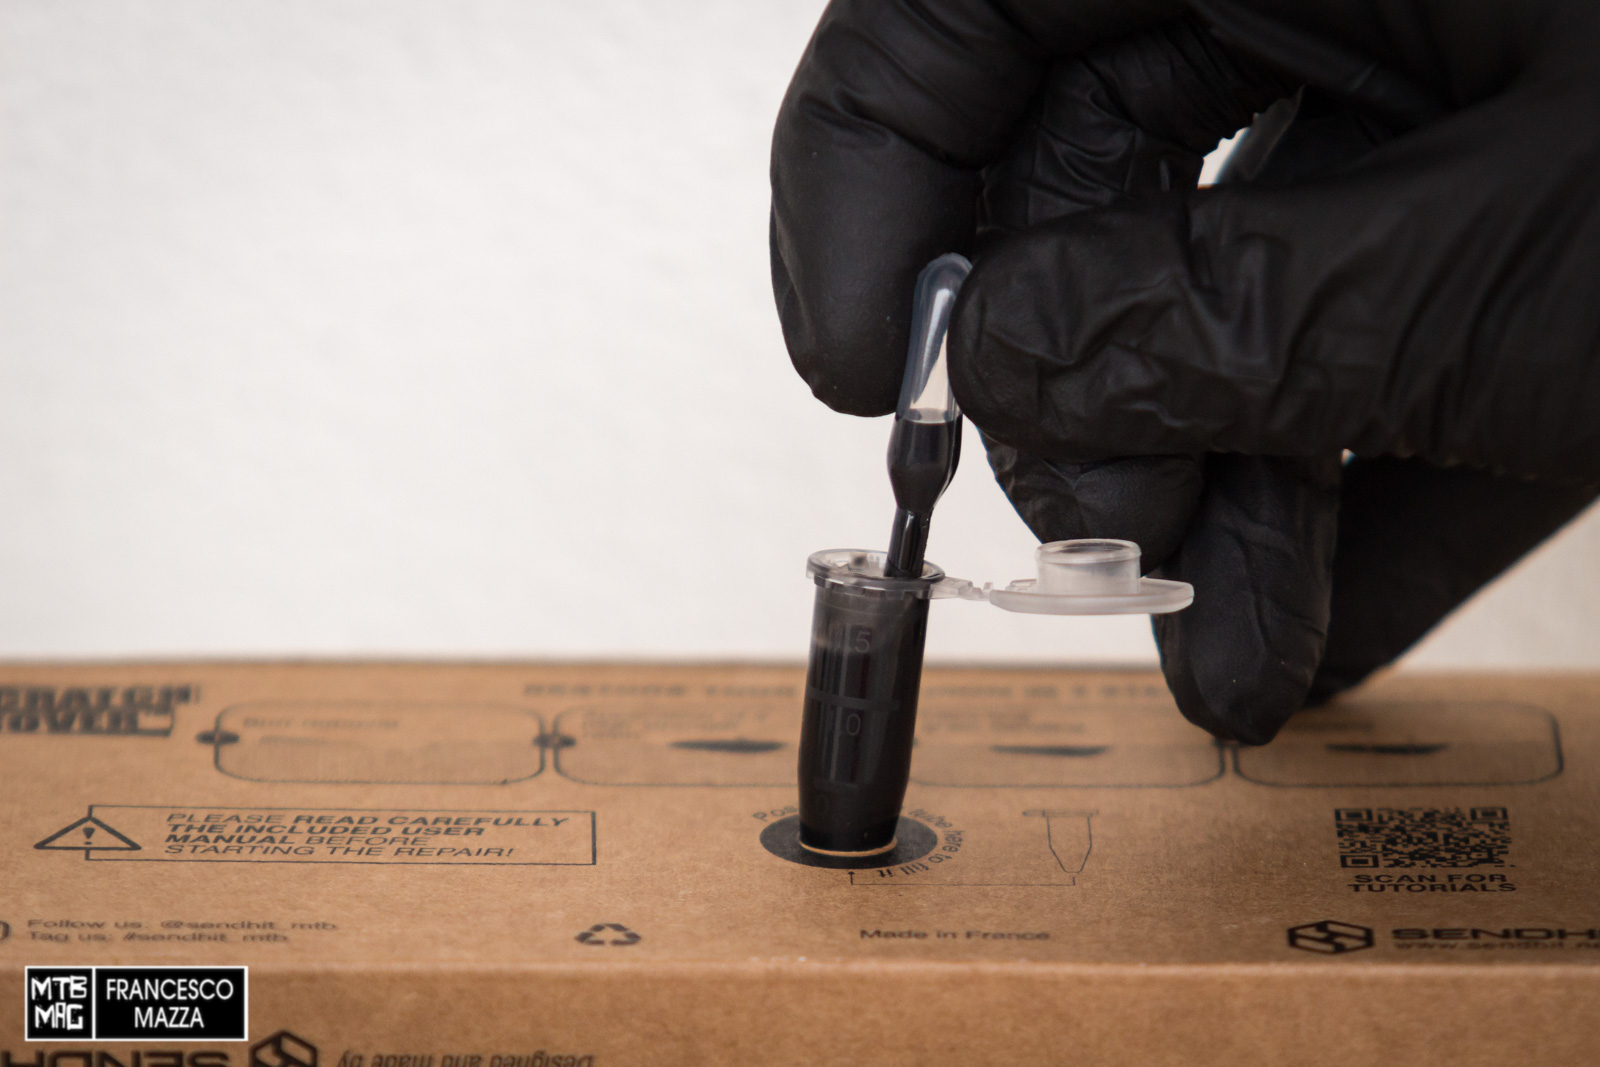
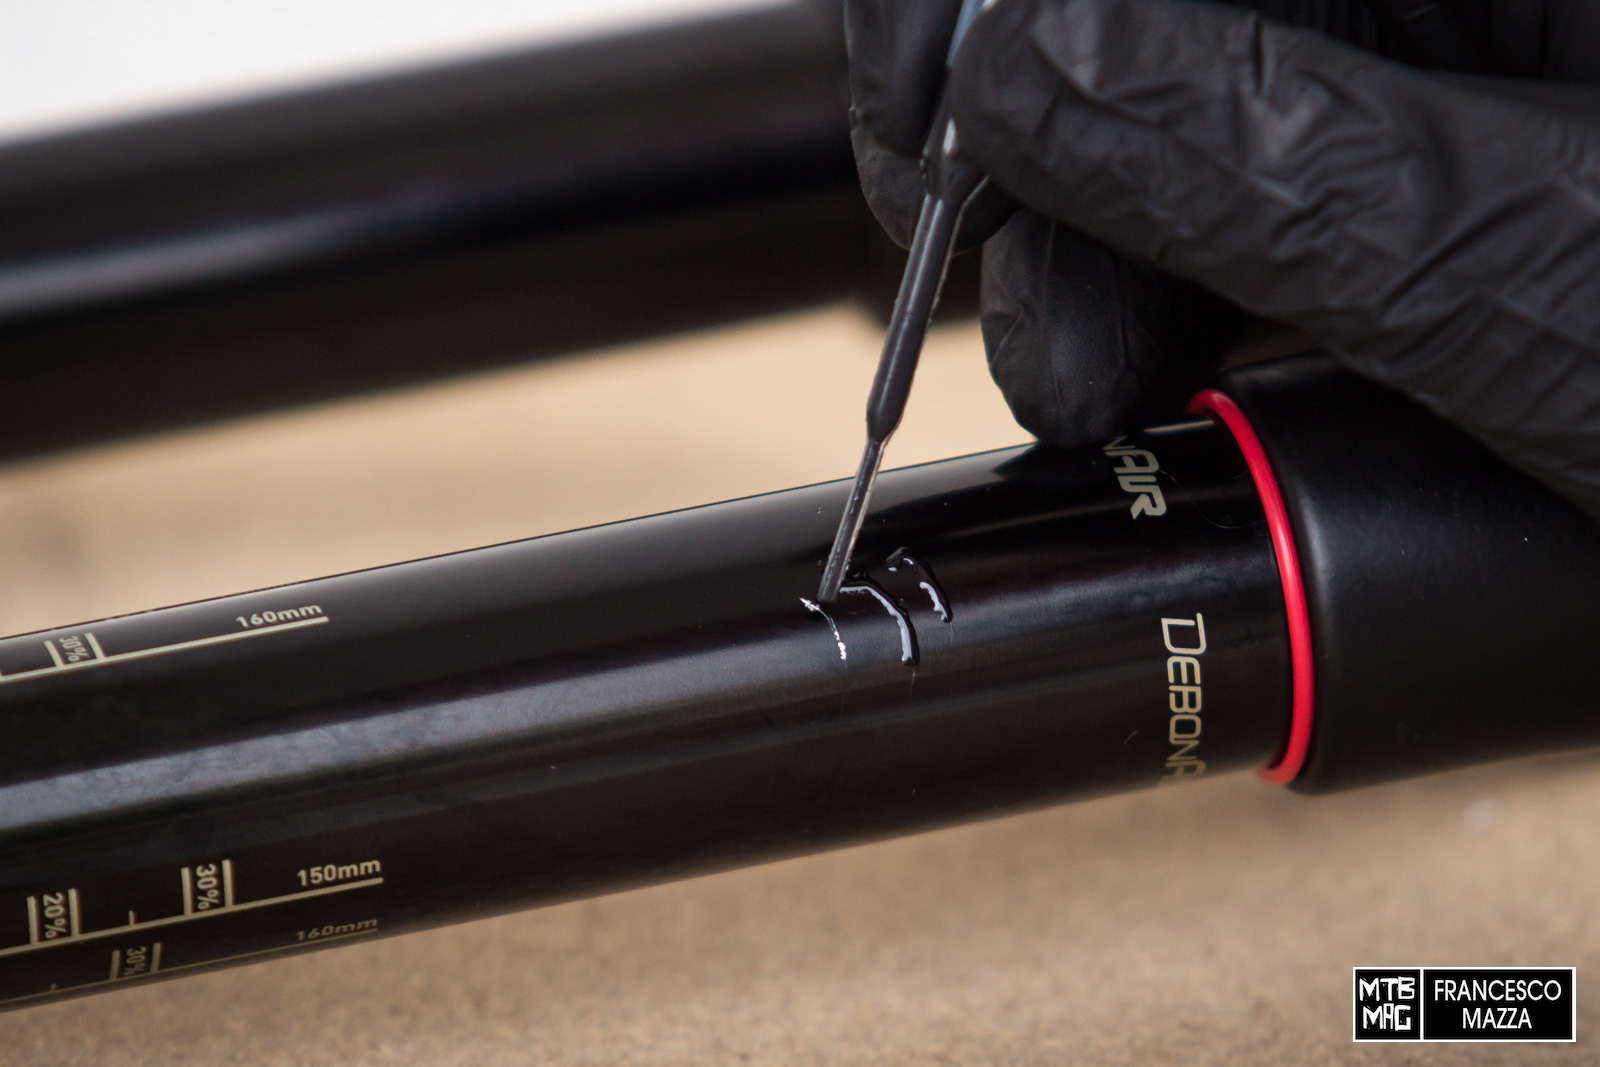
Now let’s move on to applying the product on the scratches. With a piece of absorbent paper we clean the applicator nozzle, so as to perform a precise and clean job. With light pressure on the dropper bottle, dispense the right amount of resin so that every part of the scratch is adequately covered with a “round” layer of resin, without skimping and without exaggerating.
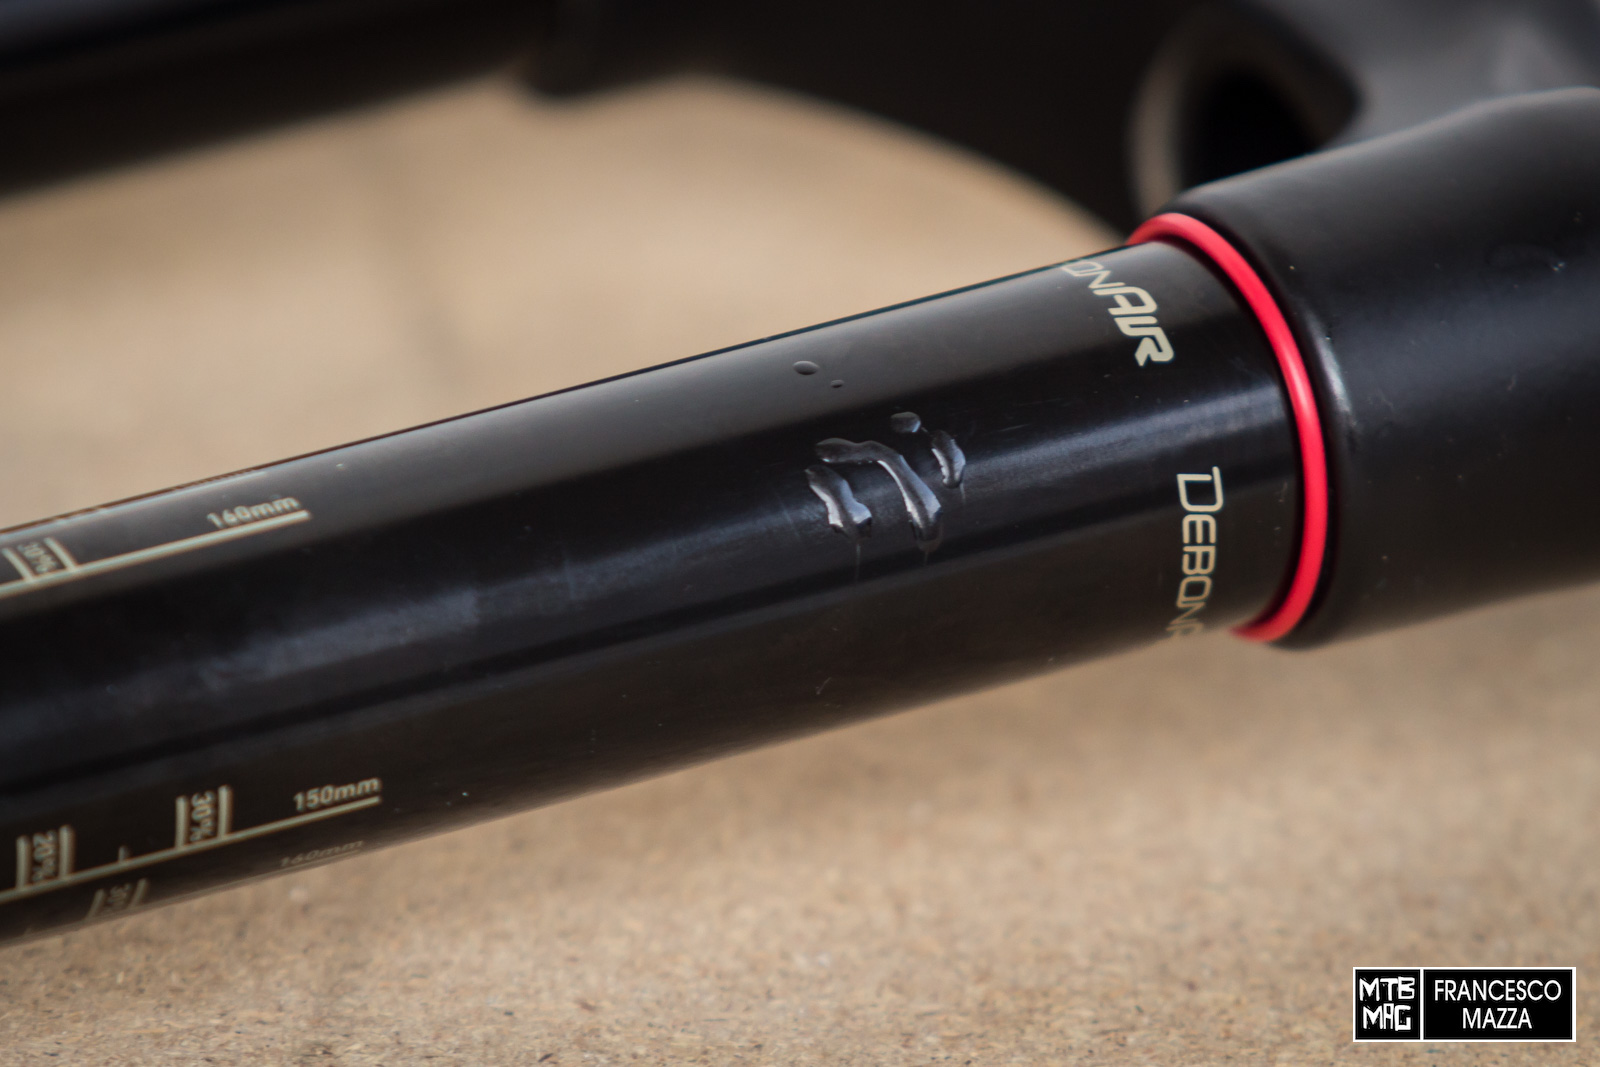
The resin must be left to dry to ensure that it reaches the hardness necessary to be worked and integrated with the finish of the stanchion/tube itself. The hardening times range from 6 to 8 hours minimum. Personally, not being in a hurry, I let the resin harden for about 24 hours before moving on to the next steps. Remember to leave the surface horizontal, with the resin facing upwards to prevent it from dripping.
Now place the strip of abrasive paper on the appropriate support and begin to smooth the excess resin, gently and carefully, slightly wetting the surface to be smoothed and following the movement direction of the tube with the movements, taking care to move around the curvature of the surface to accurately smooth the entire area. Stop often to check the condition of the sanding, checking not only the sight but even more carefully to the touch, until you feel no relief under the fingers, even by sliding the nail.
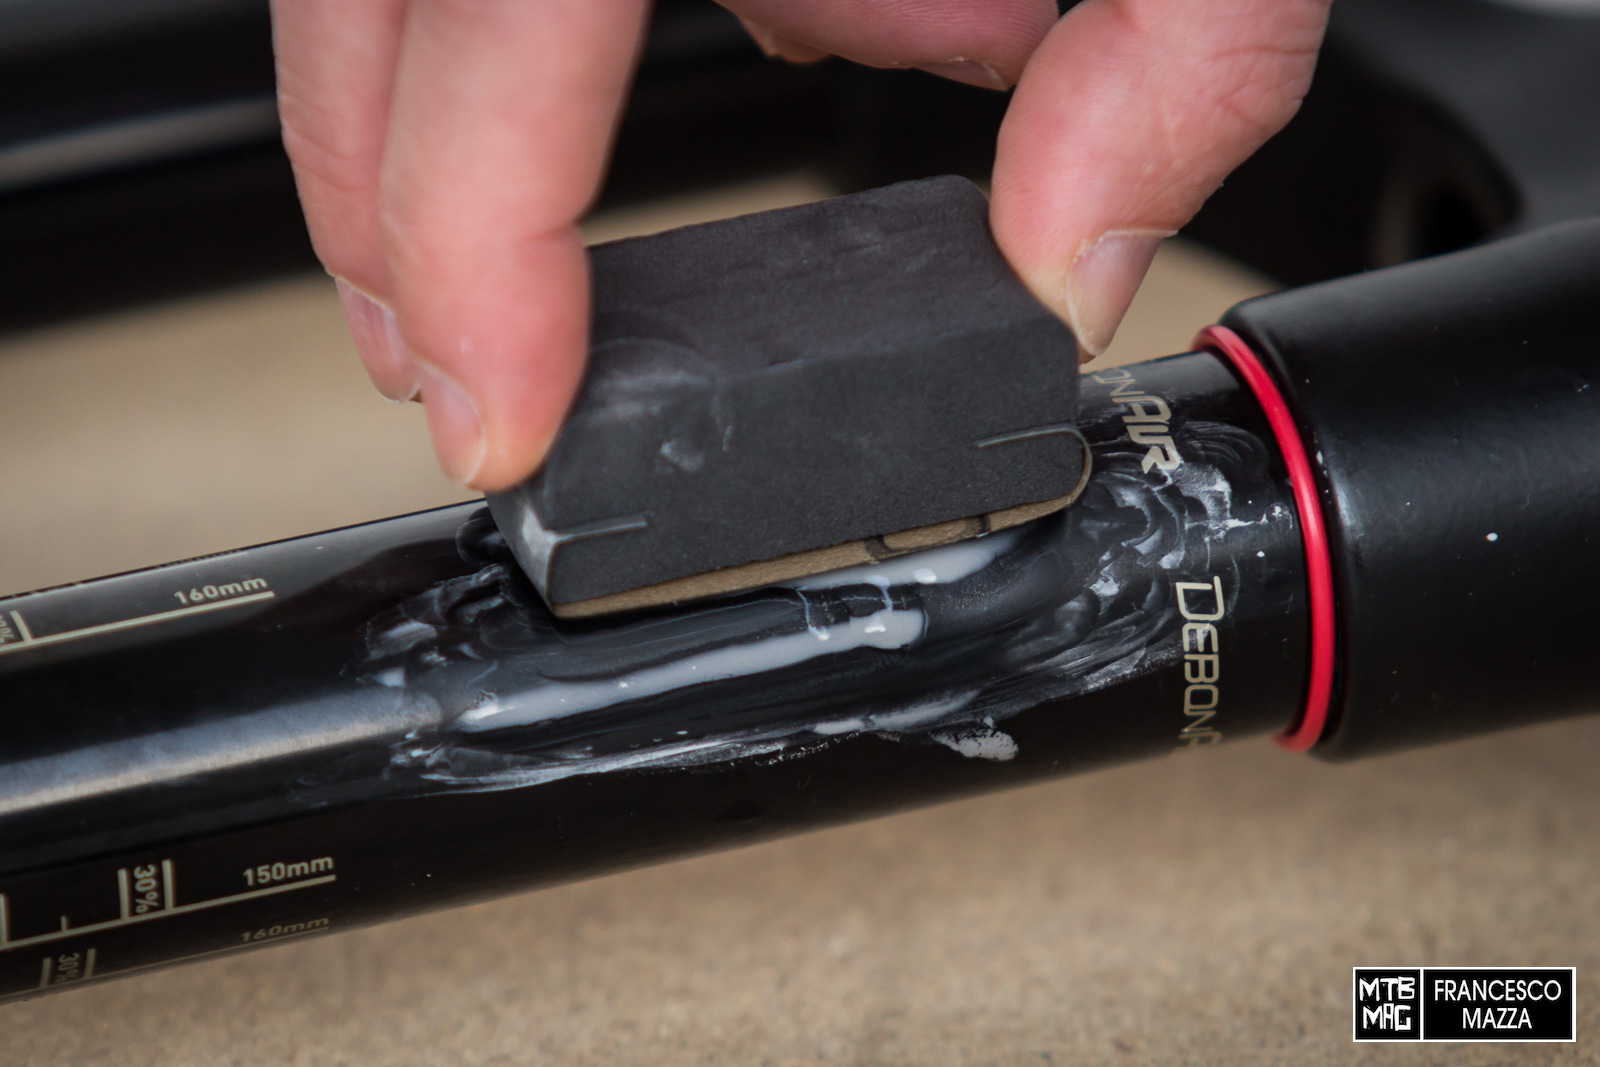
At this point we move on to the finishing with the supplied abrasive paste which creates a polishing effect. Just a little product, spread and rubbed with a cotton cloth or even better microfiber, to eliminate the slight opaqueness, due to the abrasive paper and make the shiny surface return as new.

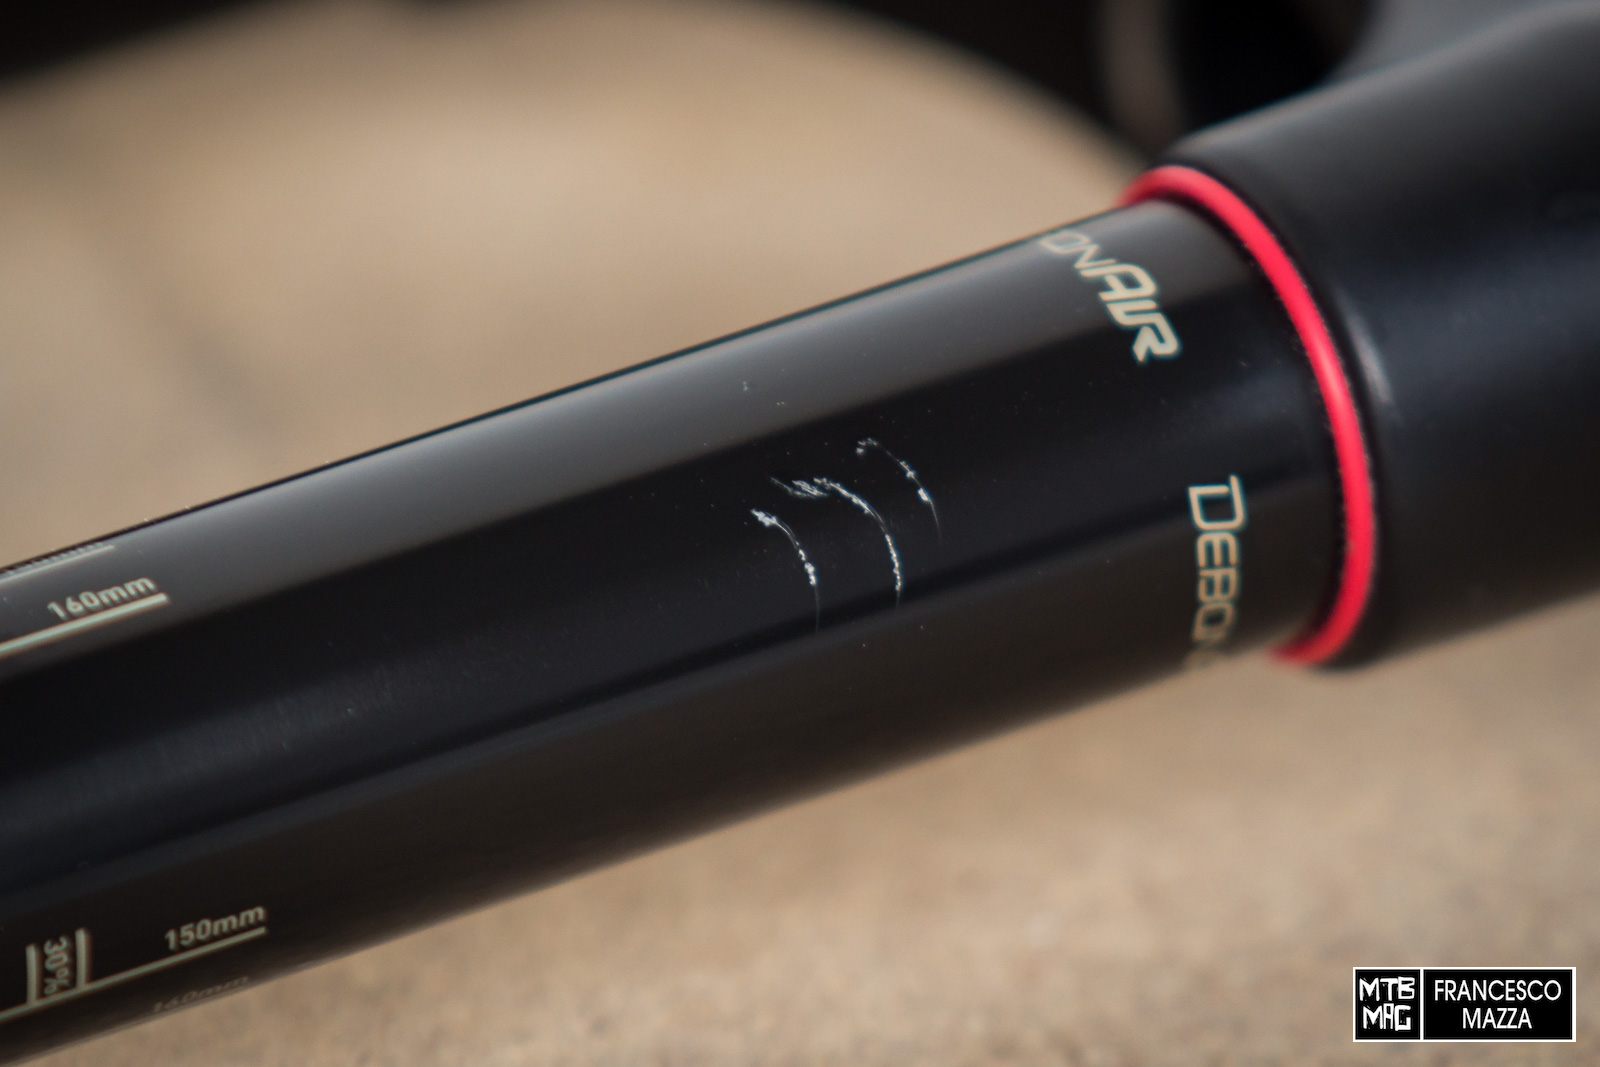
The result is a stanchion mechanically returned to as good as new, with a shiny and incredibly uniform finish on which not even the slightest sign of the scratches I had caused to even be noticeable anymore. The same cannot be said of the aesthetic result, since unfortunately the damage has been only slightly reduced to the eye and that the black color of the resin has completely vanished once it has been smoothed to bring it back to the level of the stanchion. You can probably get better results even in aesthetic terms when the scratches are deeper and thus allow the resin to penetrate deeper, without the abrasive paper removing much of the pigmentation it contains. However, regardless of the aesthetic factor, the result in mechanical terms is remarkable.
The Scratch Cover kit is sold at a price of 39.99 euros.