Last week we decided to crack open our old 2012 Rock Shox Boxxer Team and drop in a new Charger damper along with a Solo-Air kit. While the Charger damper is all the rage, and people rave about the latest Boxxers which feature them, we wanted to shed some light on just how easy it is to drop one of these little units into an old fork.
The same goes for the Solo-Air kit. A great deal of consumers are loving the smooth action(especially for an air spring) as well as the tunability that the Bottomless Tokens give the spring curve. Again, this is a new feature that is available in the Rock Shox Boxxer World Cup, but it drops into any 2010-2015 35mm Boxxer chassis pretty easily.
Before we get into the meat and potatoes of this process, here are a few key bits of info :
Charger Damper :
• $379 Retail Price
• 100 Grams lighter than the previous damper
• Externally adjustable Low Speed Compression
• Externally adjustable Rebound
Solo Air kit
• $188 Retail Price
• Includes 4 Bottomless Tokens
• Saves approx. 300 grams over steel spring
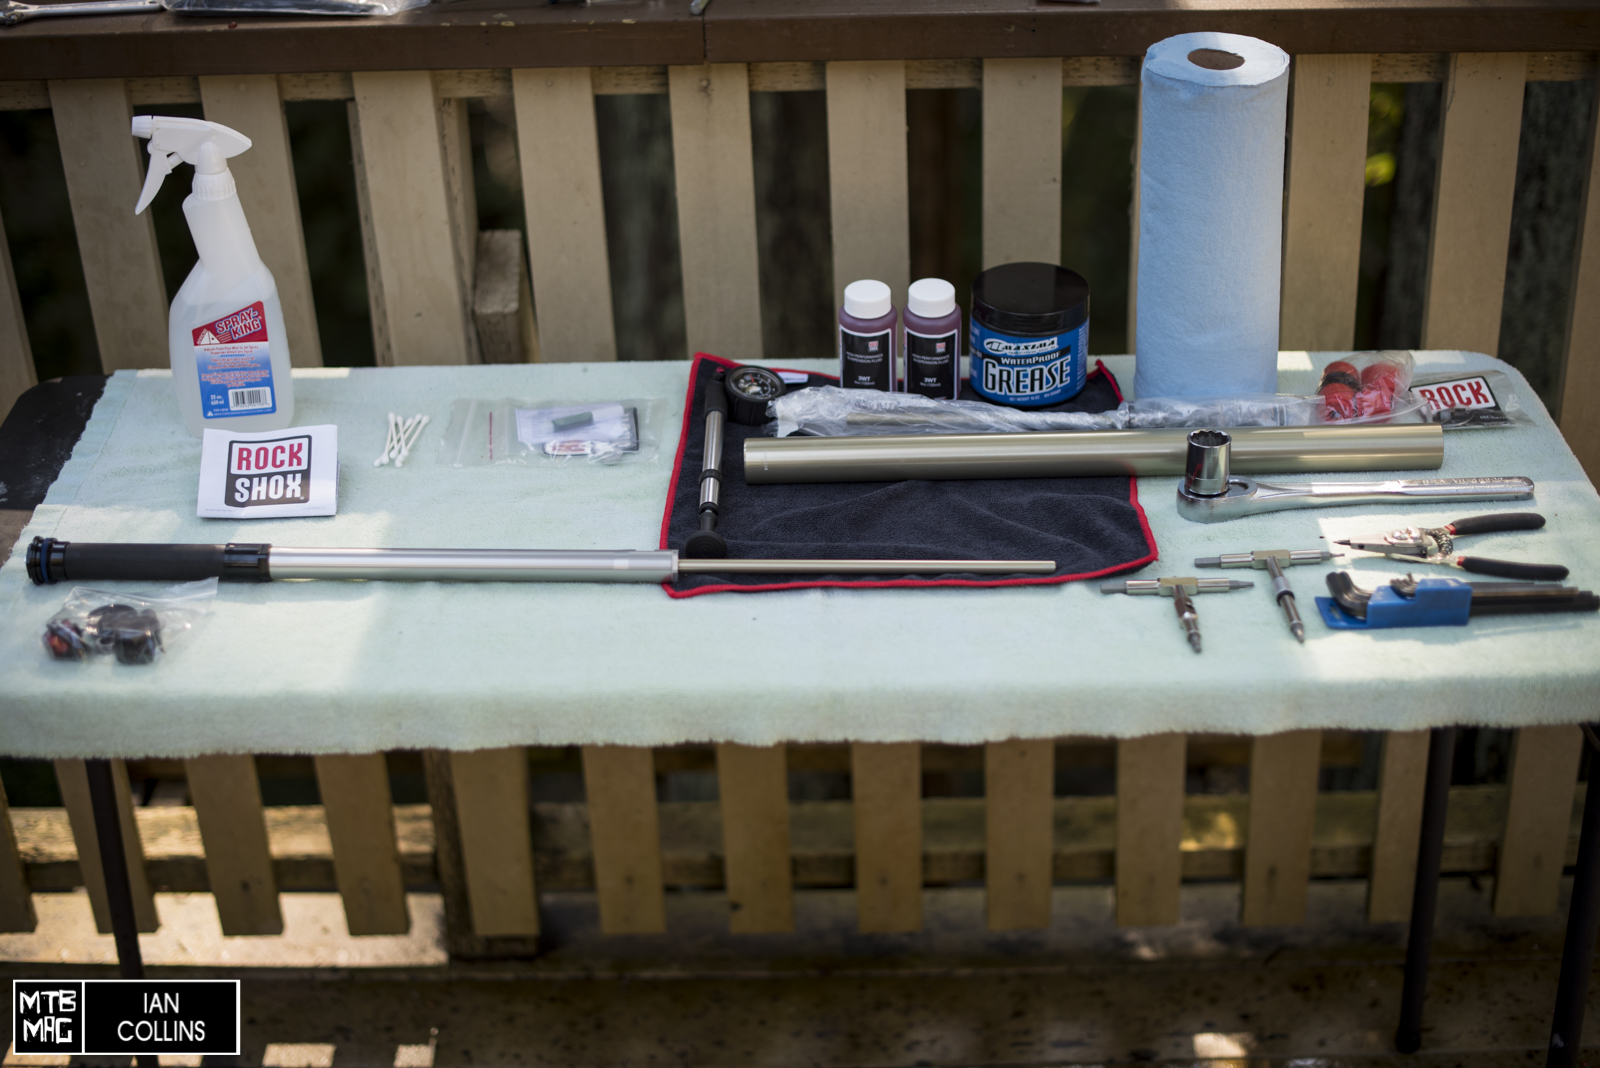
Alright, let’s do this. A clean bike in a stand, and an organized area to work from is a great start. You’ll need a few tools and items :
• Isopropyl alcohol
• Shop Rags and Q-Tips
• Dowel
• Rubber mallet
• Metric Allen key set
• Shock pump
• Circlip Pliers
• 24mm Socket
• Torque wrench
• Sram Butter or Slick Honey
• Bucket
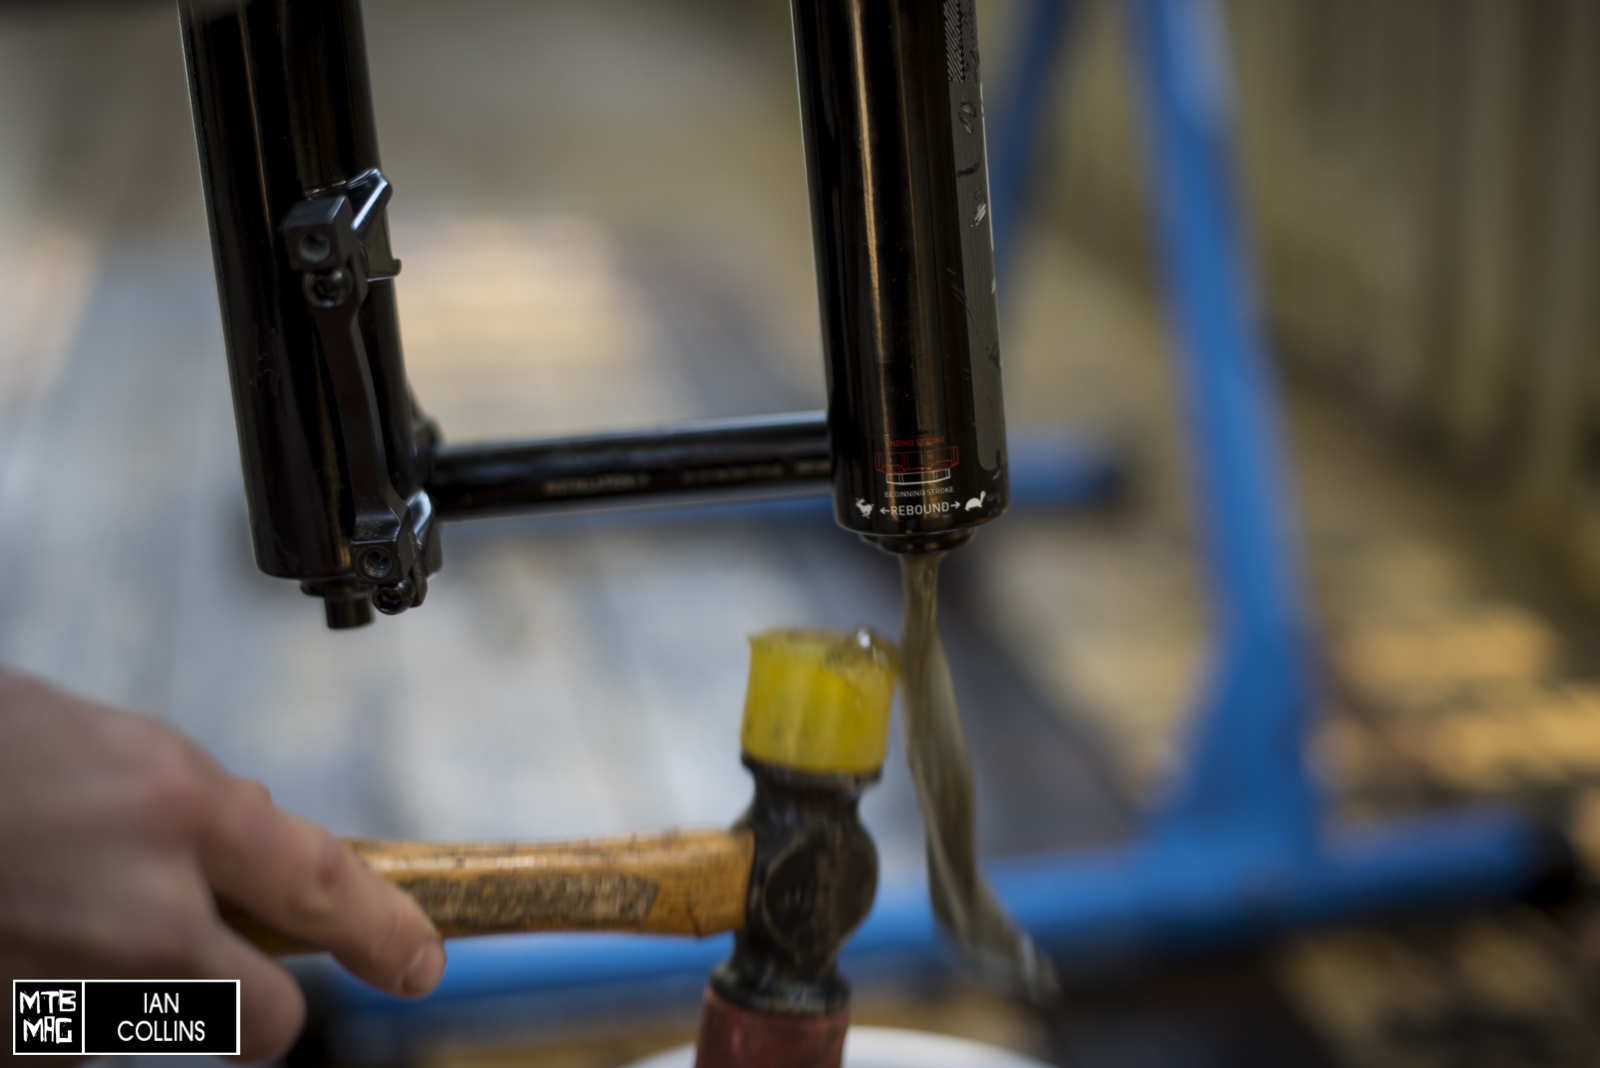
Assuming the front brake and wheel are already removed, the first step is to un-seat the pre existing rebound shaft. With a bucket placed below the fork, loosen the footbolt by a few turns, and give it a tap with a soft rubber mallet. Oil will drain into the bucket for a couple of minutes.
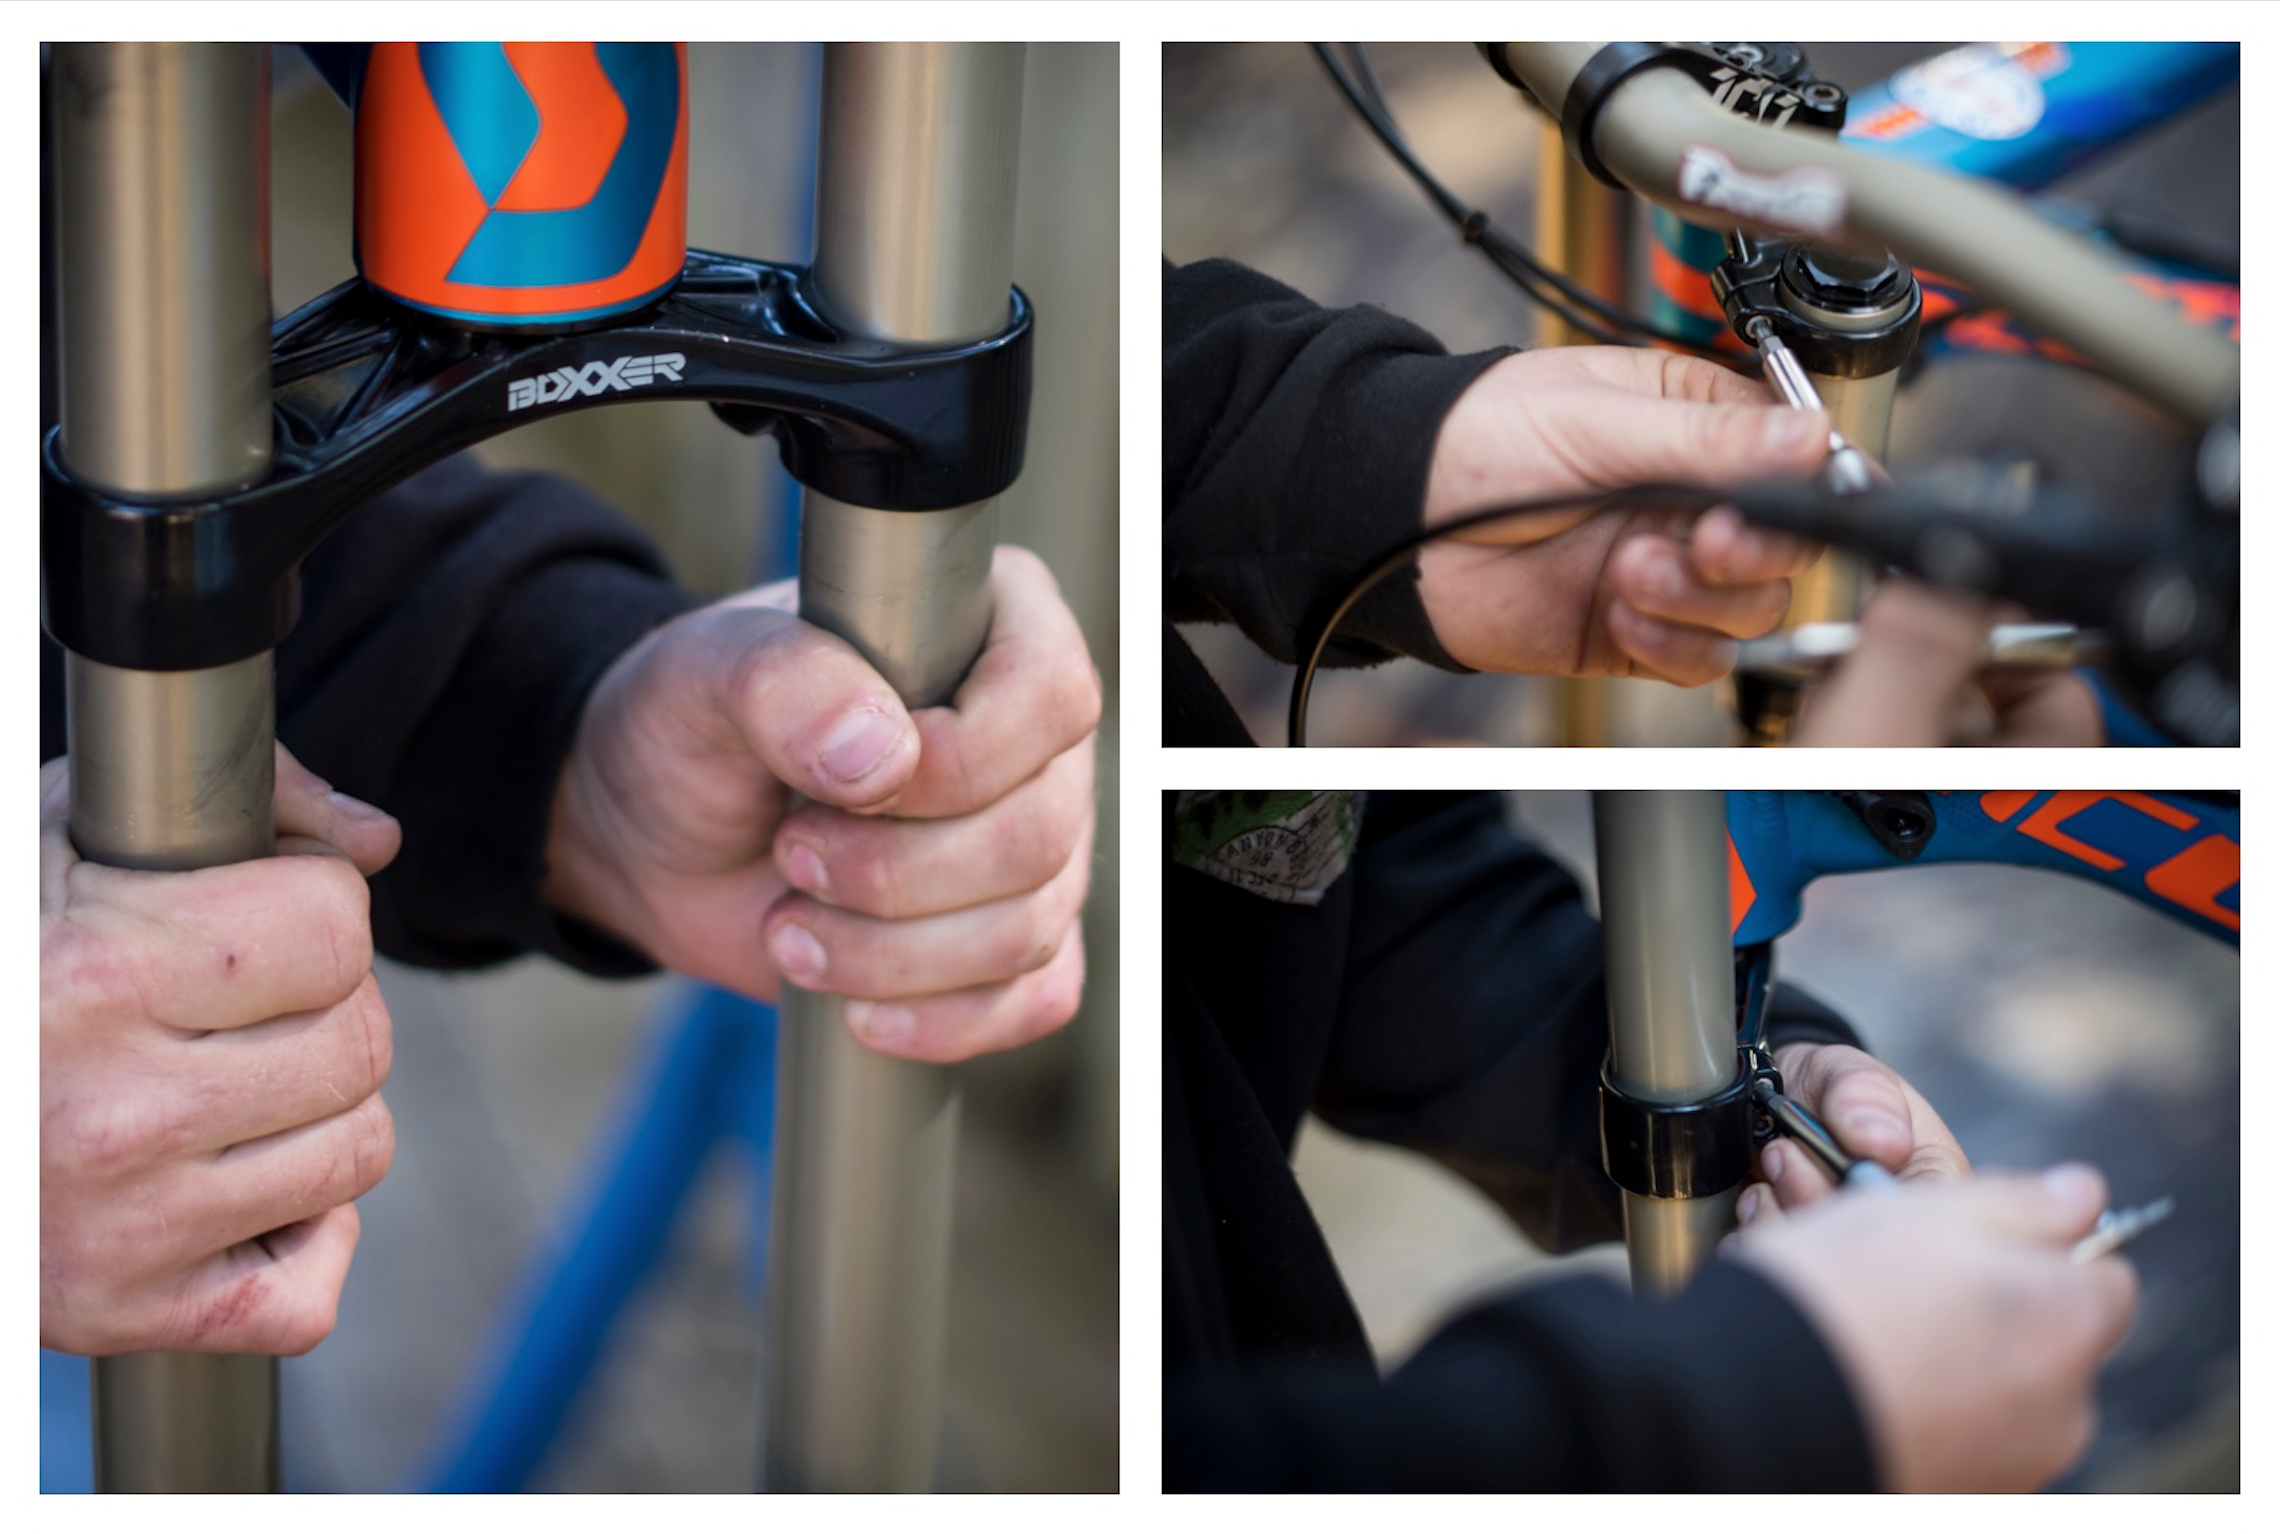
Now is a good time to remove the fork from the bike. You can leave your front end assembled, but loosen the upper and lower pinch bolts on the crowns and pull the fork out.
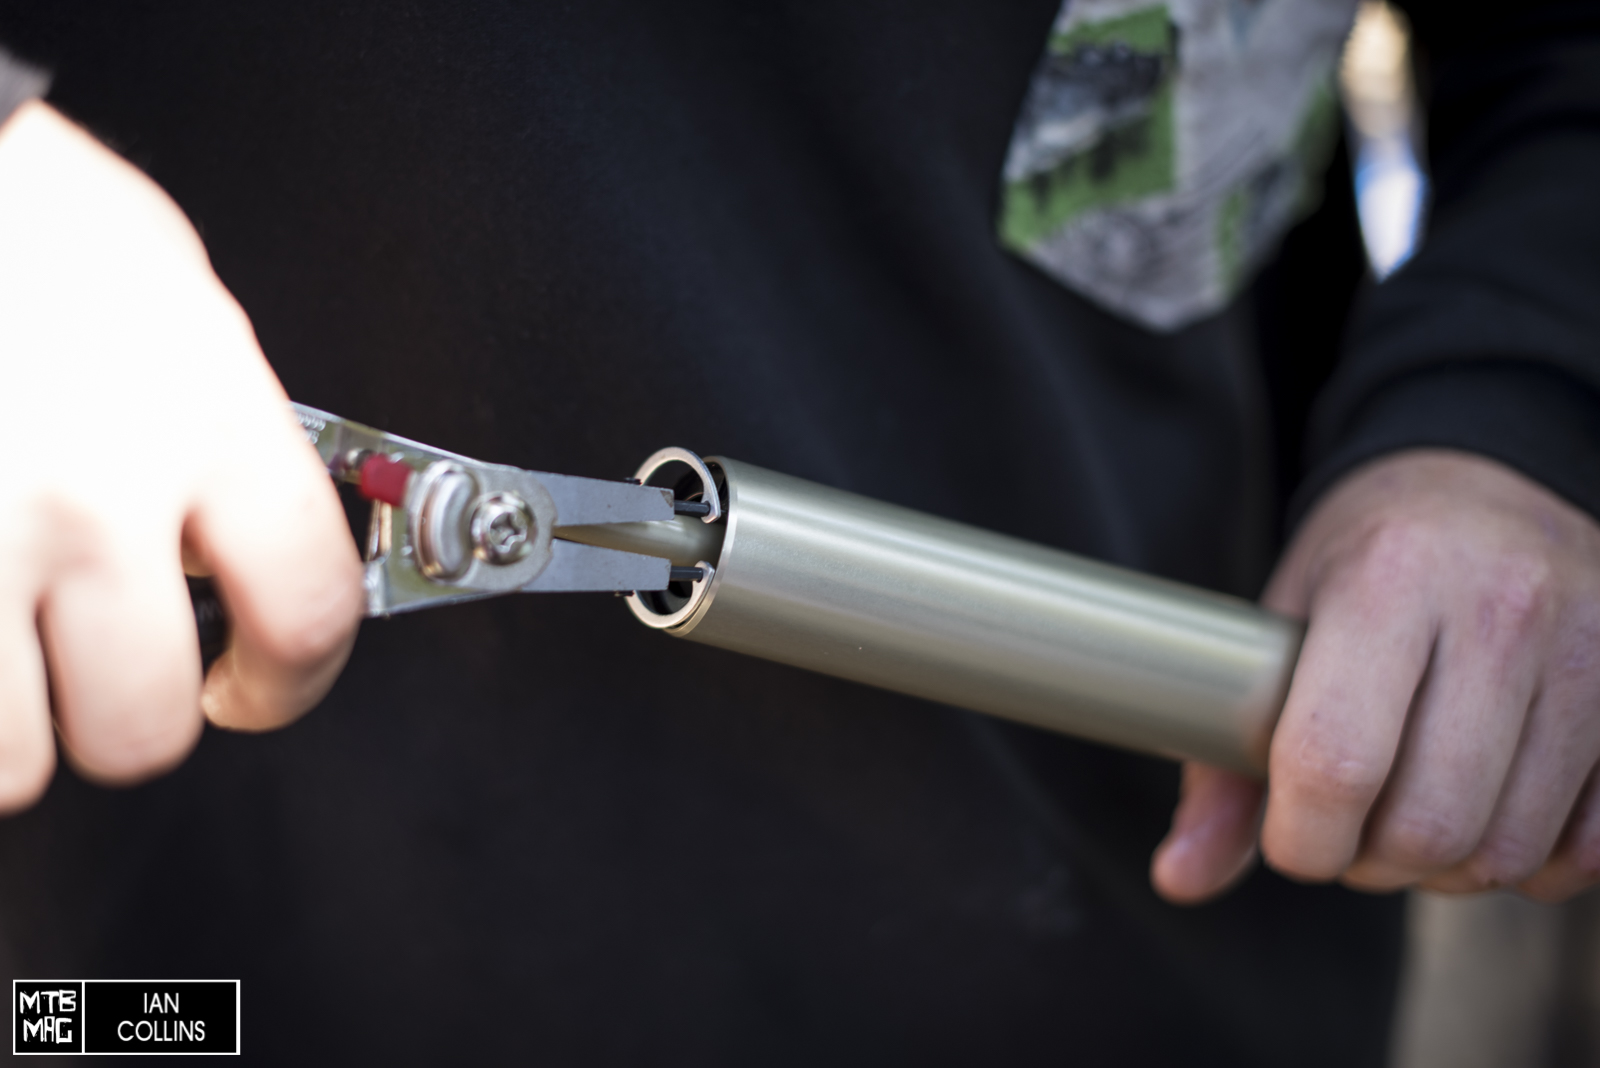
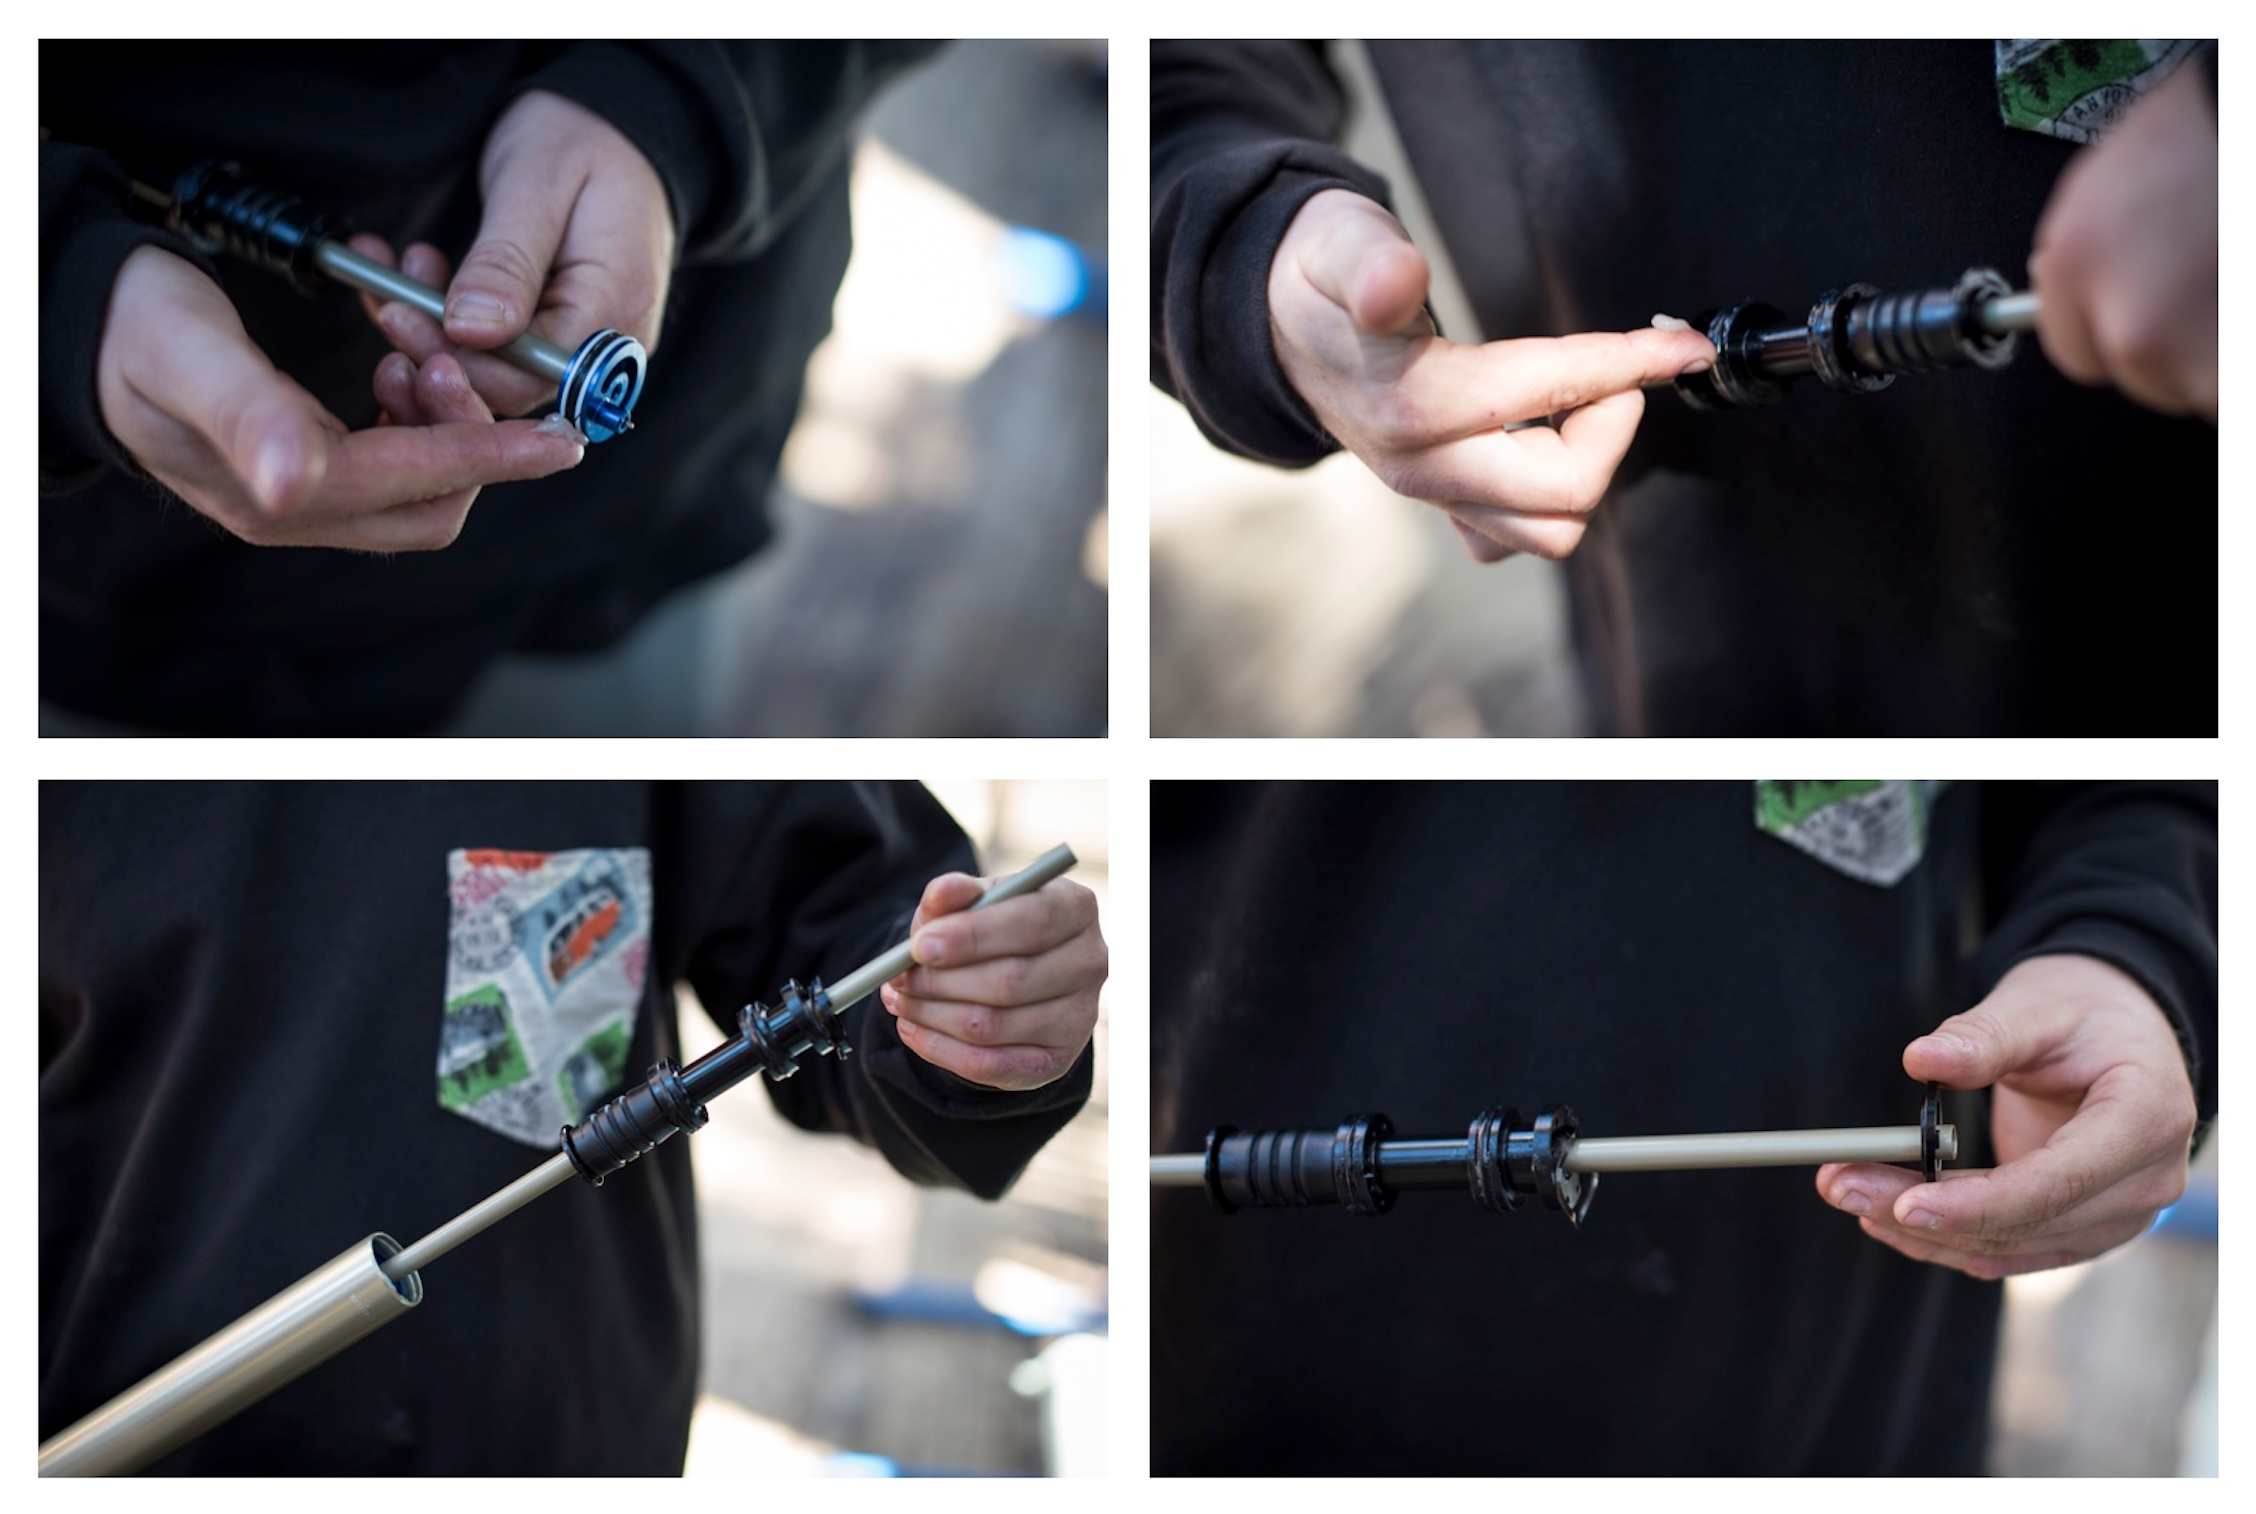
Carefully use a pair of circlip pliers to begin taking the old cartridge out. Once this is done, you can pull your old damper out from up top. The removal will vary depending on which iteration of damper you have, or if you have an aftermarket cartridge. A couple of allen keys to remove the adjustment knobs, and a socket removes the rest of the unit.
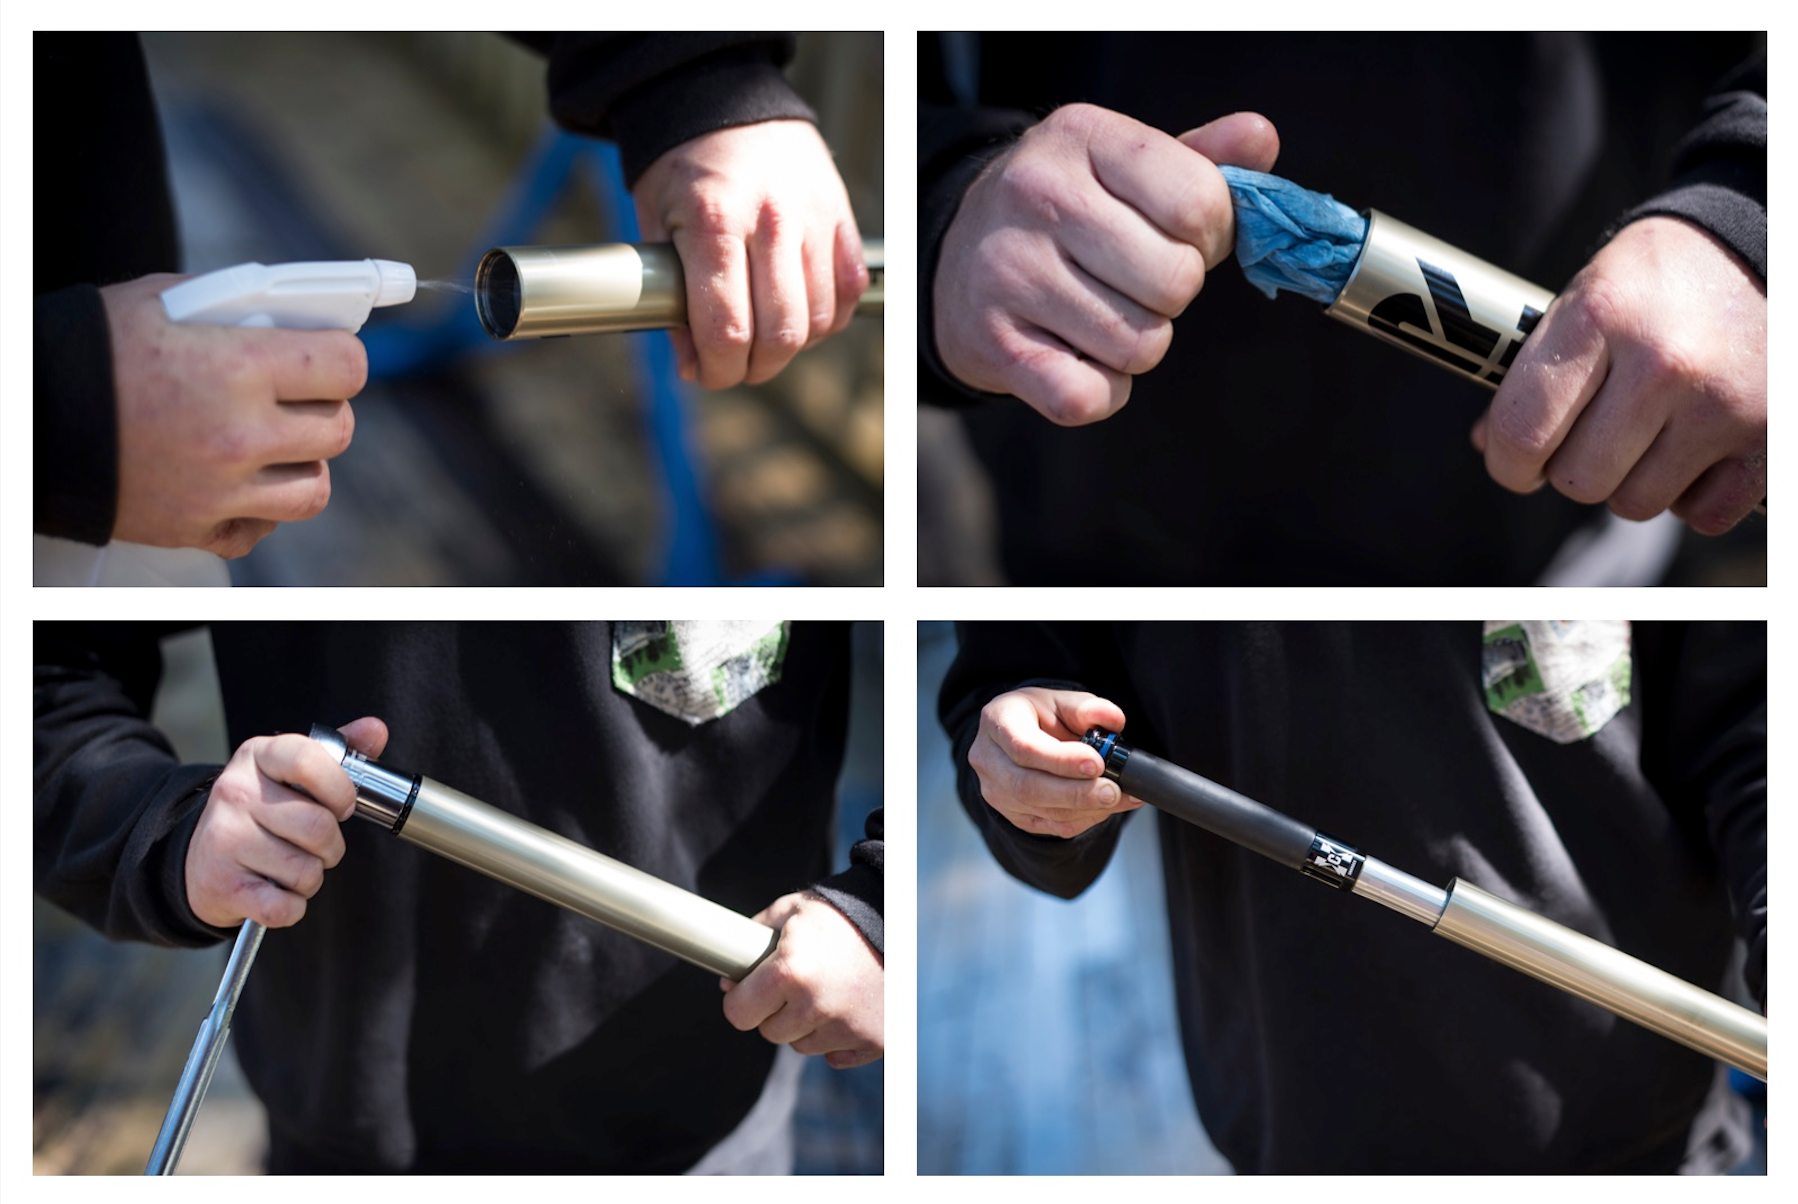
Clean the inside of the old stanchion with a few sprays of isopropyl alcohol. Push a shop rag through with a dowel. Next, drop your shiny new Charger damper in. Hand thread it until it’s time to torque it to 7.3 N-M(65 in/lb) with a 24mm socket.

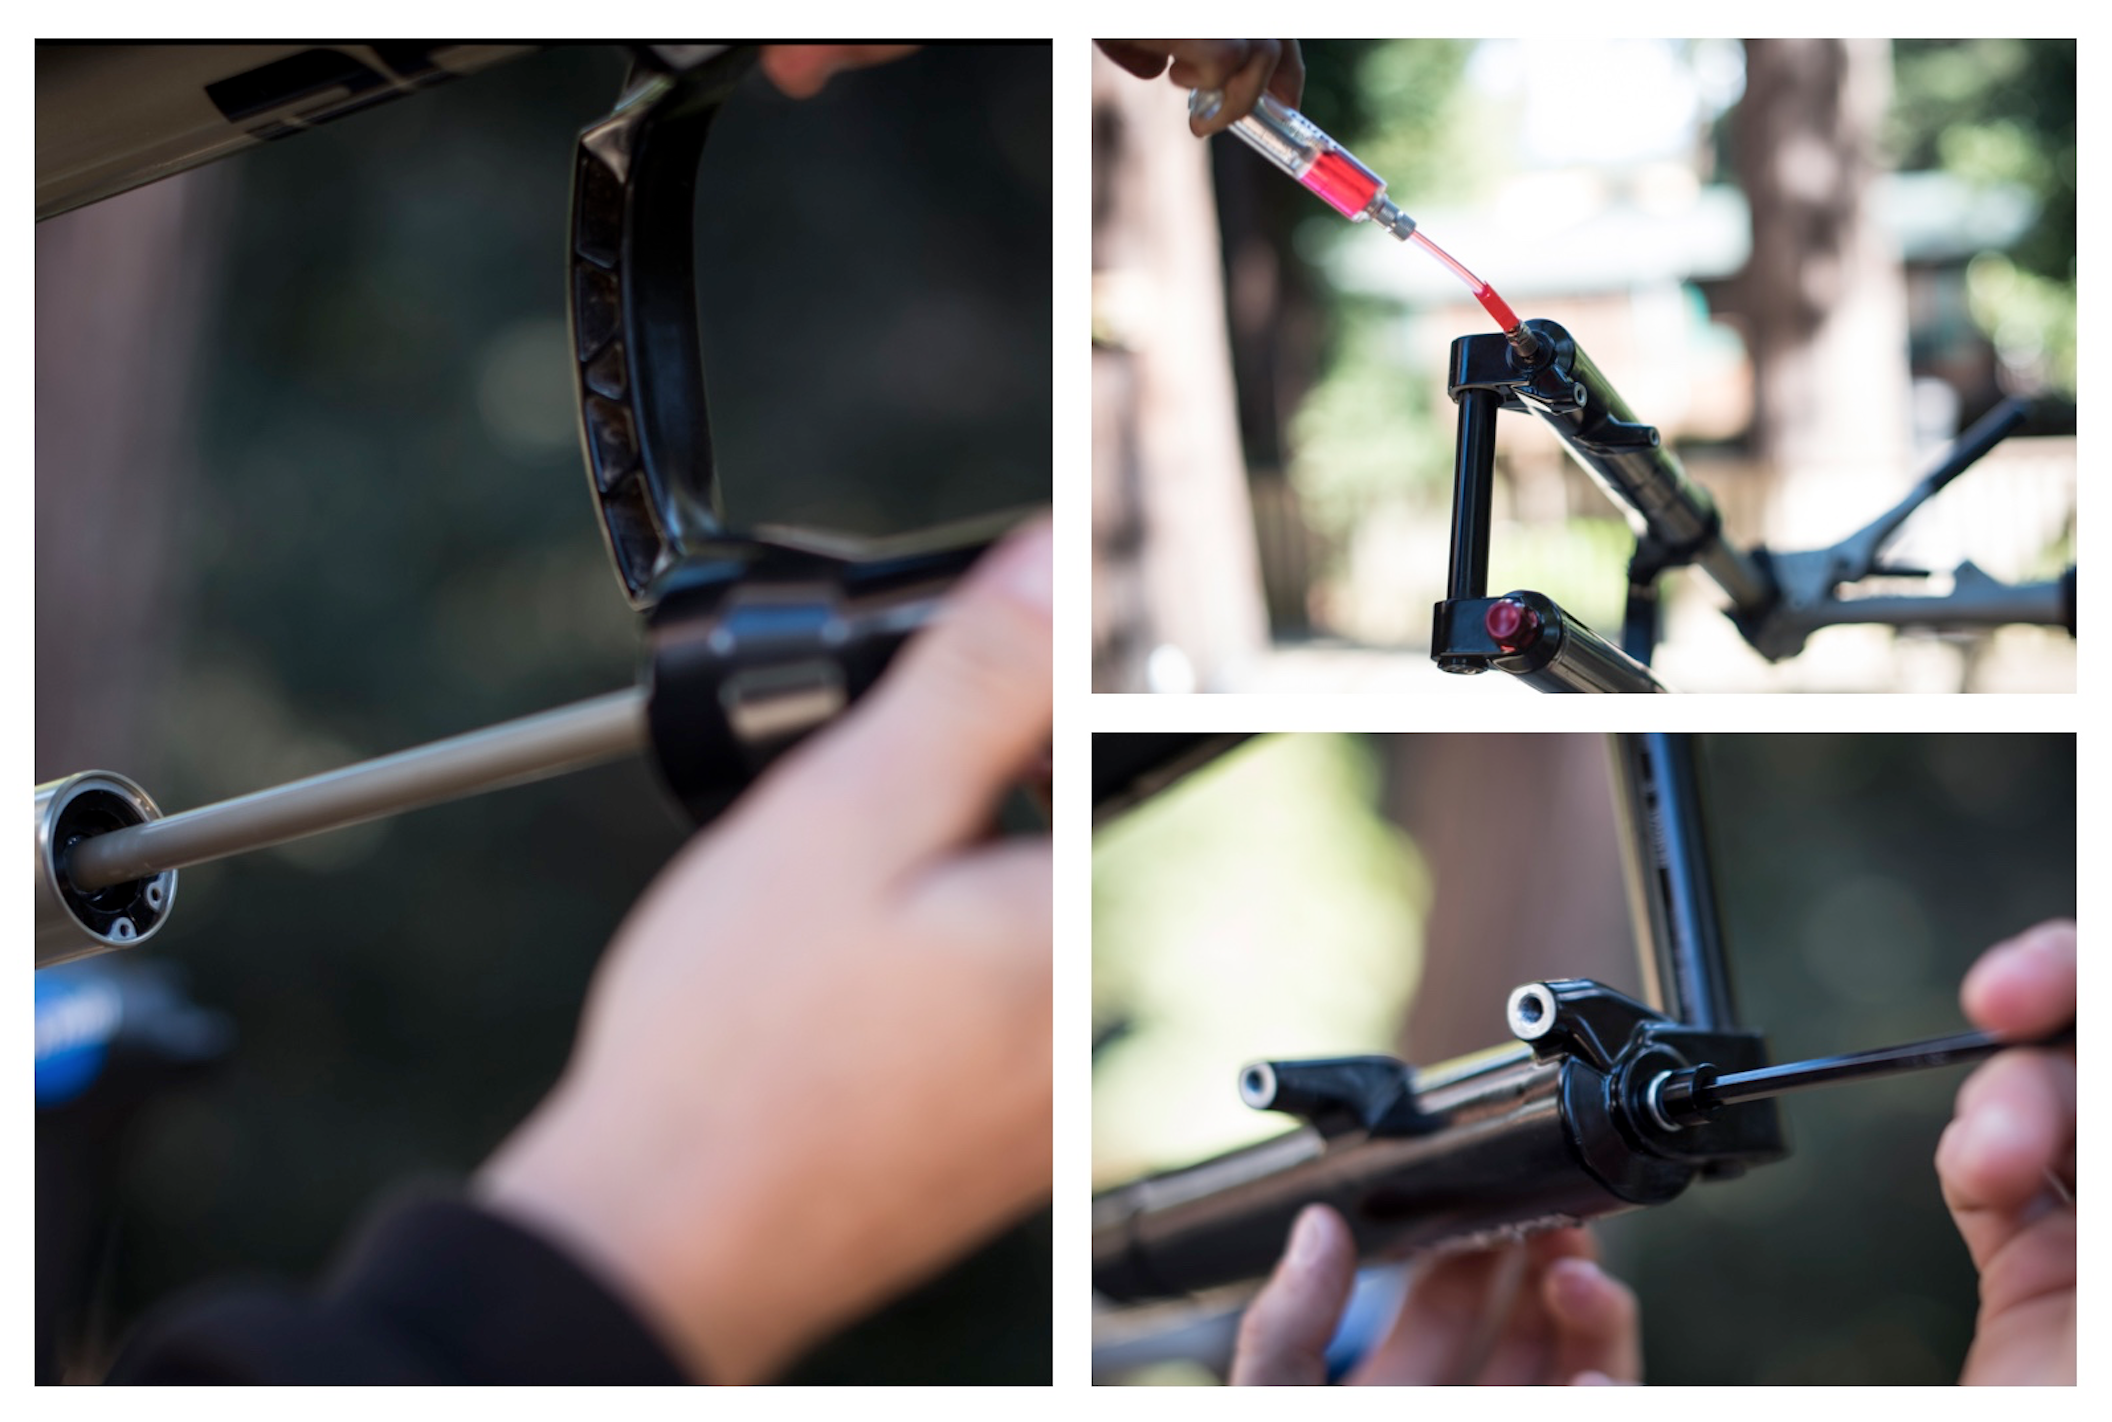
Using Sram Butter or Slick Honey, generously lubricate the bottom cap(shown top left) and in the orientation shown, press it into the stanchion until it seats firmly. Next, reinstall the C-clip. Be sure to double check that it’s firmly locked into place. Install the compression damping adjuster onto the top of the Charger damper with an allen key.
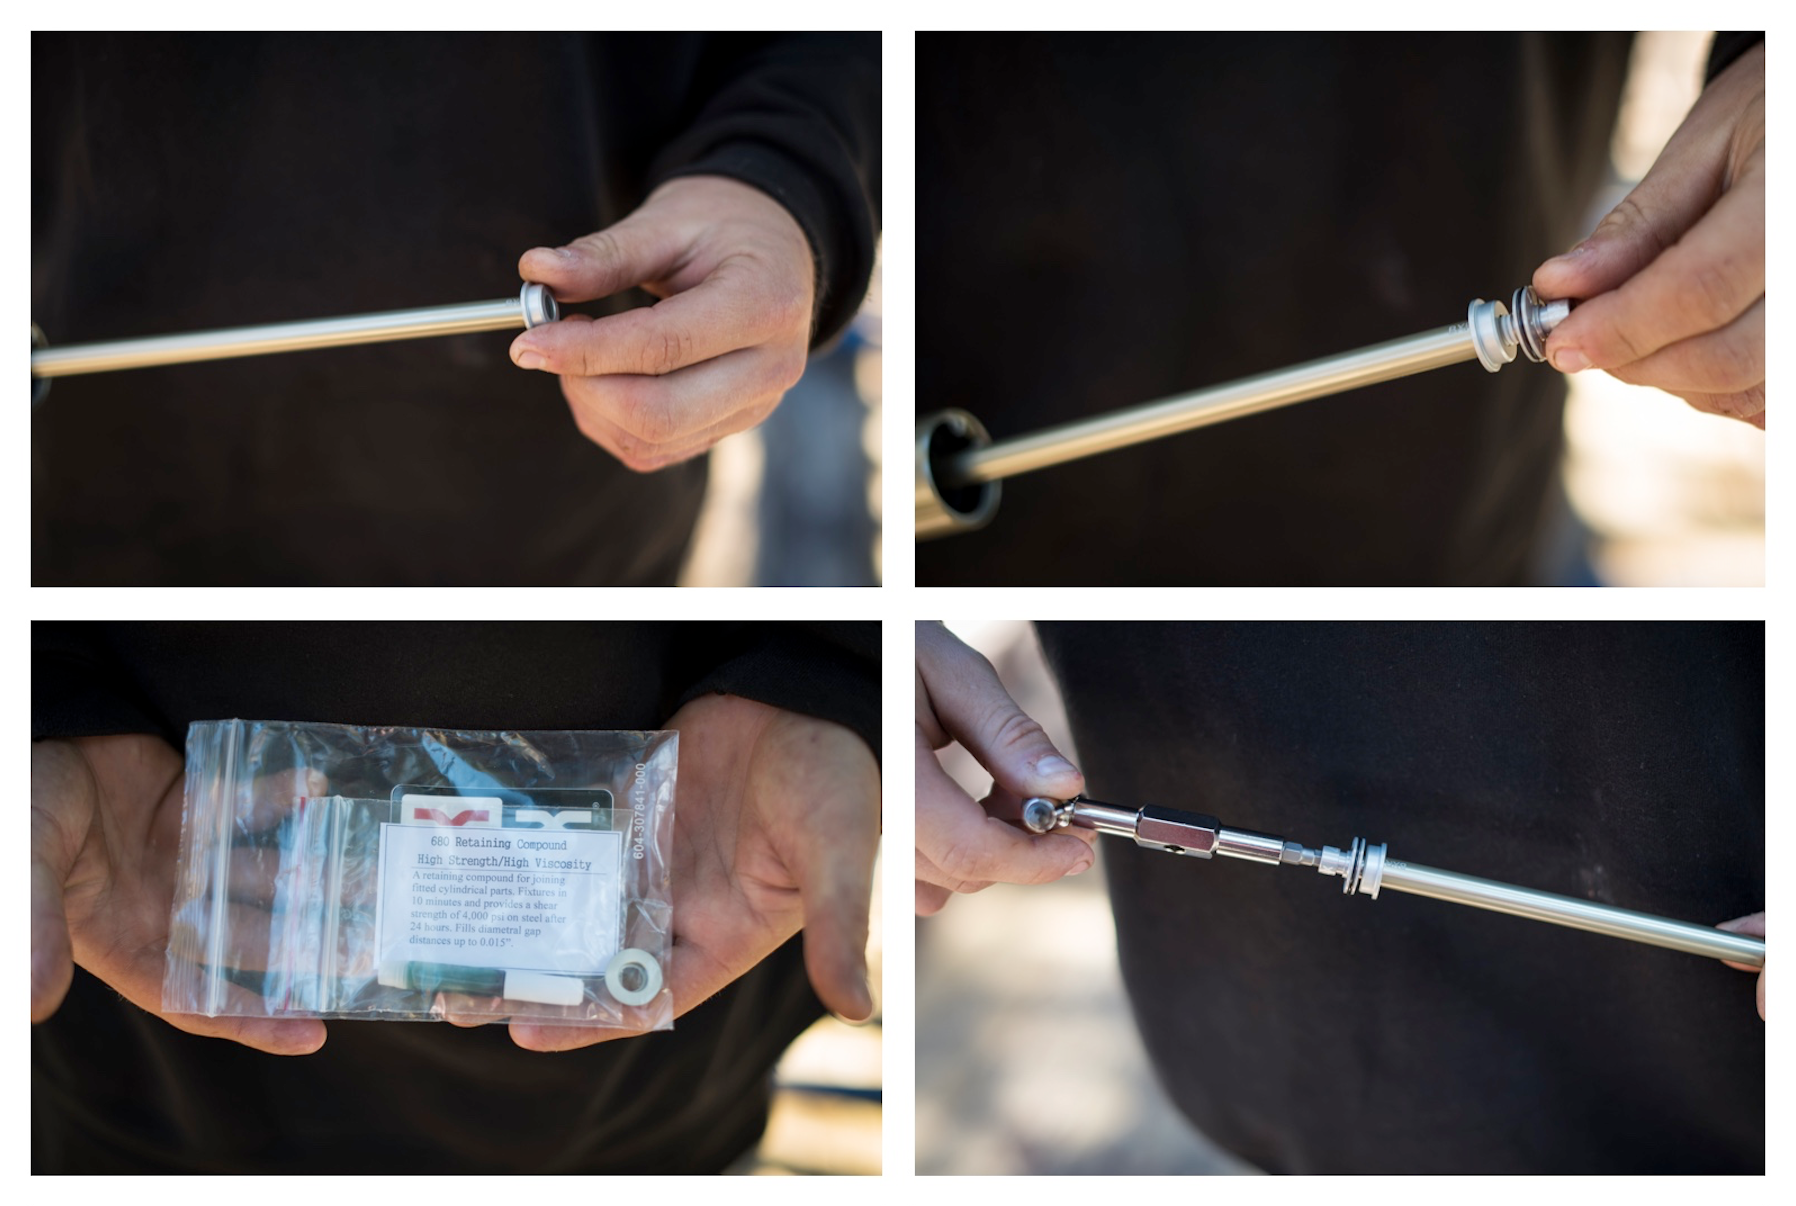
The next step is super important. Here we are installing the casting plug onto the rebound shaft. This plug ensures a proper seating into the lower legs, along with perfect alignment. You will find the casting plug in a bag along with some #680 Green LocTite. Use the footbolt to provide the casting plug with an interference fit on the rebound shaft. Once you tighten the plug up enough to seat it, remove the foot bolt and set it aside.

Apply the LocTite to the outside of the casting plug

If you are running a fork that has seen quite a bit of hours, not might be a good time to install new seals into the lower legs. If not, simply grease those seals liberally with SRAM butter or slick honey and carefully install the stanchion/damper into the lowers about a 2-3″. Pump 10CCs of Rock Shox 0W30 oil into the lower leg. Next, slide the stanchion all the way into the lower leg. Be careful to avoid contaminating the green loctite with oil, and make sure to clean the lower bolt hole with a Q-Tip and some isopropyl alcohol. That way, the LocTite bonds properly. Install the footbolt with a 5mm allen key and torque it to 7.3N-M(65in/lb) Last, install the rebound adjustment knob.
VOILA! You’ve done most of the install for the Charger damper. The kits are obviously sold separately, so if you just choose to upgrade the damper, this is all you have to do. If you choose to update your air spring to the new Solo air, or want to shed some weight and ditch your old coil spring, read on and we’ll walk you through that part next as well.
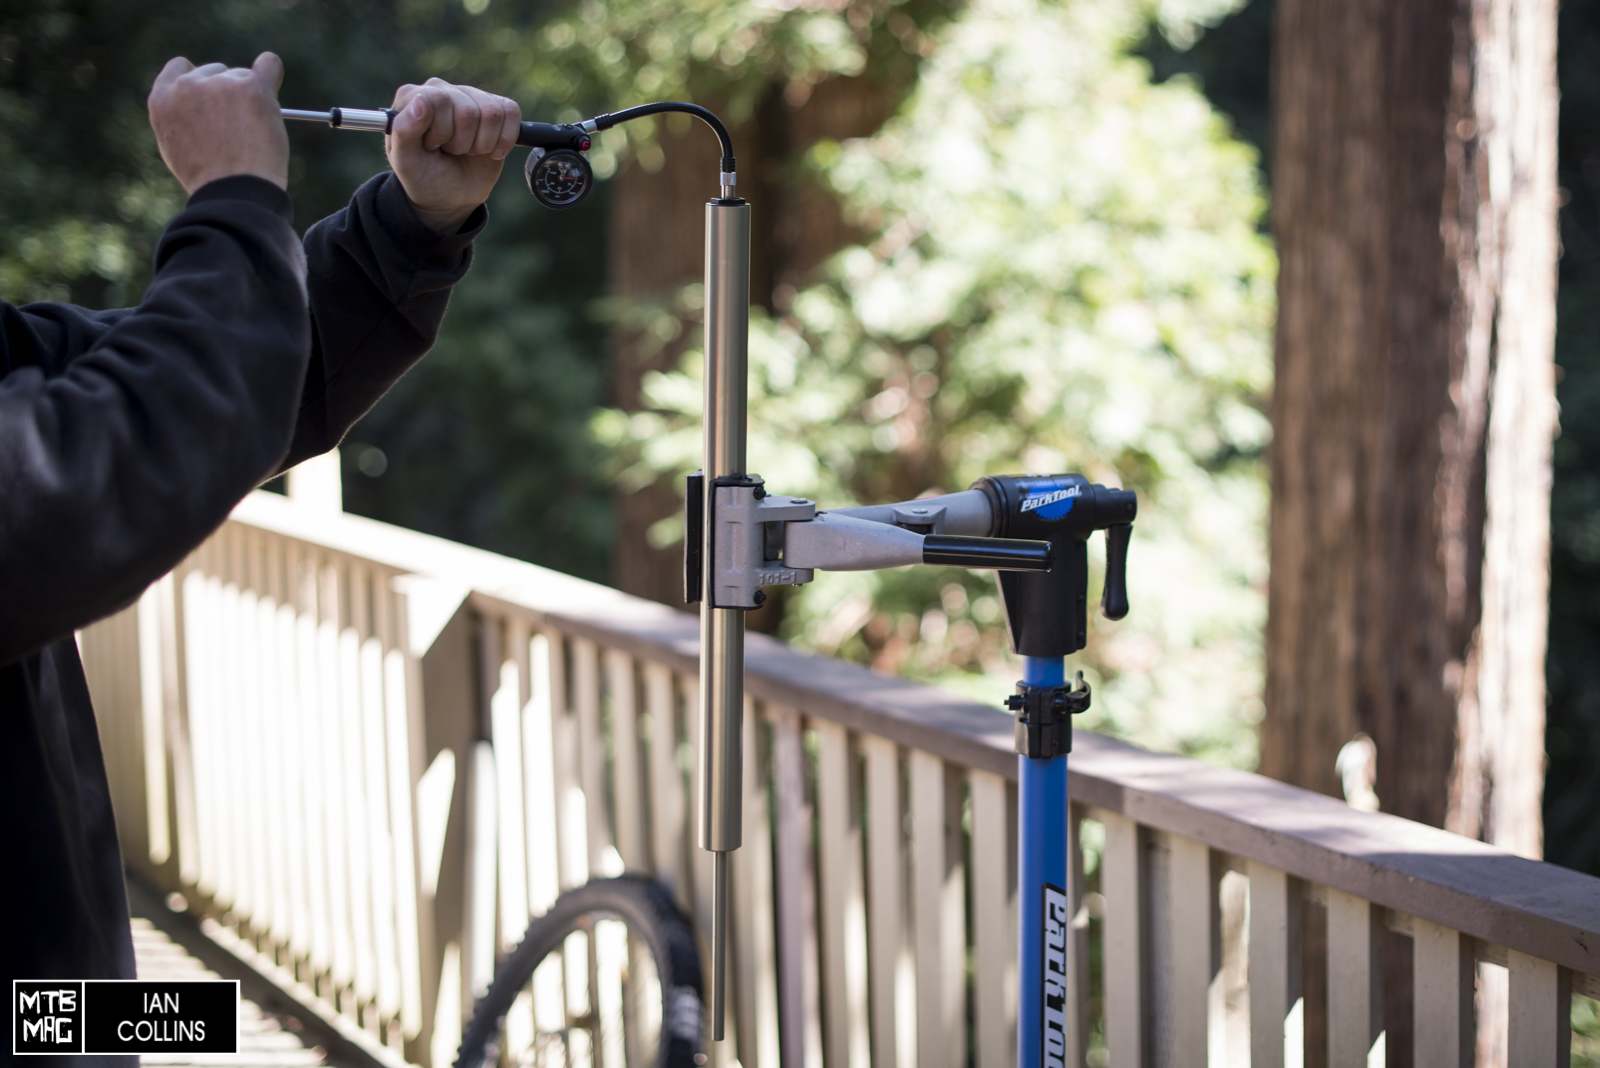
FIRST thing first. If you have an air spring, deflate it by removing the top cap and depressing the schraeder valve.
Now, in the same manner that you dislodge the rebound shaft on the damper side, you separate the stanchion/spring assembly from the lowers by loosening the foot bolt a couple of turns and tapping it with a rubber mallet. Have your bucket ready for the old oil to drain into. Note : we re-used the pic from the damping side. The air spring is on the left side of the fork 😉
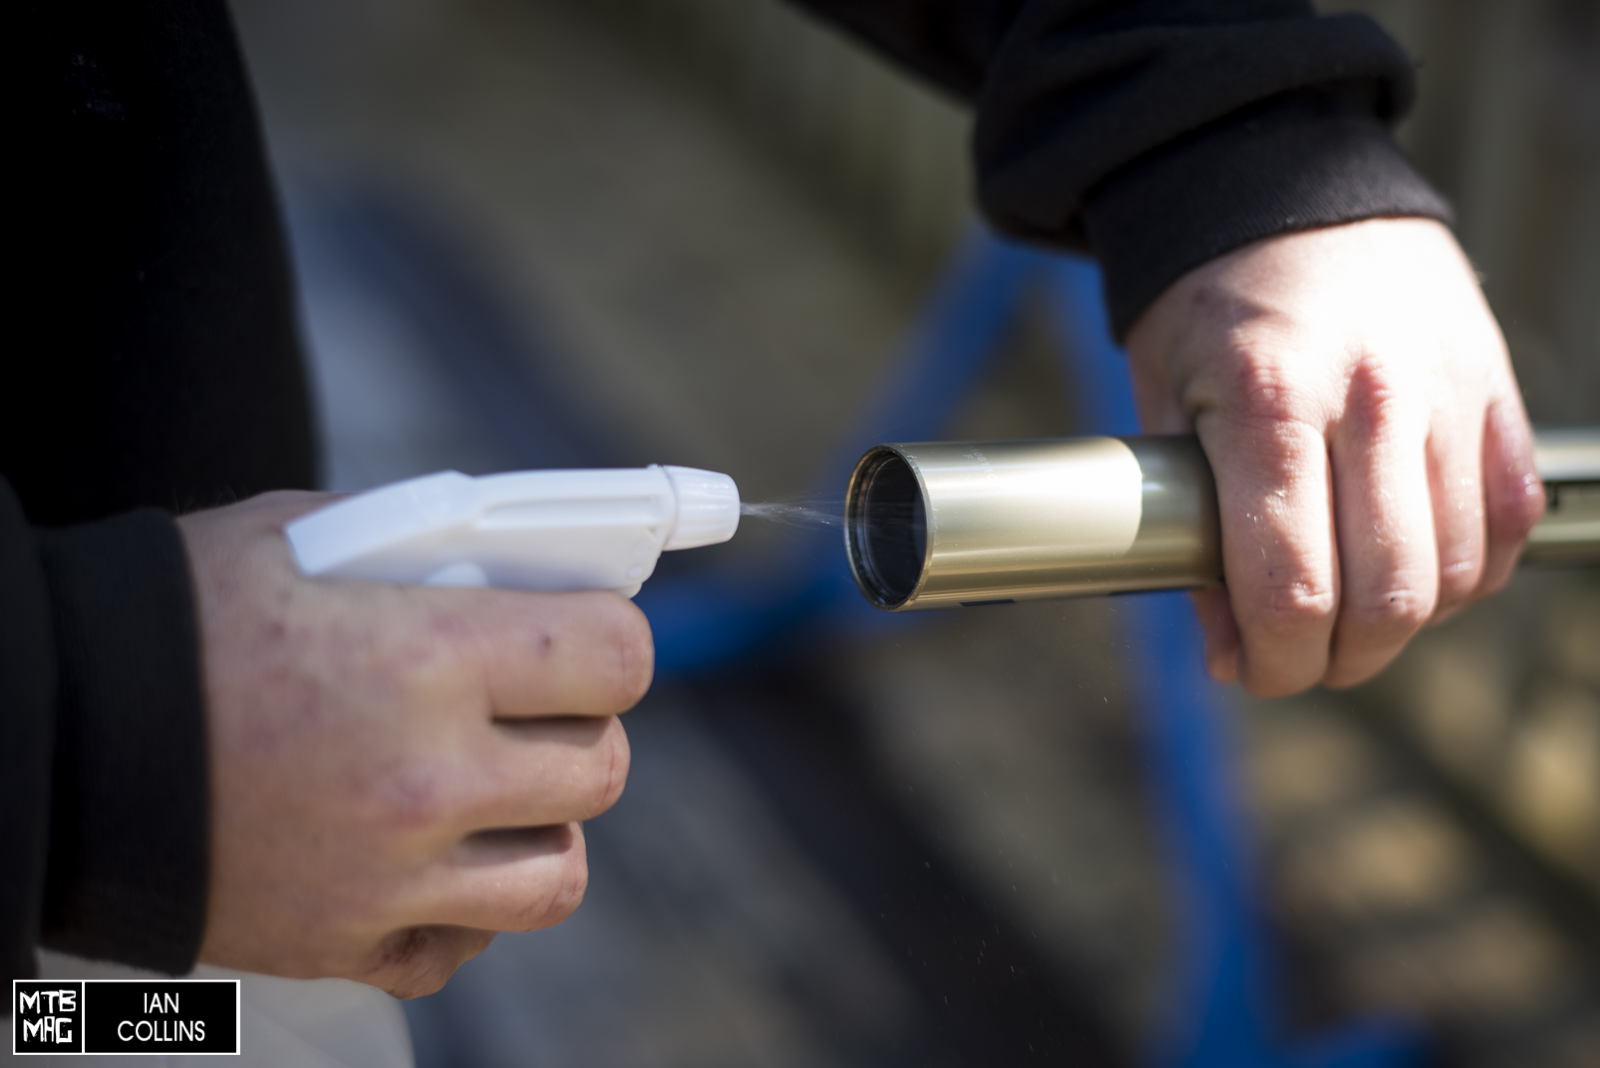
Follow the same steps to clean the inside of the stanchion just like we did on the damping side.
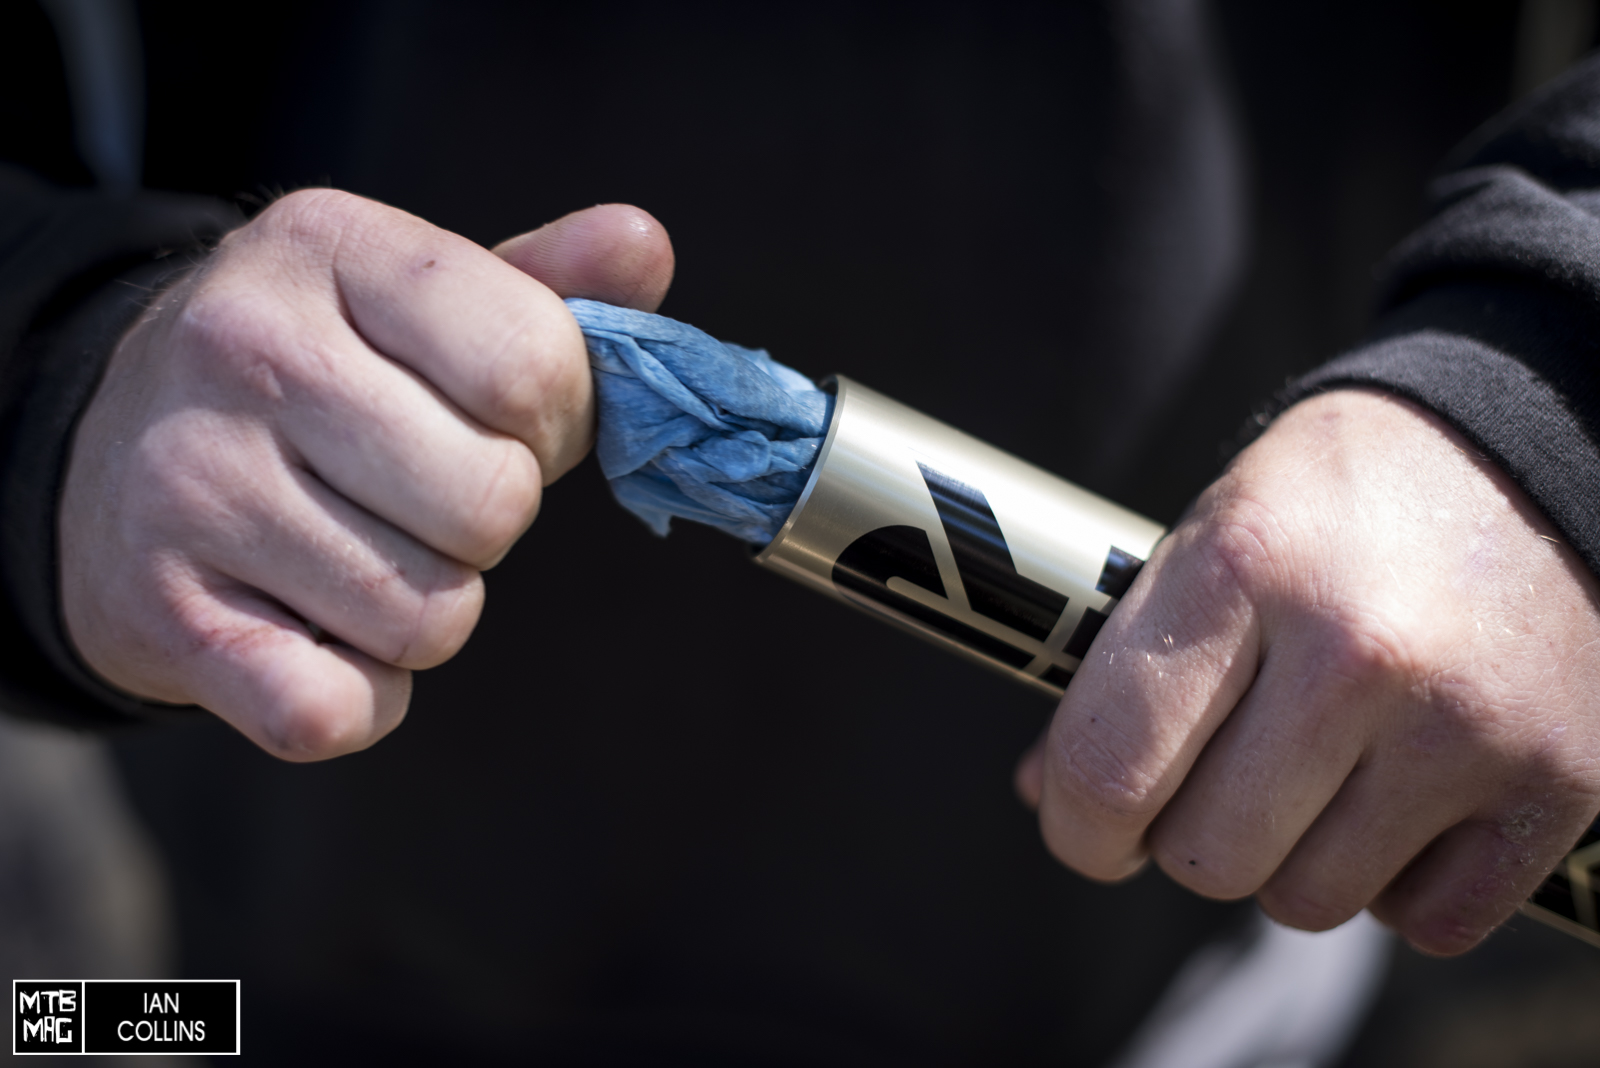
Again, follow the same steps to clean the inside of the stanchion.
***VERY Important note before moving forward. If you have a coil sprung fork that has been ridden then you will need to buy a NEW stanchion as the inside of it will have been marred and likely will not seal correctly. If you are installing the Solo air into a fork that was used with an older version of a Rock Shox air spring or into a brand NEW coil sprung Boxxer, then it is safe to continue to use your old stanchion.
Lightly grease the seals of the air assembly and insert it into the stanchion. Slide the wavy washer and the retaining ring over the shaft as shown.
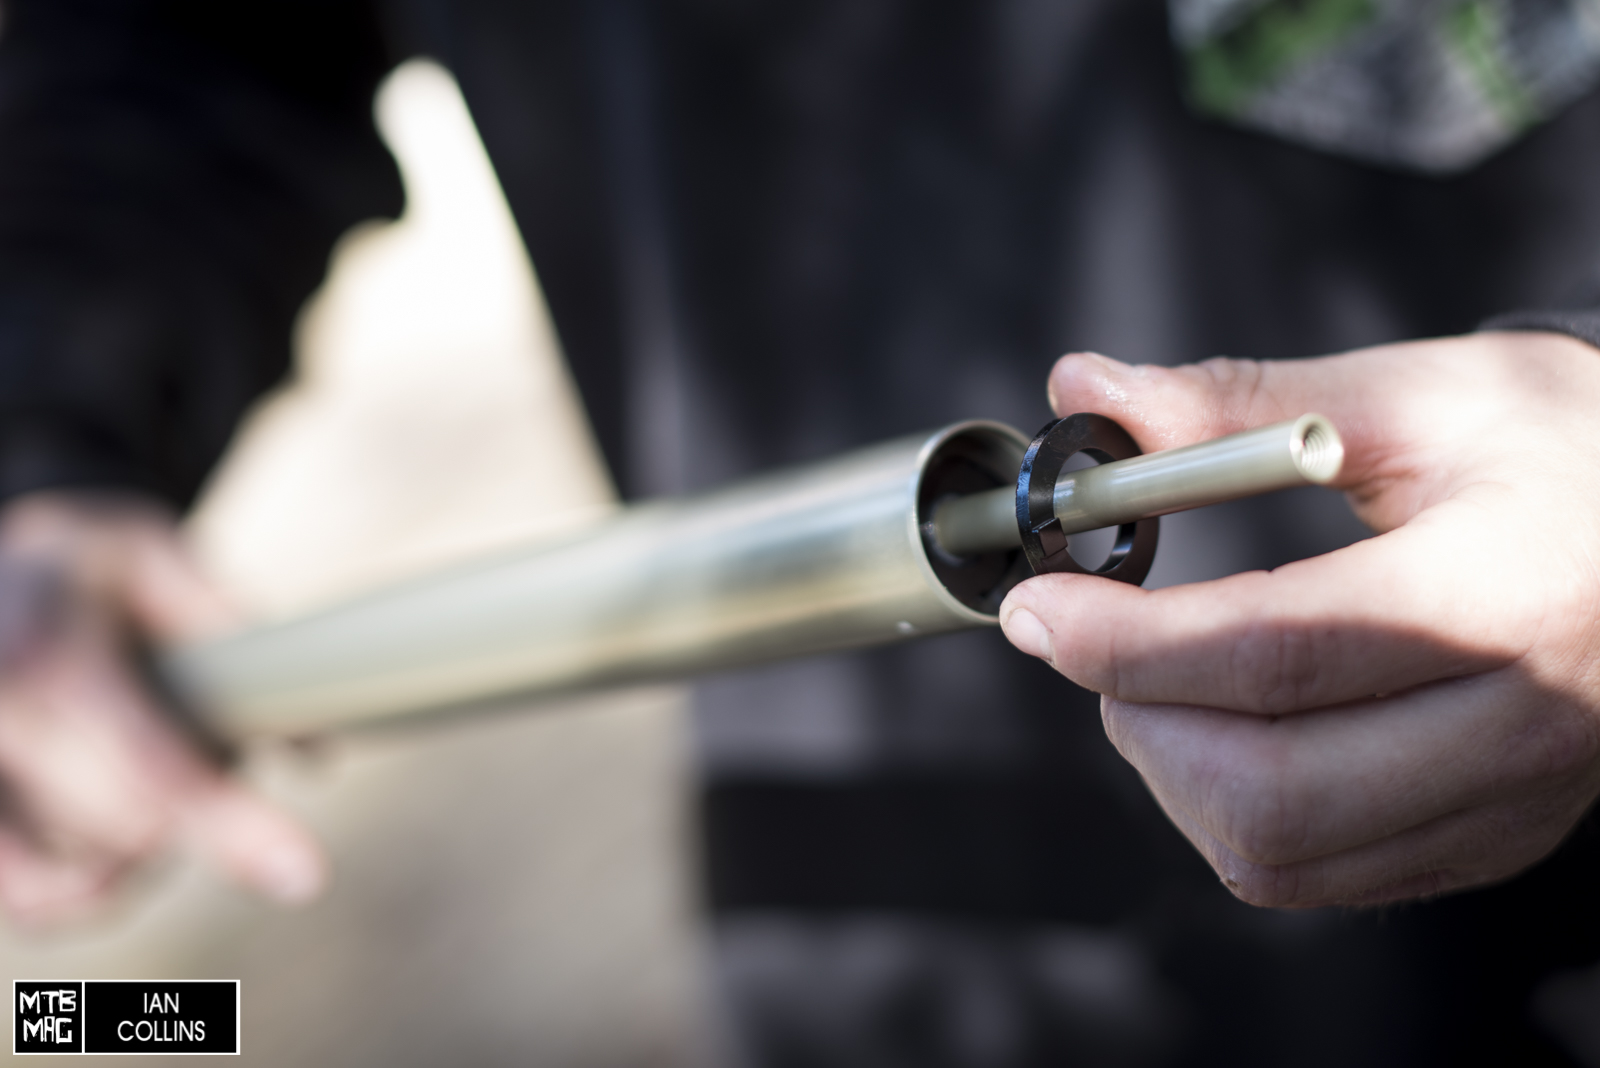
Make sure the retaining ring is installed in this orientation(note the raised area). If it is installed incorrectly, the C-Clip will not seat correctly.
Reinstall the C-clip with the circlip pliers.
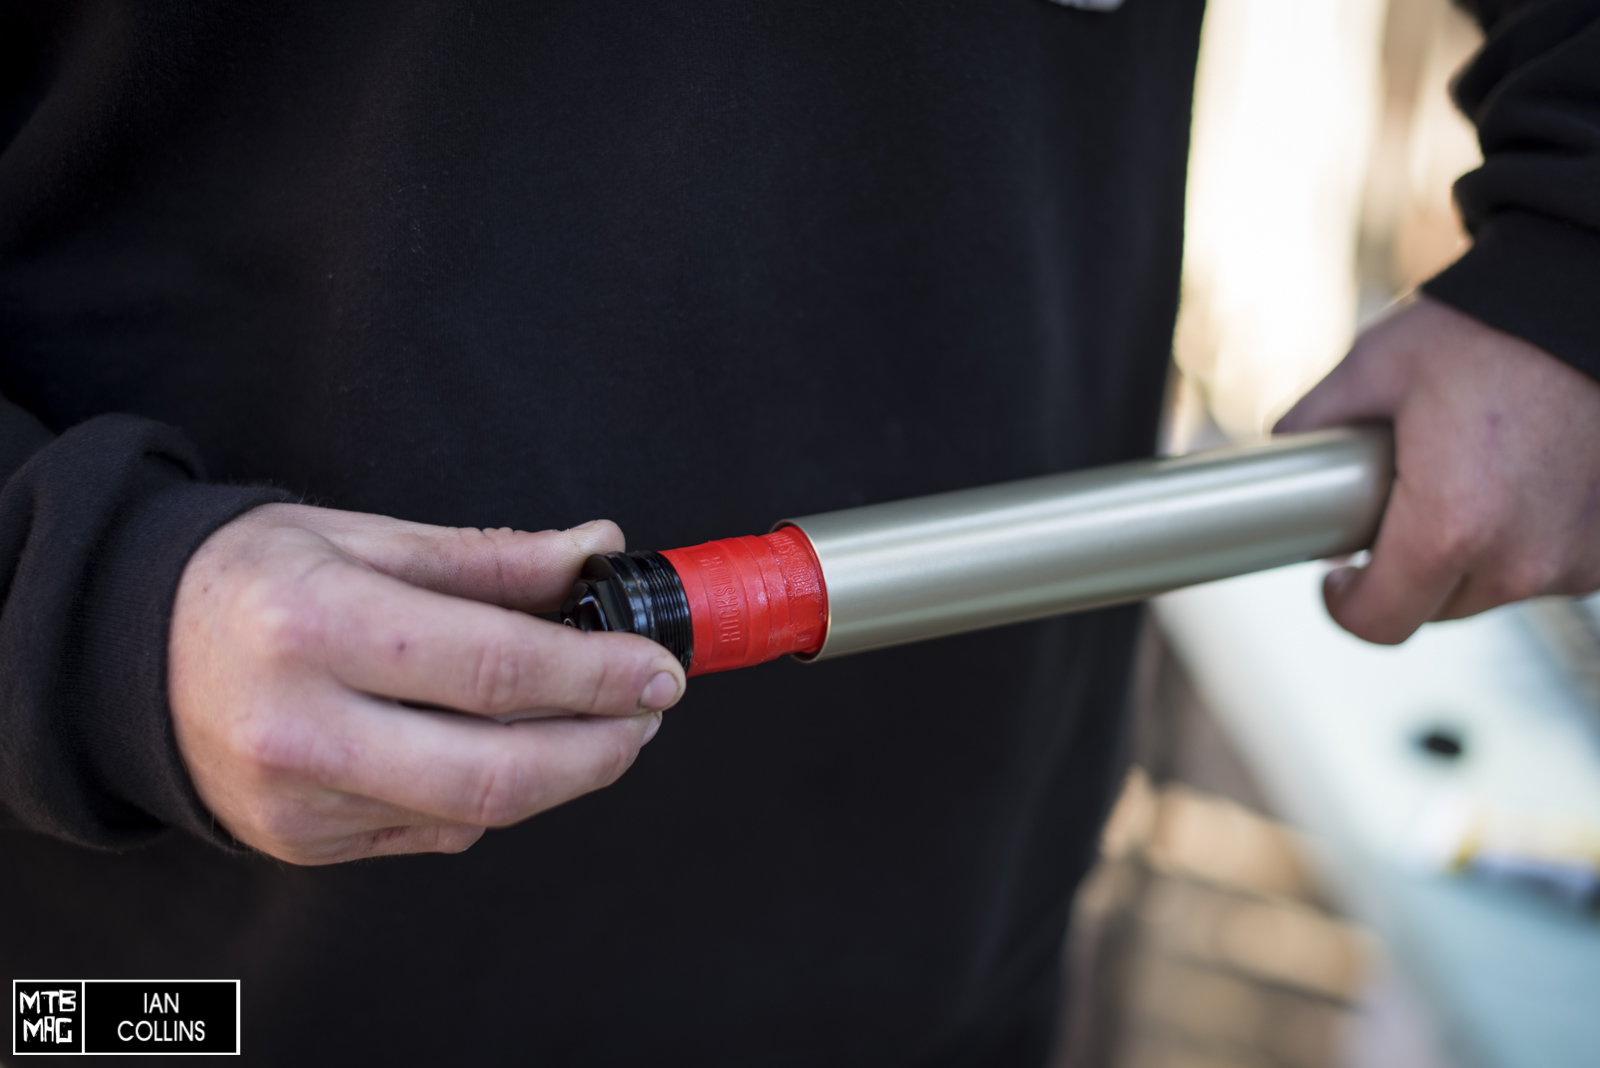
Choose the number of Bottomless tokens you wish to use, snug them onto the air cap with an 8mm allen key, and install the cap. *We chose 2 tokens….more aggressive riders may choose up to 4, while those preferring a more linear feel might not run any at all.
Torque the air cap to 7.3 N-M(65 in/lb) with a 24mm socket.
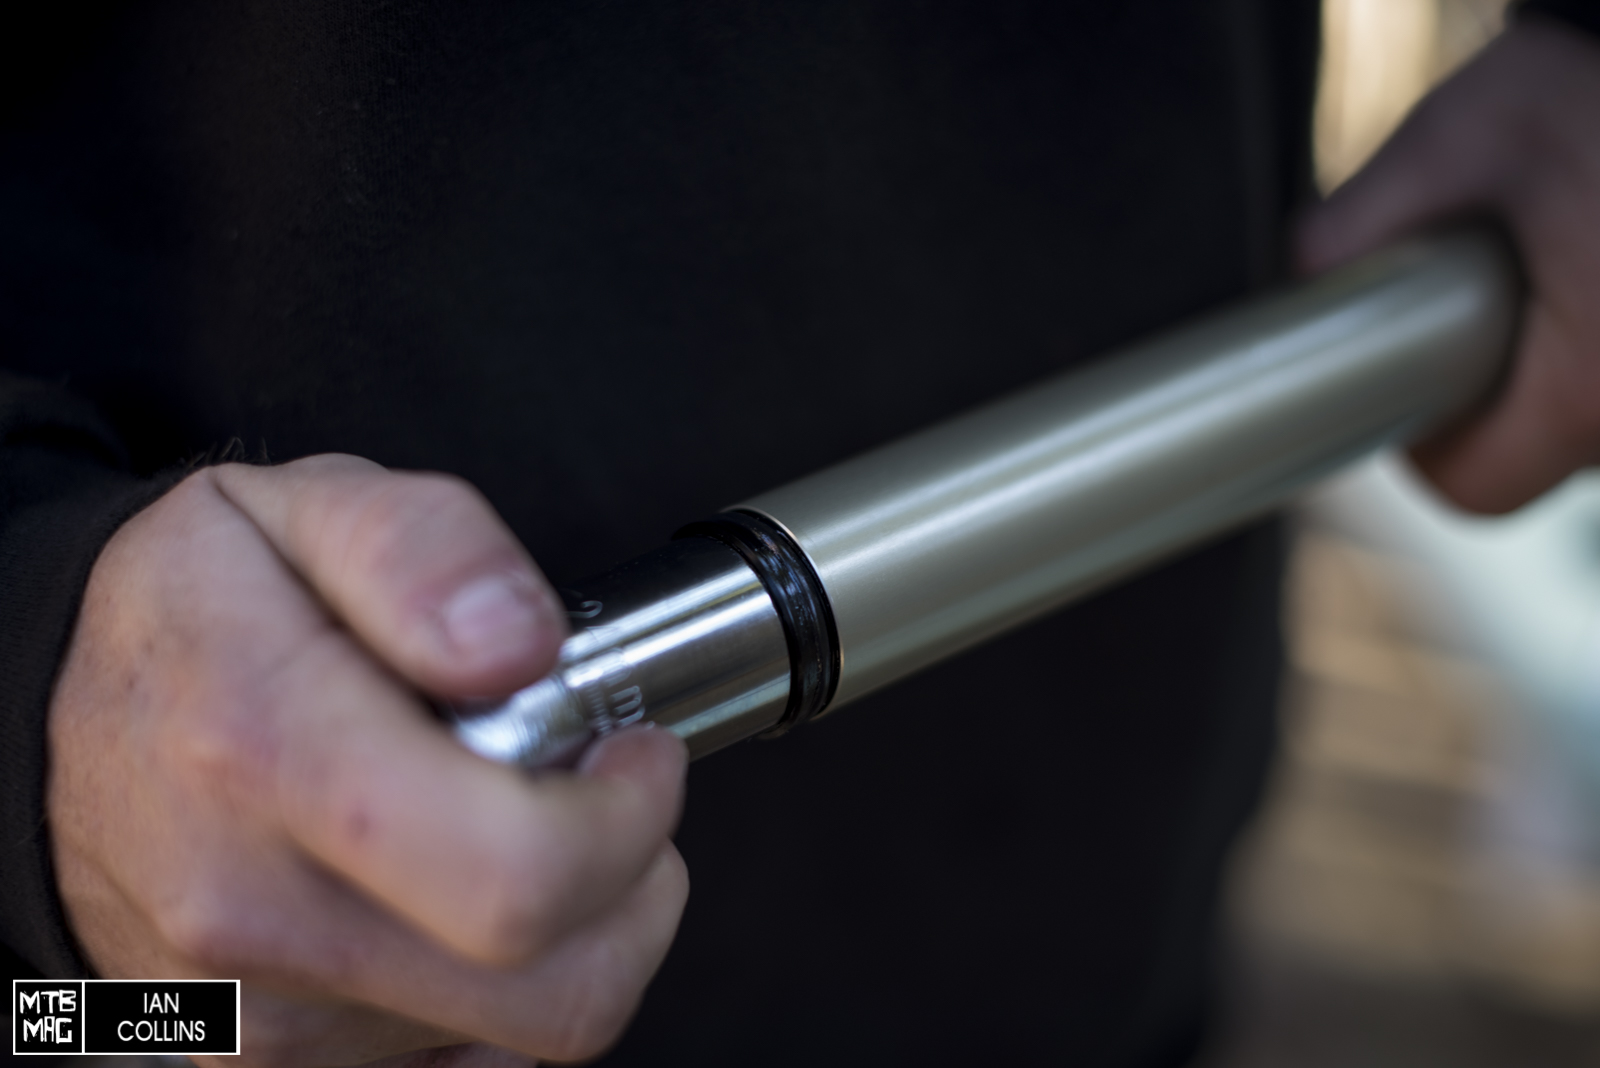
Pump 20 psi or so into the chamber so the air spring shaft extends fully. Once everything is fully installed and the fork is correctly mounted back onto the bike, you will fully inflate and set your sag accordingly.
In the same manner that you installed the right (damper)side stanchion, install the left one. Just make sure you lubricate the seals in the lower legs. The spring side doesn’t utilize a casting plug, so you don’t have to worry about that. Everything else is the same though. 10cc’s of oil and the same torque specs on the foot bolt.
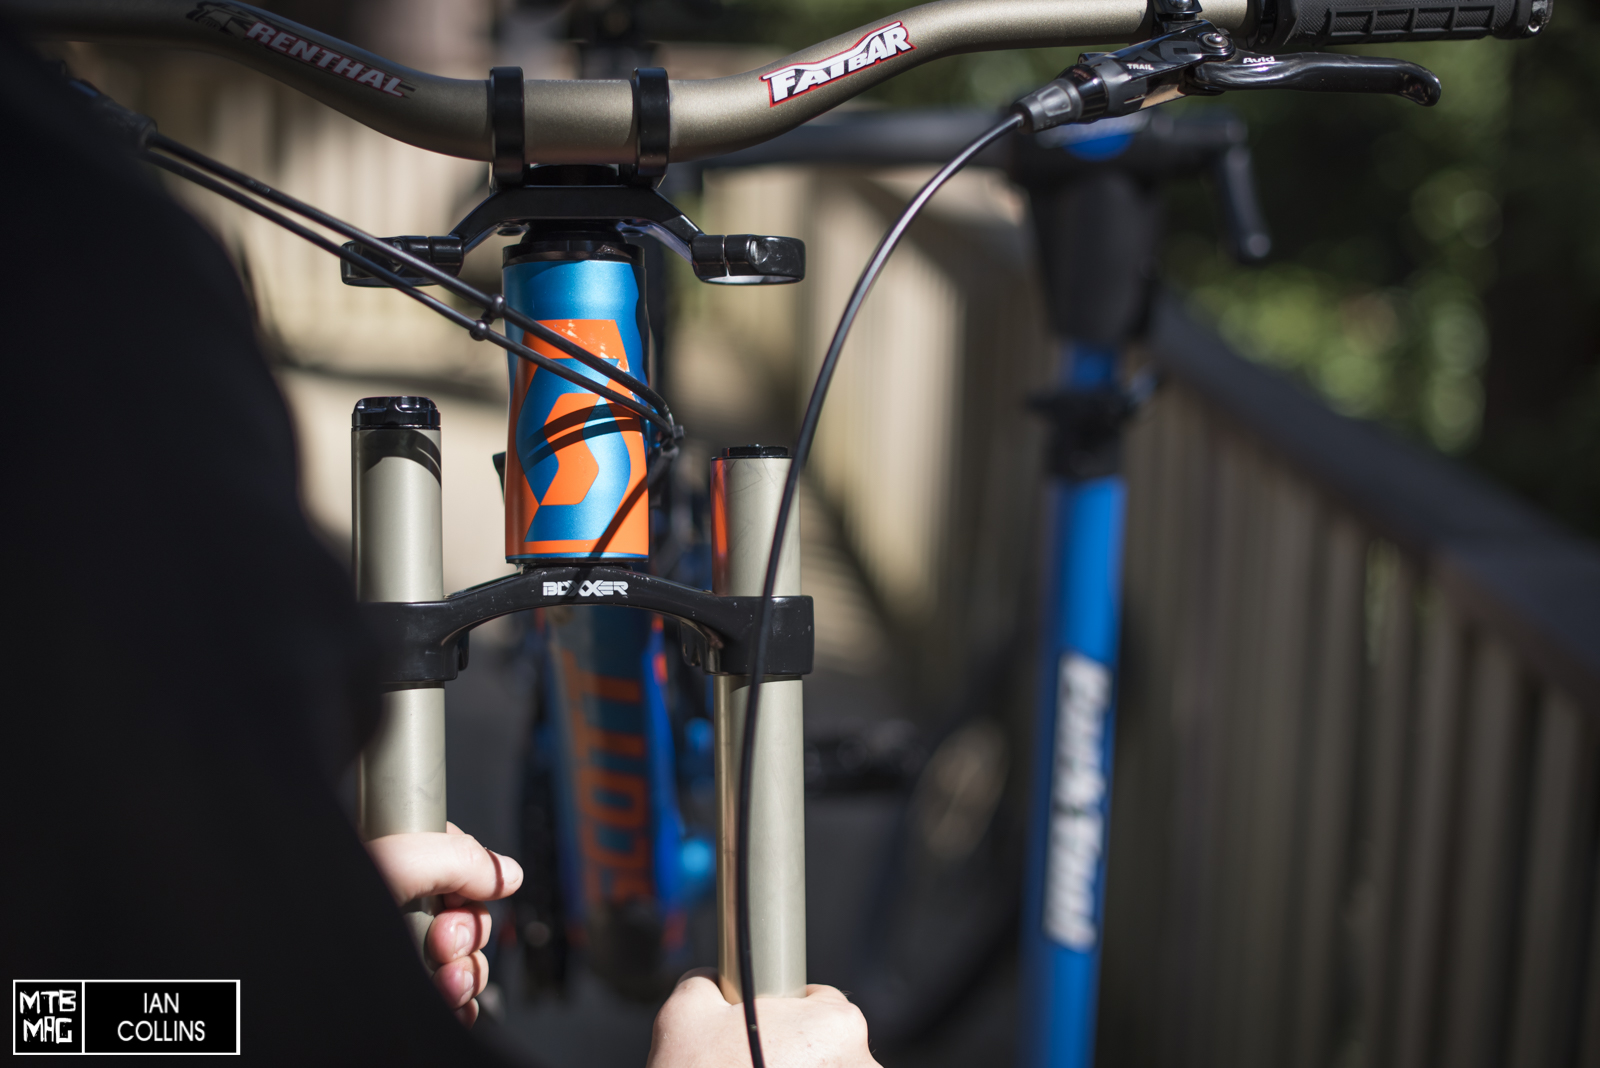
Wipe all of the outside surfaces off with isopropyl alcohol then reinstall the stanchions and lower legs. If your frame doesn’t have integrated bumpers, make sure you reinstall yours onto the fork. Set your ride height and with a 4mm allen key, make sure you torque your crown’s pinch bolts to 5 N-M (44 in/lb). Reinstall your front wheel and brake, set your preferred sag and go shred.
Here is a quick clip we snagged just a couple of hours after installing the new damper and air spring. So far our test rider(in front of the helmet cam) has felt a massive improvement all around over his 2012 Boxxer team. It’s pretty cool that you can drop new technology into a 3 year old chassis and have top notch performance for a fraction of the cost of a whole new fork.
Charger Boxxer Testing from MTB MAG on Vimeo.