[ad3]
Classic situation: trailside puncture in your tubeless wheels… The latex begins to spurt from all sides, you stop and try everything to stop the air from leaking out. You spin the wheel like a madman position the hole at the bottom so the latex should the plug. Suddenly it seems that the hole is closed. So you begin inflating the tire, but right as you arrive at a pressure that would allow you to get home, the hole opens again.
In 90% of cases you just get pissed off and eventually remove the tire, get covered in dirt and latex and insert a tube.
In this short tutorial we’ll share a trick we learned from Thomas Frischknecht last week. It’s a trick that allows you to fix most of the holes you’ll encounter in tubeless tires in a matter of seconds. If the cut is too large – say more than 6.7 mm, your only option would be to apply something inside the tire(a dollar bill works – thank us later) to prevent the tube from blowing out, and inserting a tube.
1. Get yourself a Tubeless tire repair kit
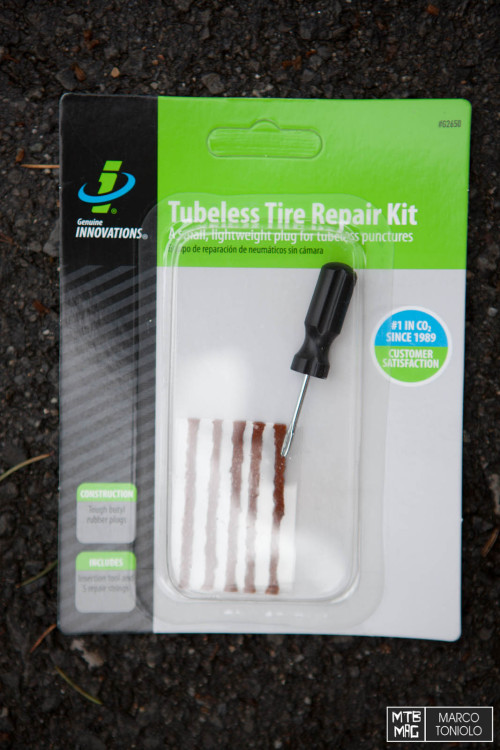
Get a repair kit. Basically, it is designed for speed, it works quickly and is super cheap.
As you can see there are five rubber plugs and a special screwdriver which secures the strips before placing them into the tire’s casing.
2. Punctured Tire!
If you really want to try this in the garage, take an old tire and puncture it with an awl or a knife.
Note : this works with any tire, also it works on a motorcycle or a car – however, you may need a different kit with a burlier handle to help puncture the belt.
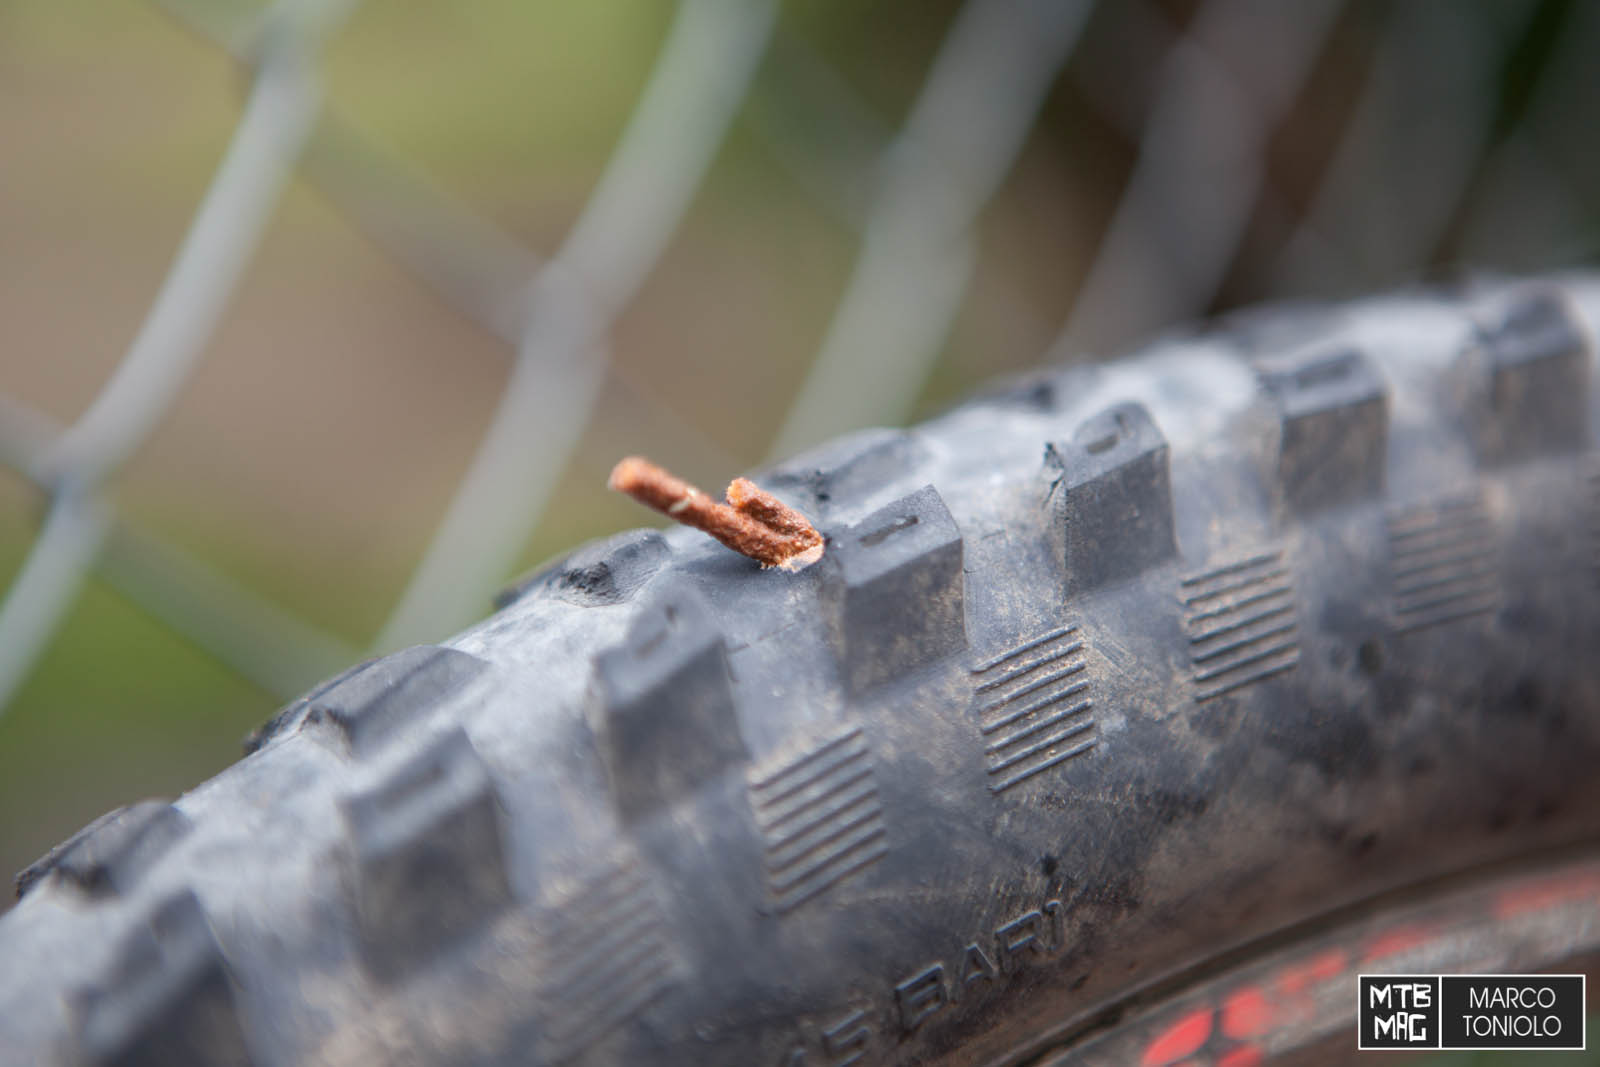
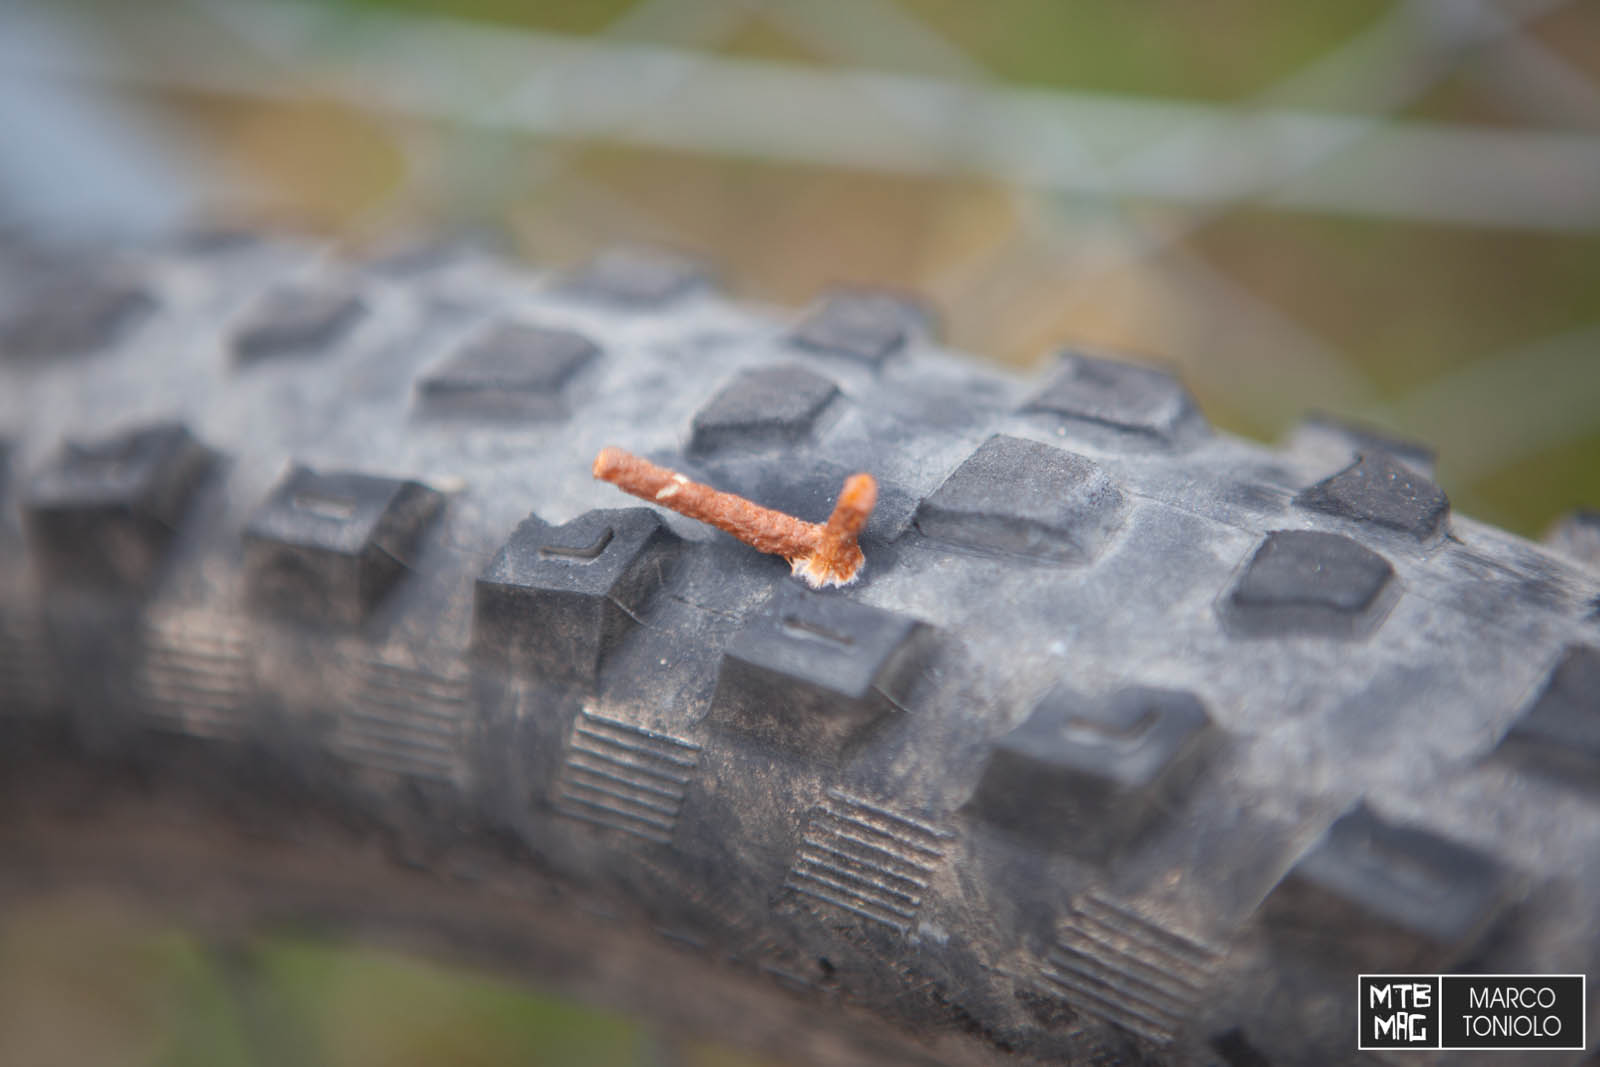
3. Place a strip in the special screwdriver
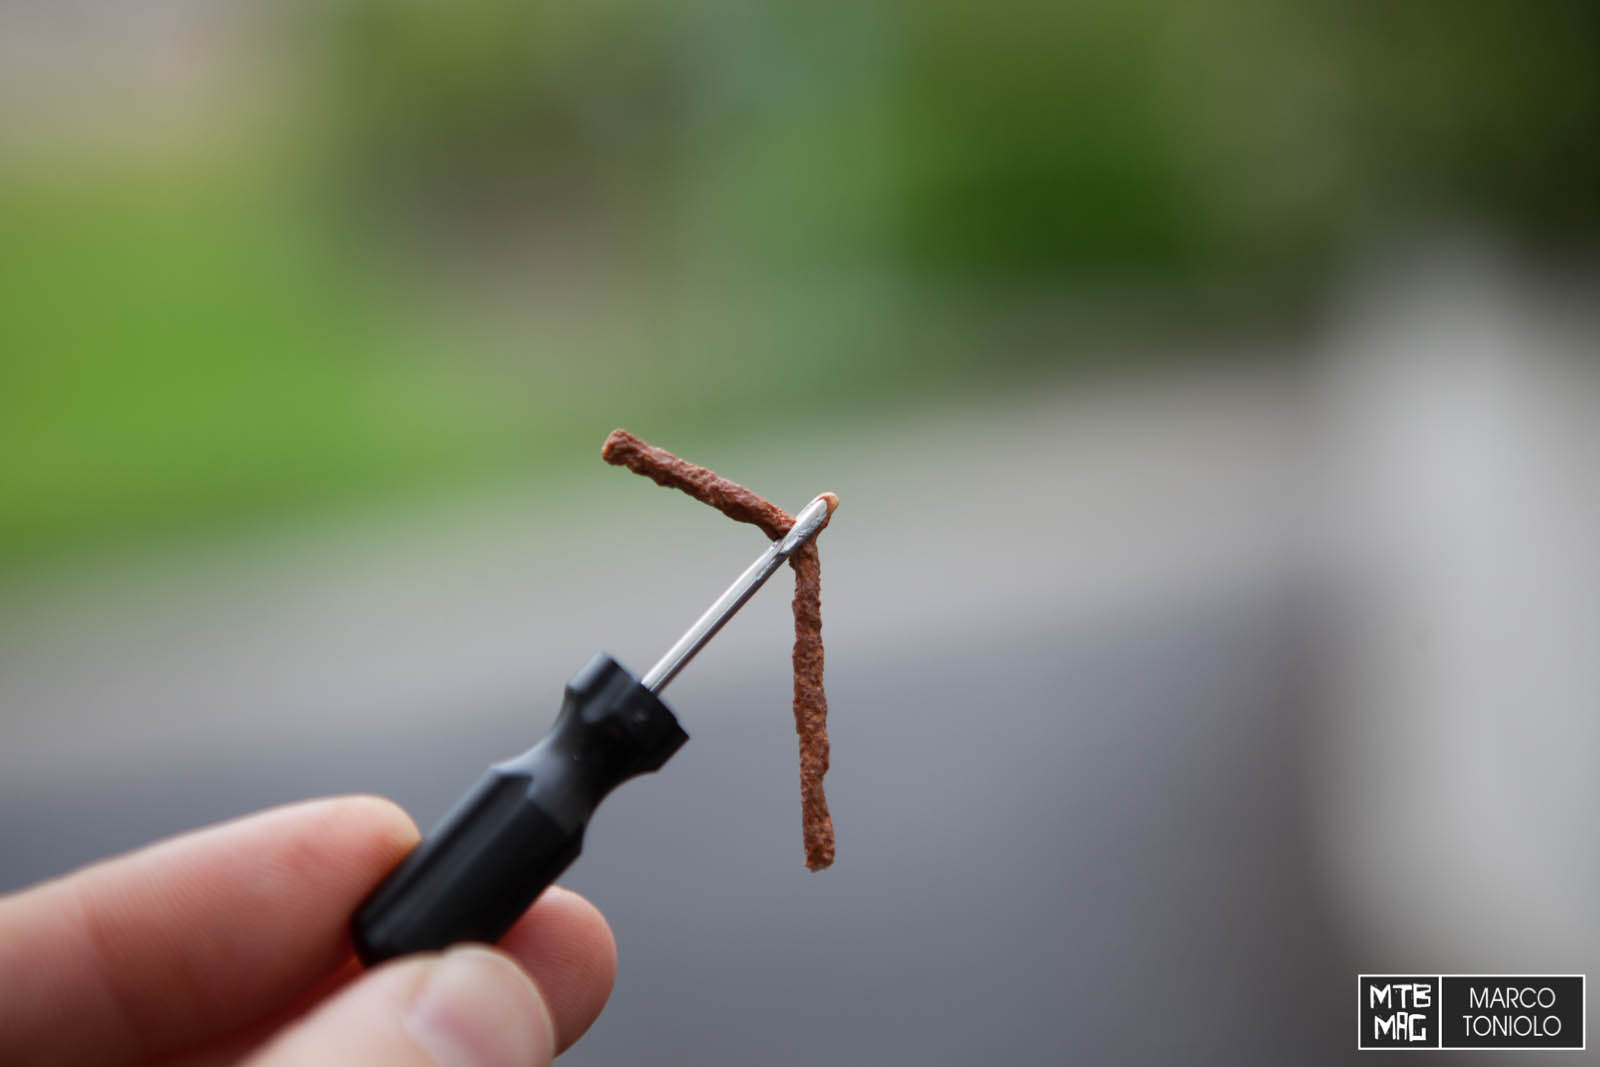
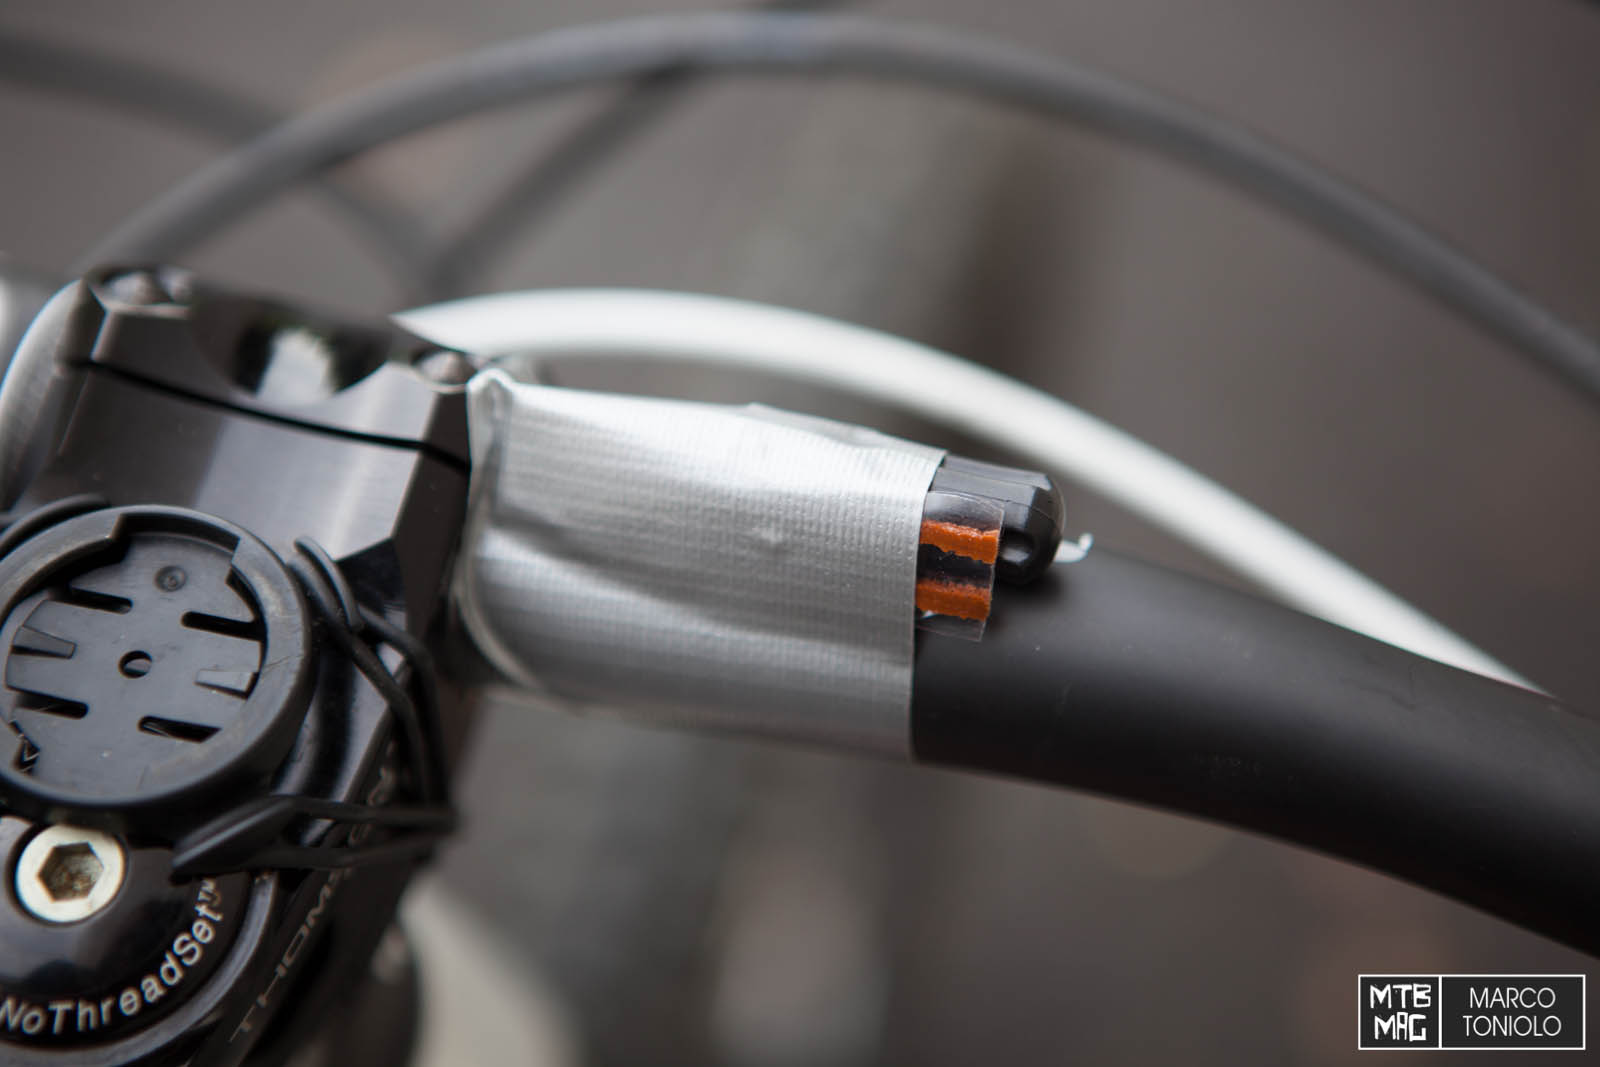
If you leave for a race, you should do this the day before and fasten the handlebar to be even faster (the photo is just an example).
4. Punch the screwdriver into the hole forcefully

Push it in for good, almost to the end. Keep the hole up in the air so no latex flows out.
5. Remove the Screwdriver
With your other hand, hold the strip of rubber in place so it does not follow the screwdriver out, although it should stay put on its own. Remove the screwdriver.
Good to go.
Continue your ride. The latex should seal any imperfections between the plug and the tire.
You can keep using your tire normally until it wears out providing it’s sealed up nicely.
If you’ve installed the plug well and the puncture isn’t too big, you should be able to add some air with a C02 or handpump to get back to your desired pressure and finish your ride without having to cautiously limp home.
Let the plug do its thing and have a good ride!  [ad12]