We recently stopped back into FOX’s Scotts Valley, CA headquarters for another quick tutorial with their legendary World Cup race tech, Jordi Cortes…Last time that we dropped by, we went over air spring tuning for the 36 fork and DPX2 rear shock. Here we’ll be discussing how to do an air spring assembly swap, which is relevant if you want to change the amount of travel in your fork on a non-travel adjust model. The air spring assembly itself is under $45.00 and can be purchased through FOX dealer’s anywhere. Aside from getting the correct air spring assembly, you’ll need a handful of fairly basic tools, pictured below.
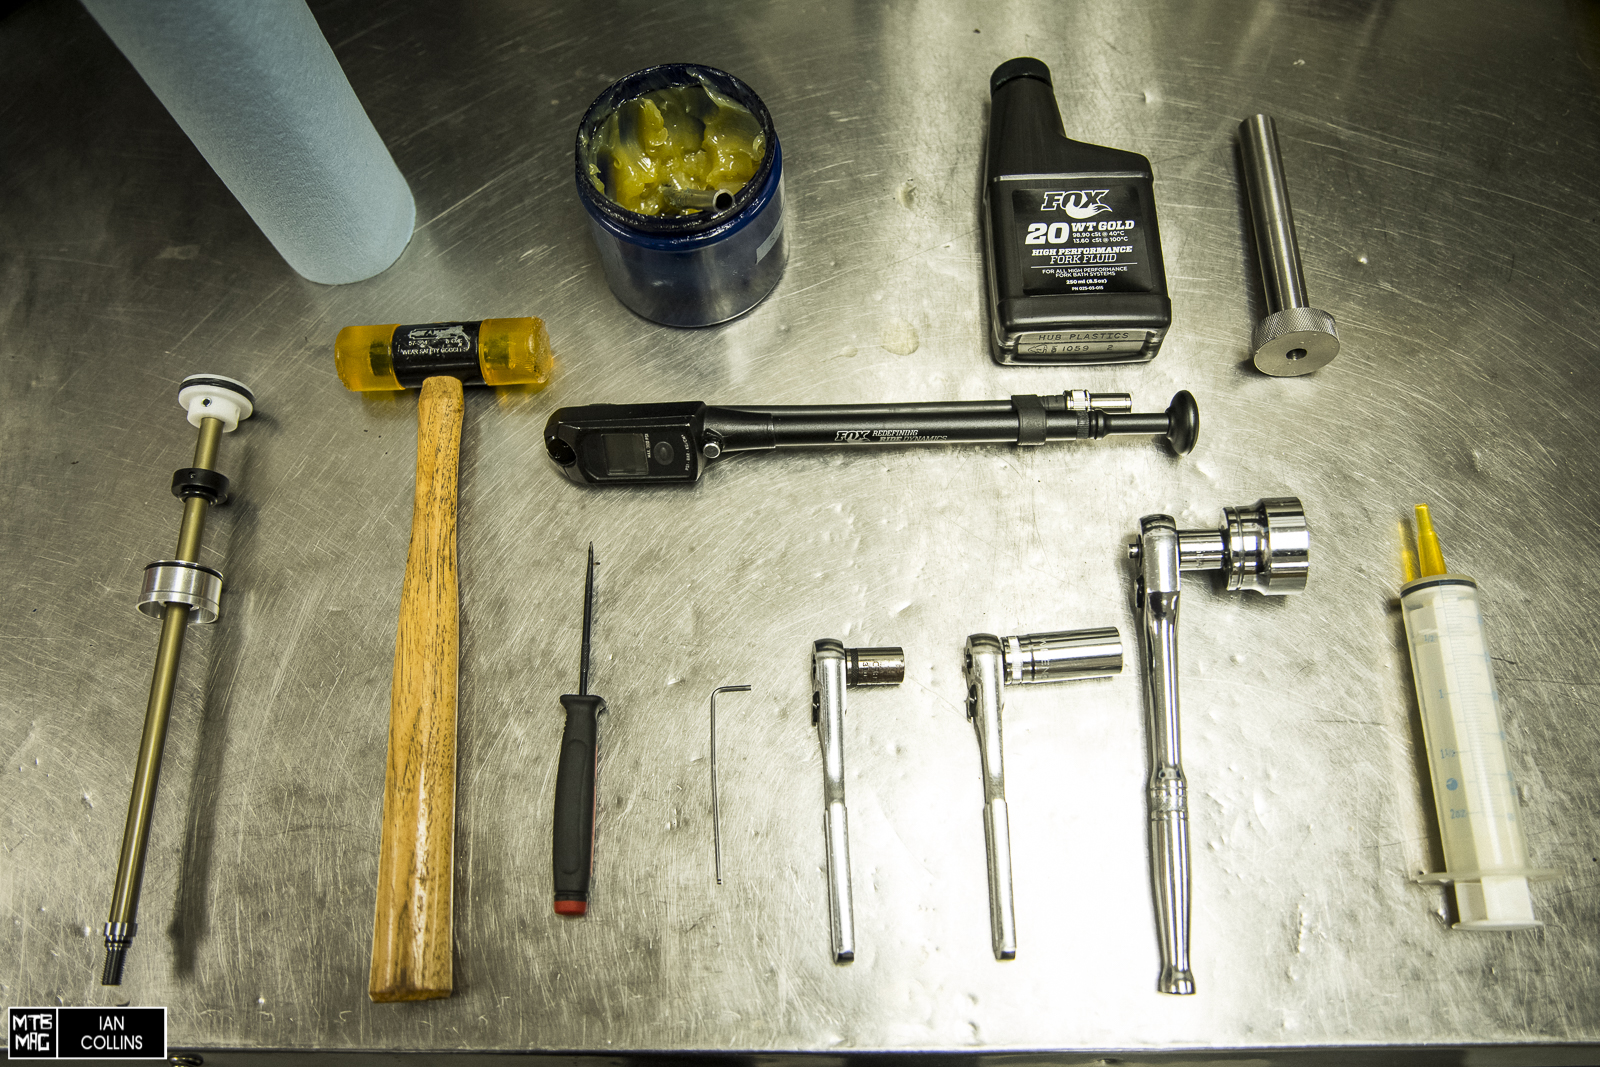
Left to Right, counter clockwise: Air spring assembly, rubber mallet, pick, 2mm allen key, socket wrench with a 10mm, 15mm & 32mm sockets, syringe, a tool to unseat the air spring shaft/damper rod (can be done with a socket), FOX 20 weight gold fluid, shock pump, grease (slick honey), roll of shop towels. **Not pictured, a bike stand will make your life easier, and an oil pan is necessary for draining a few CC’s of oil.

Step one. ALWAYS let the air out first. You can do this with the valve cap.

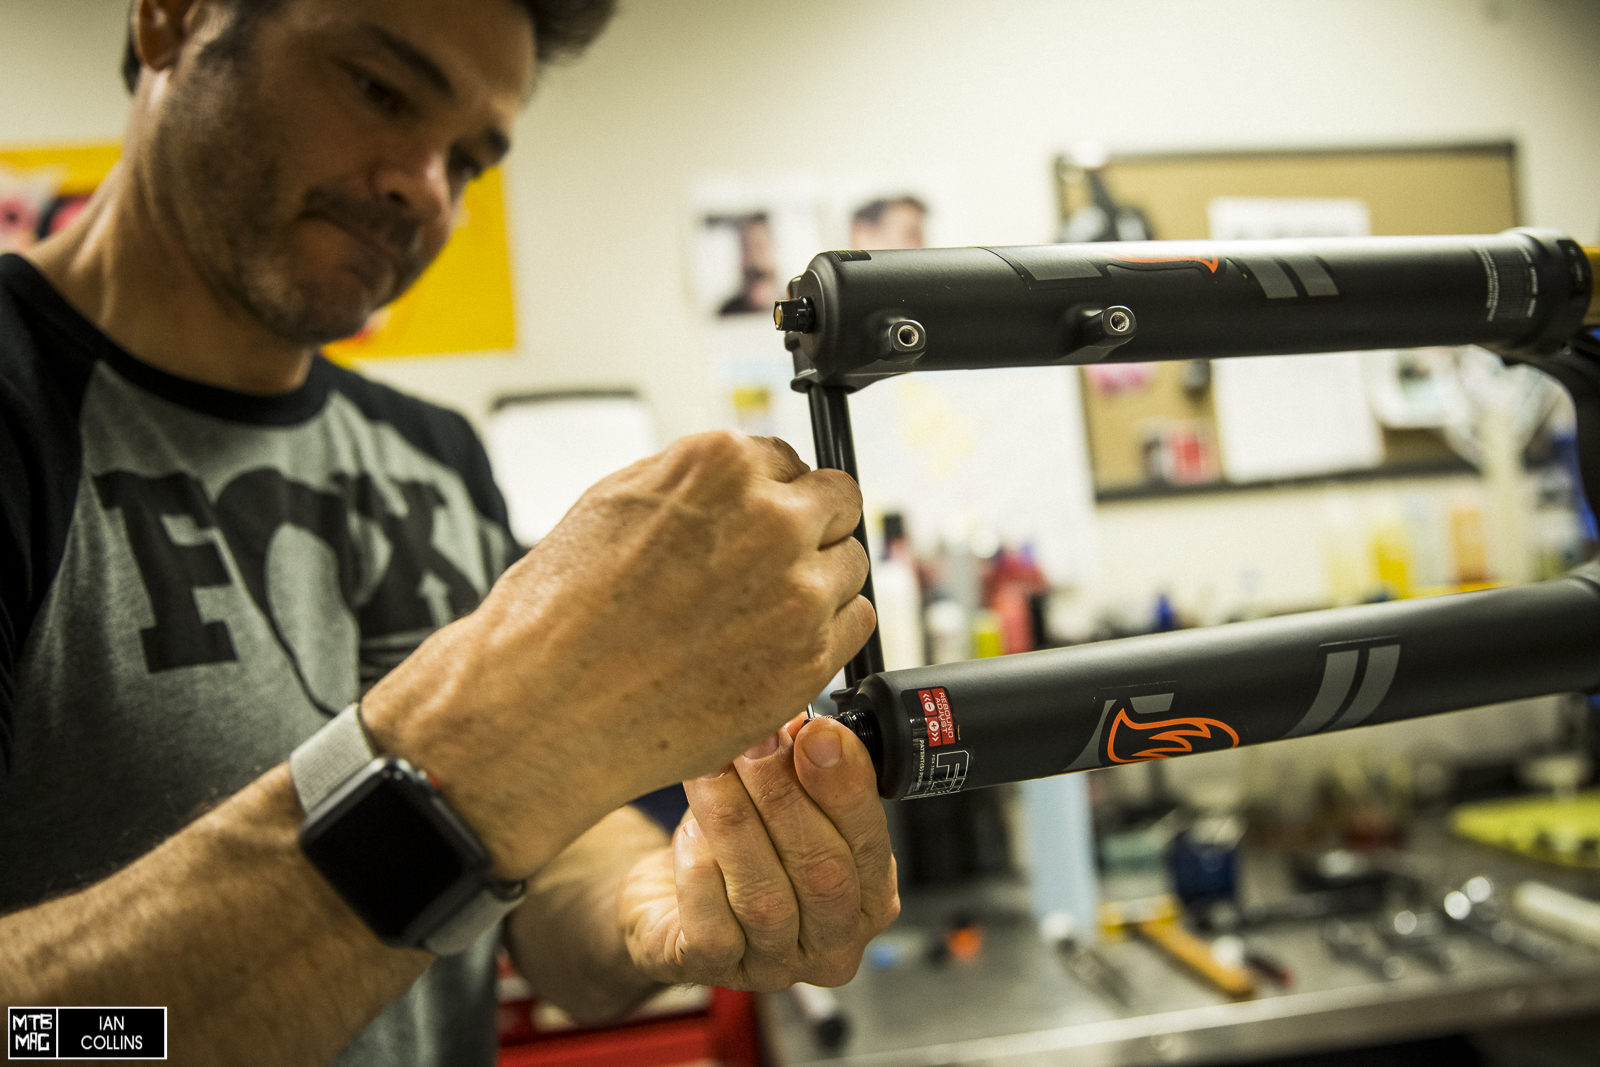
Using the socket wrench and 32mm socket, carefully remove the air spring cap, using two hands so you don’t round it out.
Remove the protective cover over the rebound knob by hand, then use the 2mm allen key to loosen its set screw so you can remove the rebound knob itself.

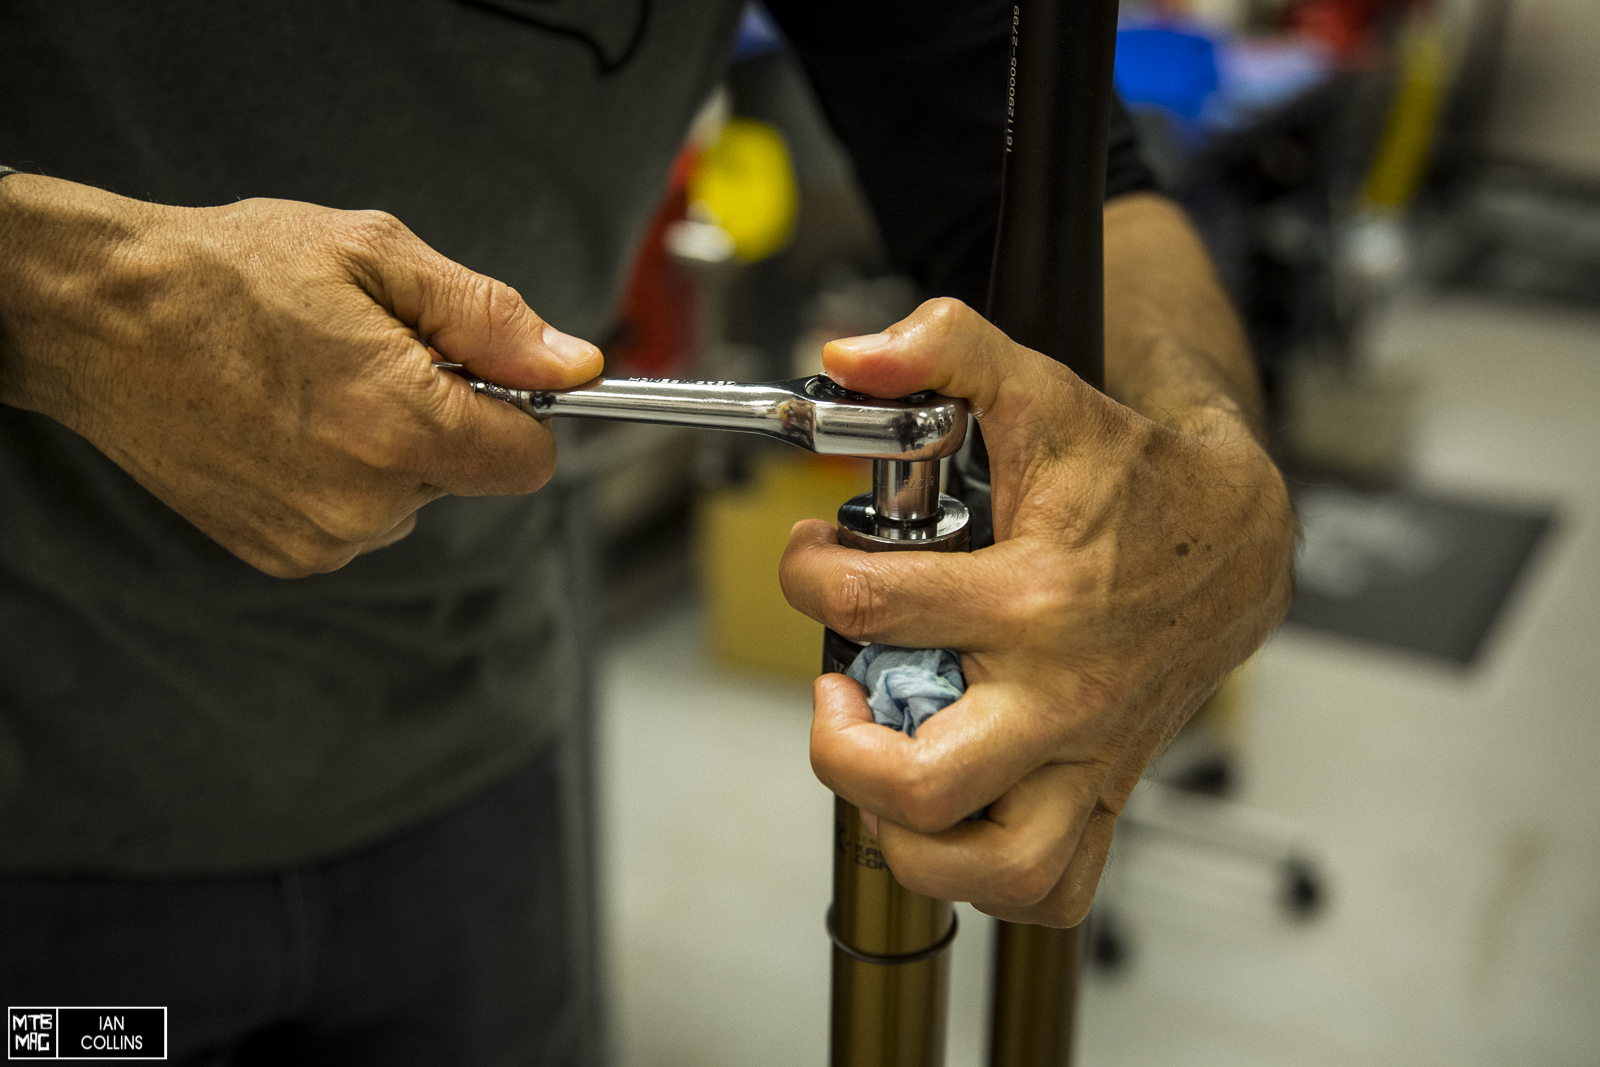
Using a socket wrench and a 15mm socket, remove the bottom nut that secures the damper rod.

With a socket wrench and a 15mm socket, remove the bottom nut that secures the air spring shaft.

Jordi is using special tool #398-00-682 from FOX to unseat the damper rod. If you’re very careful, you can use the 15mm socket to do this. To do so, leave the base nut on, but back it off about two turns and gently tap until the damper rod unseats.

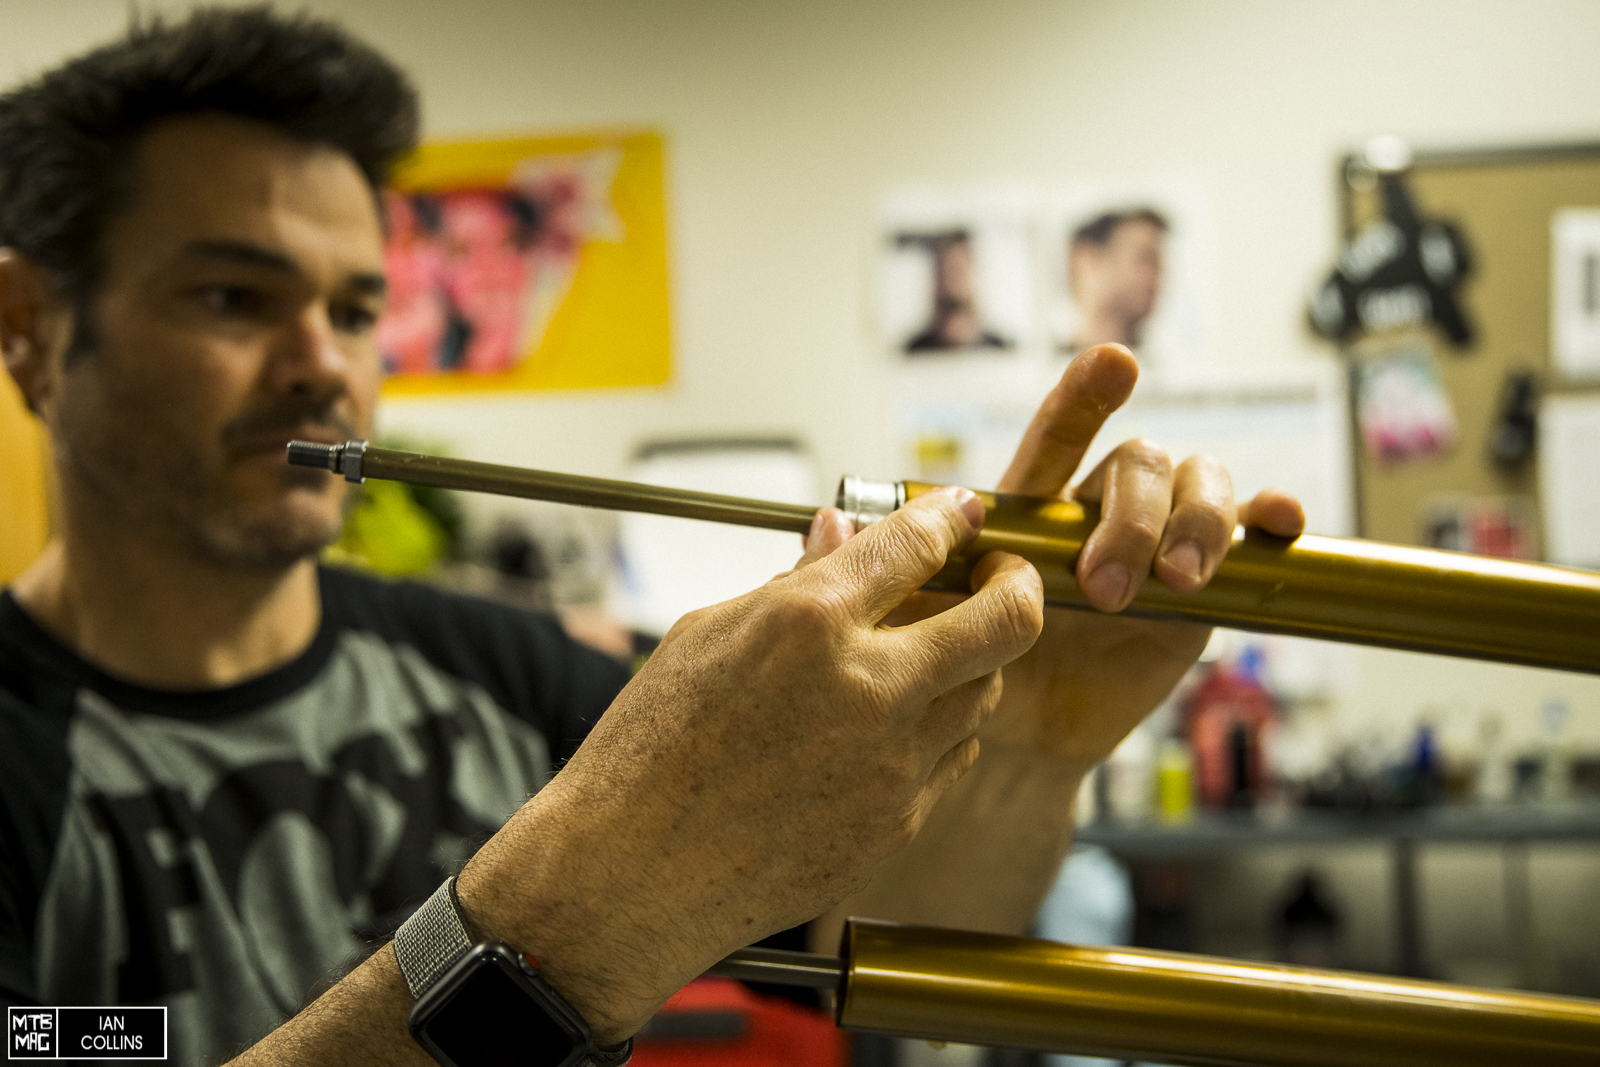
Unseat the air spring shaft with the rubber mallet by gently tapping on the threaded end that sticks out from the fork’s lower leg assembly.

Clamp the fork in a bike stand on its steerer tube…carefully pull the lower leg assembly down to separate it from the upper assembly. Make sure you keep it nice and straight.

Let both parts hang out above the oil drain pan for a bit while some excess oil drains off.

Wipe off any excess oil.

Rotate the fork 90º in the bike stand, so that it’s parallel to the ground. Here is where we actually swap the air spring assembly. Using a pick, carefully unseat the retaining ring that holds the air spring in place. Be careful not to nick the shaft itself with a pick, and perhaps wear safety glasses. It probably won’t come out at a great rate of speed, but just pay attention.

Set the retaining ring aside.

Remove the air spring assembly by gently pulling on it in a straight line away from the fork.

Here is the old and new air spring assembly. In our case, a 170mm on the left and a 160mm on the right.

Grab the new air spring assembly and generously apply Slick Honey or a comparable grease to the seals and pistons as shown.
Install the new shaft.

Carefully install the new retaining ring that arrived with the new air spring assembly. Make sure that it clicks firmly into place.

While you’ve got your fork apart, you might want to make sure the foam rings and your seals are in good shape. If not, that’s another article altogether, the rings should look somewhat fresh, not dark.

While we’re in here, apply a thin coat of Slick Honey or comparable grease to the inside of the seal and bushing area. This will make it easier to re-install the lower leg assembly.

Slide the lower leg assembly back onto the fork. It’s easier to accomplish this with the fork rotated back to being perpendicular with the ground. Slide the lowers a few inches up onto the fork so that the air spring and damper shafts don’t quite come through the lowers yet.

Next, drip or inject just 3 CC’s of FOX 20 Weight Gold Bath Oil into the air chamber.

Hand thread the air spring cap back on as far as you can, then…
Tighten it the rest of the way with the 32mm socket. Torque it to 220 inch/pounds.

With the fork rotated back parallel to the ground, inject 40CC’s of FOX 20 Weight Gold Bath Oil into the damper side.

Next, inject 10CC’s of FOX 20 Weight Gold Bath Oil into the air spring side.

Install new crush washers and using a torque wrench, tighten the bottom nuts to 150 inch/pounds each.

Re-install your rebound knob by popping it back in and tightening it with a 2mm allen key.

Set your fork to your desired air pressure. You probably don’t have a baller, high pressure, big boy shock pump like Jordi, so you’ll have to use a normal one. Remember that getting your positive and negative air springs balanced is a bit of a process.
For the FOX user manuals click here
For video guidance, click here
For the FOX air volume tuning, click here